Why use it?
The offline marking worksheet allows markers to enter marks and feedback when they are not connected to the internet. It also allows a record of all marks and feedback to be kept outside of Moodle.
Step 1: Add an Assignment
See our guide on Assignment set-up guide (individual and group) for the settings. When setting up the Assignment, under Feedback types, make sure Offline grading worksheet is enabled (ticked).
Tip: Click on the question mark icon ![]() next to any setting to display extra help or click on Moodle Docs for this page link at the bottom of each page in Moodle to access context-specific documentation.
next to any setting to display extra help or click on Moodle Docs for this page link at the bottom of each page in Moodle to access context-specific documentation.
Step 2: Students submit
Step 3: View the submissions table
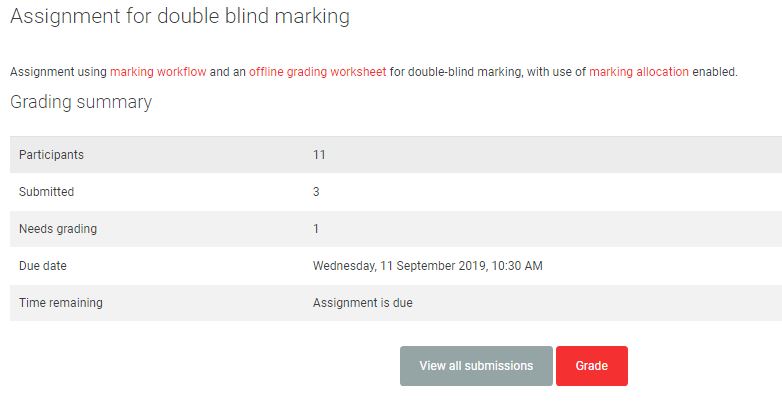
Once the deadline for students to submit has passed, click on the assignment. This will bring up the Grading summary which will show the number of participants and submissions. Click on View all submissions to view the submissions table.
The marking/submissions table lists all students and their submissions. If ‘anonymous submissions’ is enabled submissions are identified by a participant number unique to this assignment.
Note: Those with a Manager role can view student identities even when ‘anonymous submissions’ is enabled.
The table has a variety of filters and columns - see more details on the submissions table guide.
Step 4: Download grading worksheet
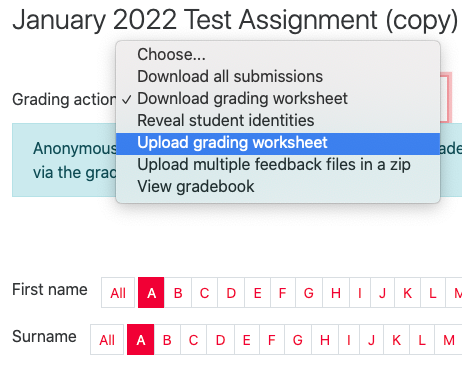
At the top of the submissions table is a drop down box allowing you to choose a Grading action. Select Download grading worksheet from this list and a CSV file of the submissions table will download.

If ‘anonymous submissions’ is not being used then the student name and email will also be included in the spreadsheet. If ‘anonymous submissions’ is enabled, then only those with the Manager role will be able to download this information and teachers and teacher editors will just see the participant number.
Step 5: Download all submissions
At the top of the submissions table, in the Grading action drop down box, select Download all submissions to download all the student submissions into a zip file. As per the submission table, each submission has a unique participant number to identify it.

If the Download submissions in folders box at the bottom of the submission table is ticked then each submission will have its own individual folder. If this is not ticked then the files will just be in one zipped folder.

Step 6: Enter marks into the grading worksheet
Open the grading worksheet .csv file in a spreadsheet editor e.g. Excel.
Using the participant number to ensure data is entered into the correct record, marks and feedback can then be entered into the grading worksheet under the Grade and Feedback comments column.
Save the .csv file.
Note:
Make sure you enter data in the correct column of the spreadsheet.
Make sure you save the amended worksheet as a CSV file.
Step 7: Upload grading worksheet
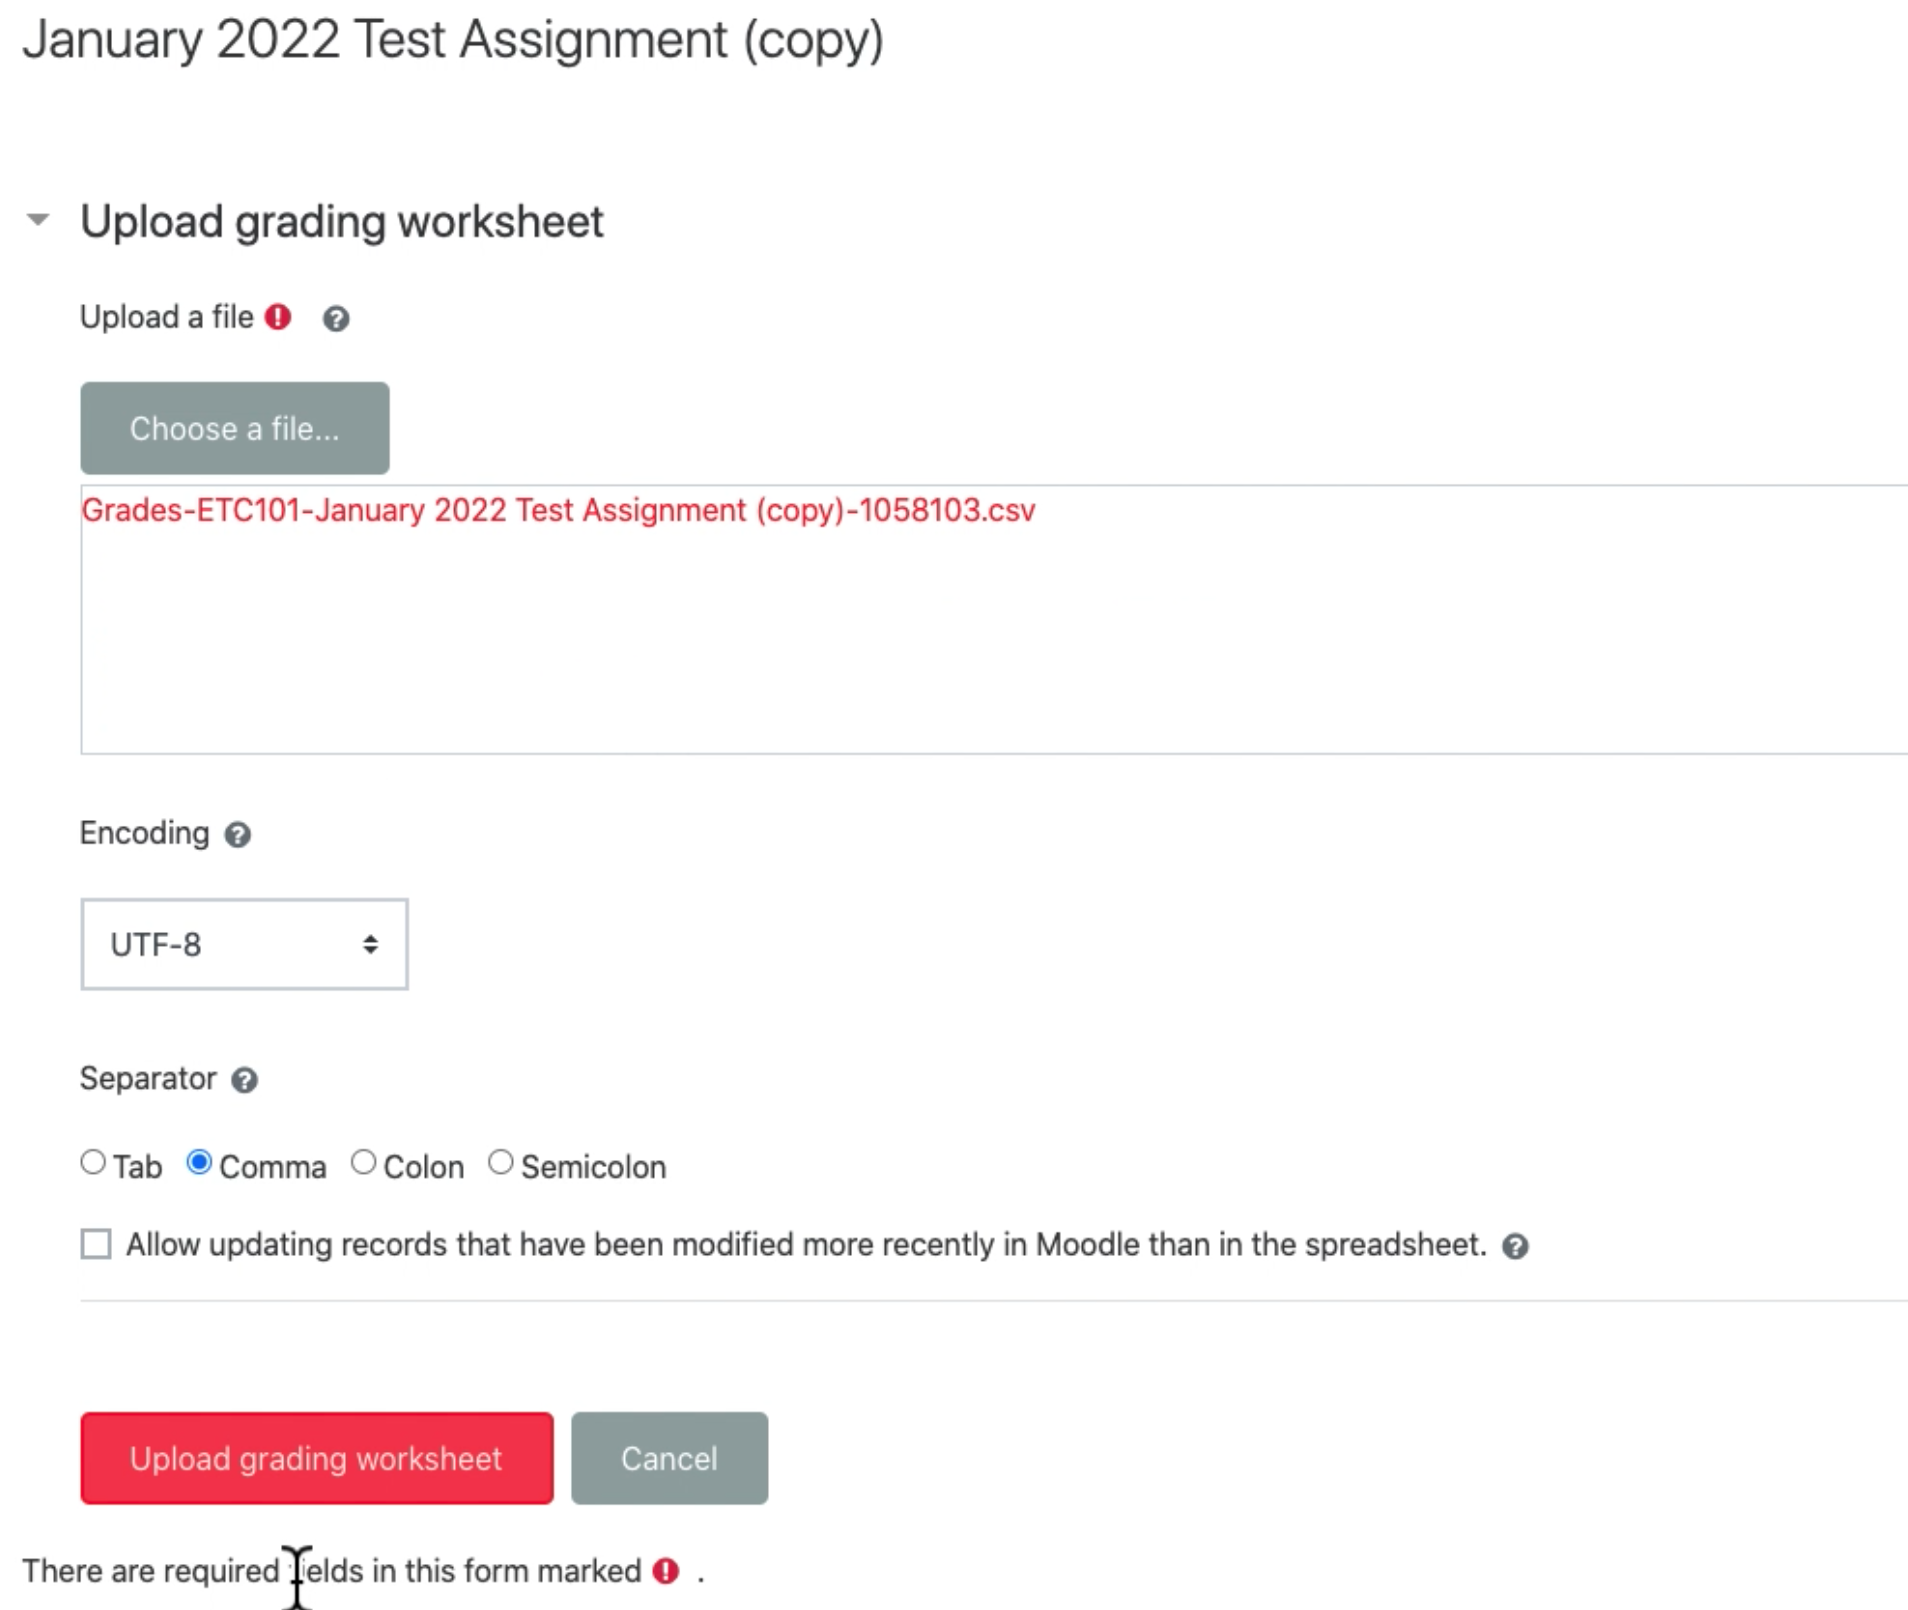
At the top of the submissions table, in the Grading action drop down box, select Upload grading worksheet and upload the amended CSV file.
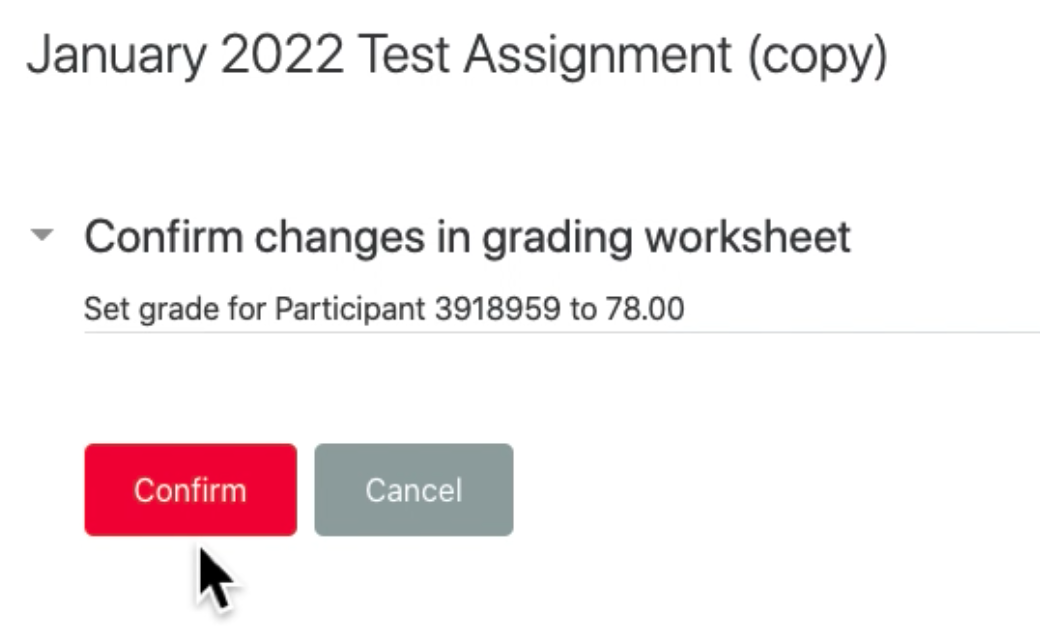
The added grades and comments will then be added to the submissions table.
Step 8: Release marks
Marking workflow state
Marking workflow is enabled by default. To release the marks using marking workflow see below.
When you are ready to release marks to students, select the submissions for which you want to use marking workflow using the Select box to left of each submission – to select all submissions, click the Select all box under Select. Scroll to the bottom of the page and from the drop-down menu With selected… select Set marking workflow state and Go. You will be asked to confirm, click ok.
Select Released from the drop down options and then save changes. At this stage (and earlier stages) you can choose to Notify students by selecting Yes to generate an email.
Students will then be able to review their grades and feedback.
N.B. If ‘anonymous submissions’ is in use with marking workflow, you will need to reveal student identities before the grades are released. To do this, select Reveal student identities in the Grading action drop-down menu at the top of the submissions table. If you cannot find this option, you will need to ask someone with Teacher (Editor) or higher access to do it.