Why use it?
The H5P activity can be used to produce interactive learning objects containing a variety of media, including video and audio and embedded quizzes, such as multiple choice, drag and drop and free text.
Step 1: Add an Interactive content activity
Go to the course page and Turn editing on. Scroll to the section where you want your activity to be displayed, click Add an activity or resource and pick Interactive content.
Step 2: Select the content type
First, you need to choose the activity type you wish to use. You can read more about each activity by clicking on the Details button right to the name of the activity.
Tip: For a full list of content types and examples, go to https://h5p.org/content-types-and-applications
To create a presentation with interactive slides, choose Course Presentation.

On the top of the page, give a Description which explains to the students what the activity is about.
Give a Title to the activity in the Editor. This will be the title displayed on the course’s main page.

Click Save and display.
Step 3: Edit the activity
If you have clicked Save and display in the previous step, find the cog icon ![]() in the top right corner and click on Edit settings.
in the top right corner and click on Edit settings.

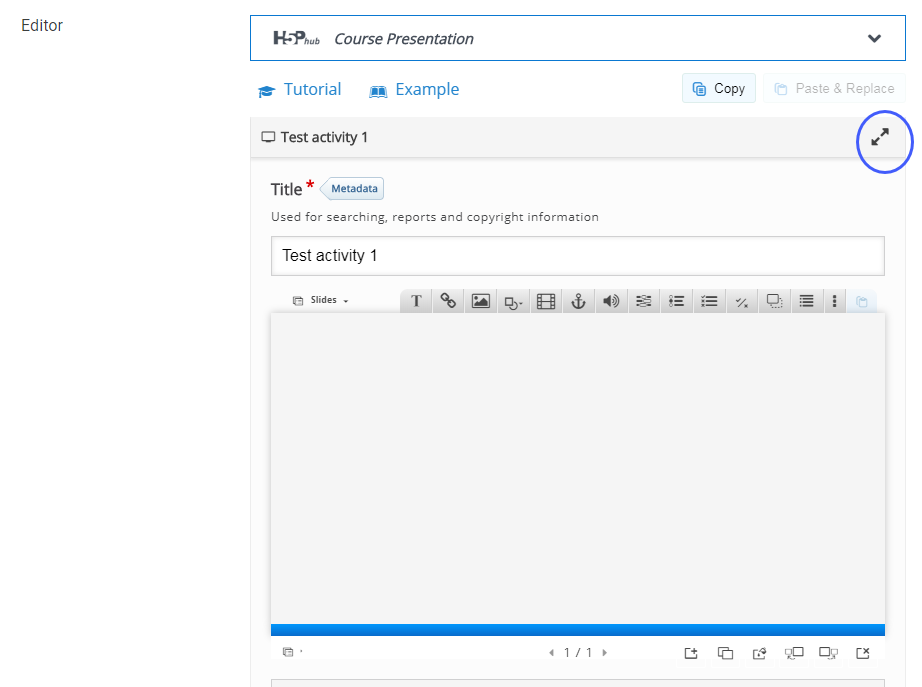
Scroll down to the Editor and edit the activity.
You also have an option to make the editor full-screen by clicking on the arrow icon next to the title.
Currently there is no auto-save for the H5P activity. Make sure you save the page regularly by clicking on Save and display.
Managing slides in Course Presentation
The menu bar in the bottom right corner displays the options to edit the slides.
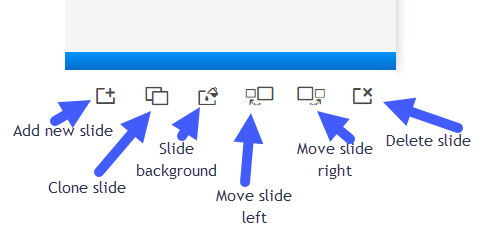
The editing options are:
Add new slide
Clone slide
Slide background
Move slide left and Move slide right
Delete slide
Adding content to the slides
Editing and content options are displayed on top of the slide. More options get revealed by clicking on the 3 dots icon.

Text and Media content
Similarly to other presentation tools (e.g. Power Point), text and media content types can be added to the slides, such as Text, Link, Image, Shapes and Video.
Interactive content
Activities include Go to slide, Audio, Fill in the Blanks, Single Choice Set, Multiple Choice, True/False Question, Drag and Drop, Summary, Drag Text, Mark the Words, Dialog Cards, Continuous Text, Exportable Text Area, Table, Interactive Video and Twitter User Feed.
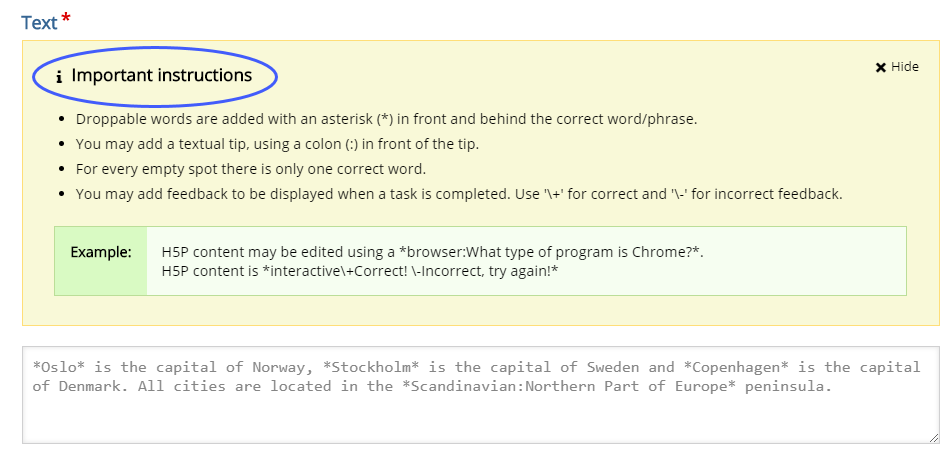
The instructions for each activity are integrated into the editing area.
Once finished adding an activity, click Done.
Once finished editing, click Proceed to save, finally click Save and display.