Why use it?
Completion tracking can help students to manage their work better and teaching staff to get better insight into students' progress.
Step 1: Turn Completion tracking on
Completion tracking is enabled by default if the course was set up after 14th June 2019. If it was set up earlier, go to the Administration block and click on Edit settings.
In there, scroll down and find Completion tracking and change it to Yes.
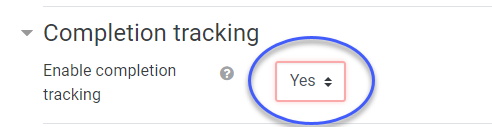
Click Save and display.
Step 2: Edit settings for individual activities
Turn editing on and click on the cog icon ![]() next to the activity you wish to change the completion tracking options for, and select Edit settings. Expand Activity completion.
next to the activity you wish to change the completion tracking options for, and select Edit settings. Expand Activity completion.

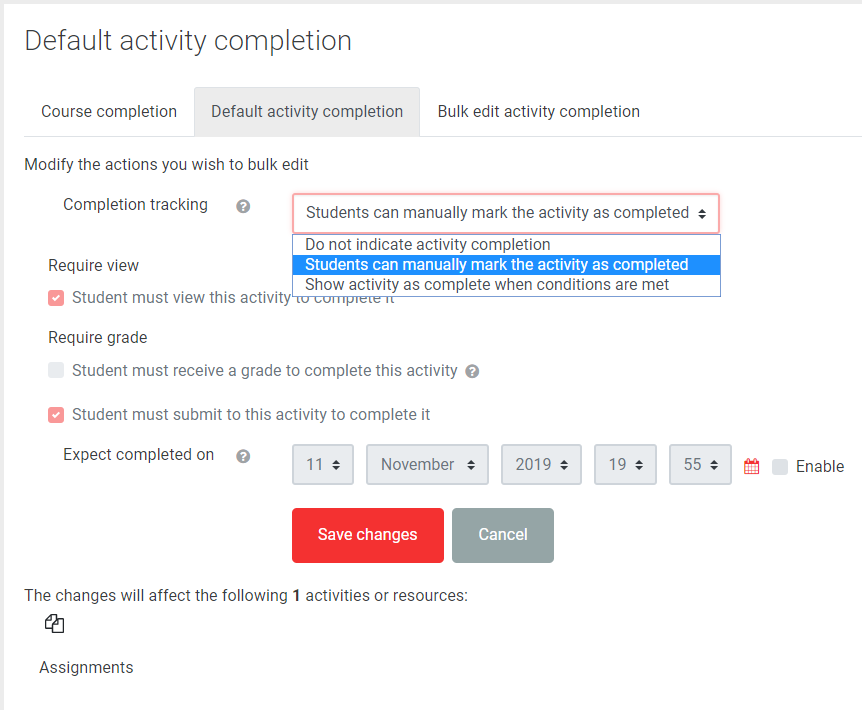
From the completion tracking drop-down choose from:
Do not indicate activity completion
If this option is selected, the particular activity will be excluded from completion tracking.
Students can manually mark the activity as completed
If this option is selected, students will see a circle next to the activity that can be ticked indicating that the activity has been completed.
Show activity as complete when conditions are met
Conditions can be set based on the viewing of the activity, a set grade and/or a time and date to be completed by.
Students must view this activity to complete it
The activity will be considered completed once the student has clicked on the activity.
Student must receive a grade to complete this activity
Depending on the type of activity, for example in the case of a quiz, a pass grade can be set. Only when the student achieved the required grade the activity will be marked as completed.
Expect completed on…
Set a time and date that the activity needs to be completed by.
Once you have set the conditions, click Save and return to the course.
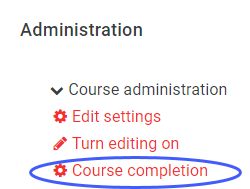
Step 3: Edit settings in bulk
Go to the Administration block and click Course Completion.
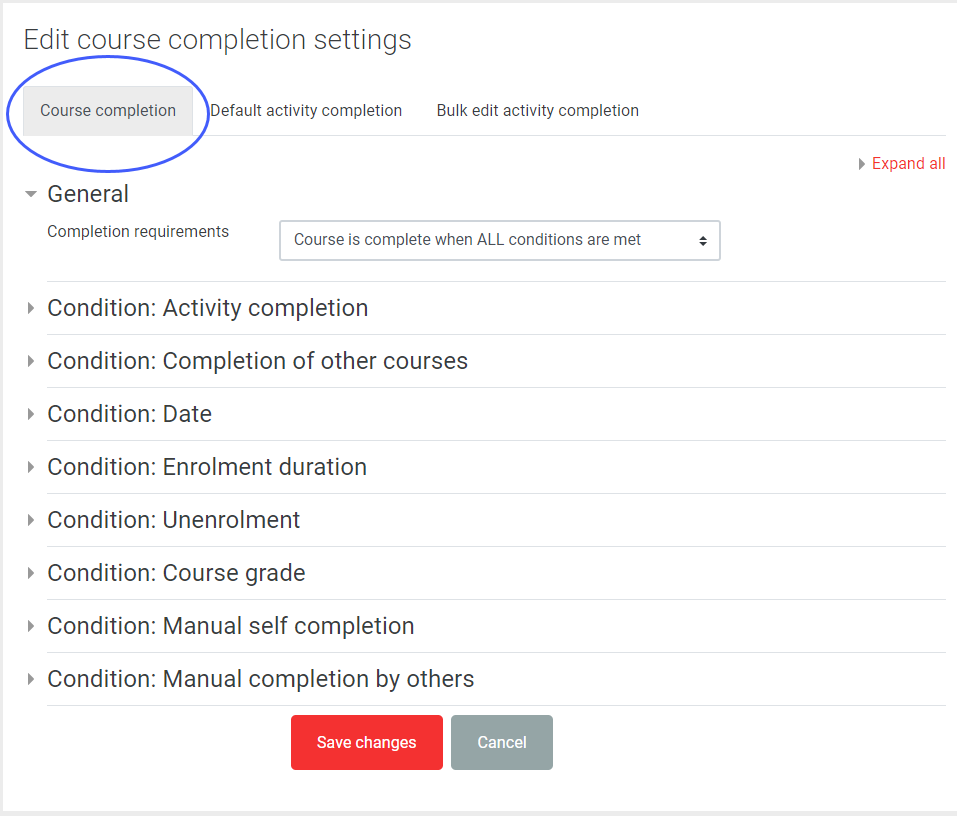
Course completion
Here you can set different conditions which would determine when the course would be considered finished. Unless you have a specific requirement, you can leave this as default.
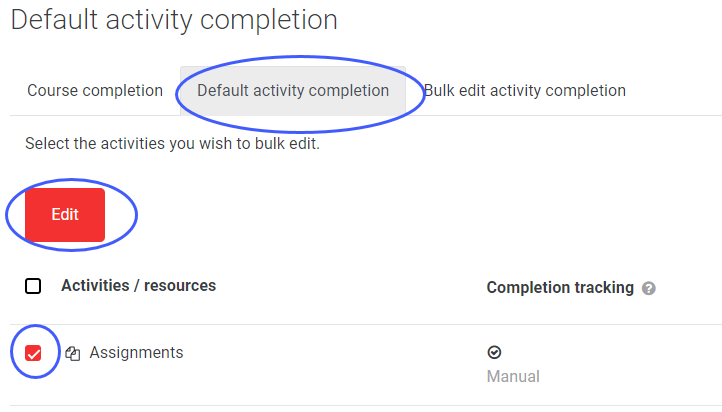
Default activity completion
Use the settings here to change the default conditions for selected activities.
First, tick the activities that you wish to amend, then click Edit.
Make the necessary changes and click Save changes.
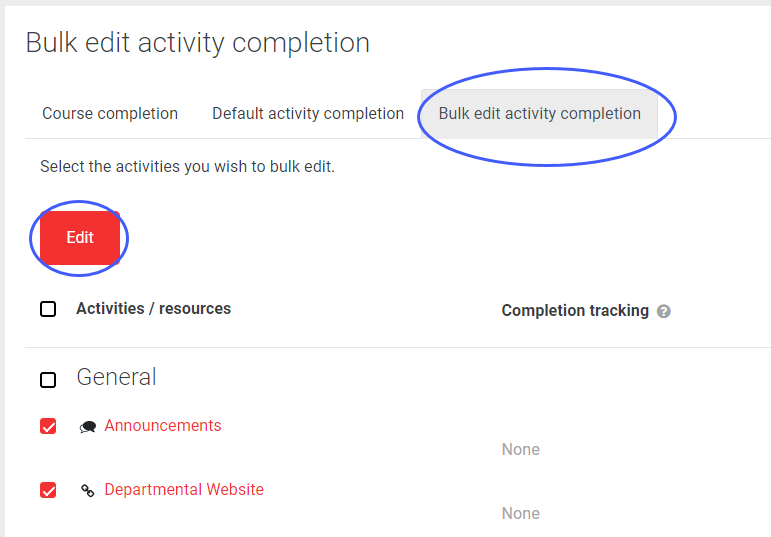
Bulk edit activity completion
Use the settings here to change the conditions of multiple activities at once.
First, tick the activities that you wish to amend, then click Edit.
Make the necessary changes and click Save changes.
Select the way and the condition of completions tracking that suits your needs.
Note: These options are the same as the settings for individual activities.
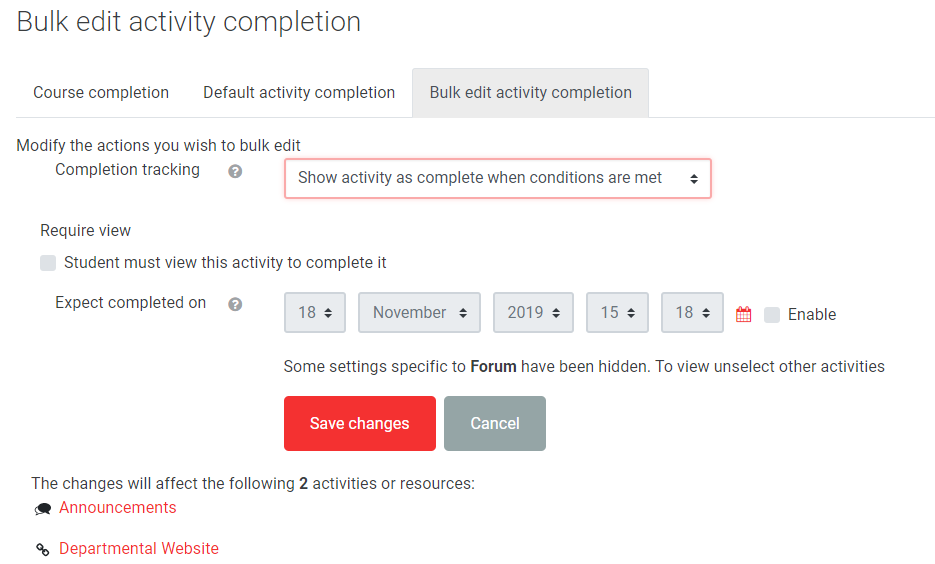
Click Save changes.