Why use it?
You can use a Label to embed text or media separators between your course activities and resources. Unlike the main text of a Moodle section, labels can be dragged and dropped to other areas of the page and can be placed in between activities or resources.
Labels can be a useful to improve the appearance of your course content. They are especially useful for creating headings. Labels should not be used for large amounts of text, as this creates clutter and side-scrolling issues. For longer text use pages or the section summary.
Step 1: Add a Label
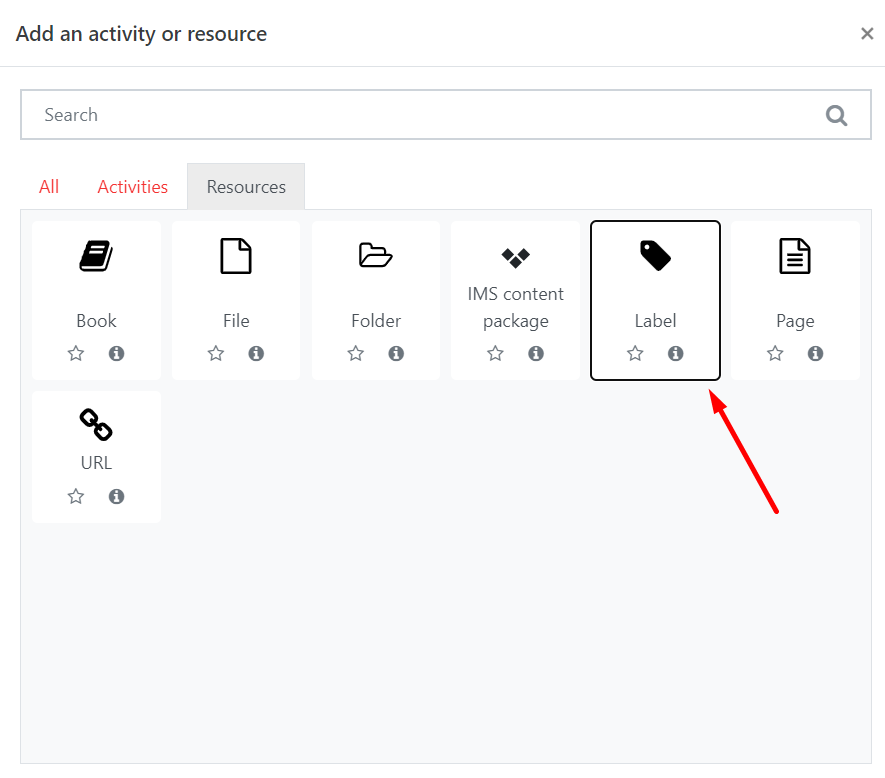
Go to the course page and Turn editing on. Scroll to the section where you want your Label to be displayed, click Add an activity or resource and pick Label from the Resources tab.
Step 2: Settings
Tip: Click on the question mark icon ![]() next to any setting to display extra help or click on Moodle Docs for this page link at the bottom of each page in Moodle for accessing context-specific documentation.
next to any setting to display extra help or click on Moodle Docs for this page link at the bottom of each page in Moodle for accessing context-specific documentation.
General
Use the text editor to add text to your label. You can also add images or embed videos as you would in any other text box.
Activity completion
If course completion is enabled for the course, make sure that you exclude labels by choosing Do not indicate activity completion in the Activity completion section.
Once finished, click Save and return to course.