Why use it?
Pages allow you to share longer sections of text, images, and multimedia within Moodle. Pages keep this material off the main site landing page but easily accessible.
This is useful to display and update information without needing to upload a file.
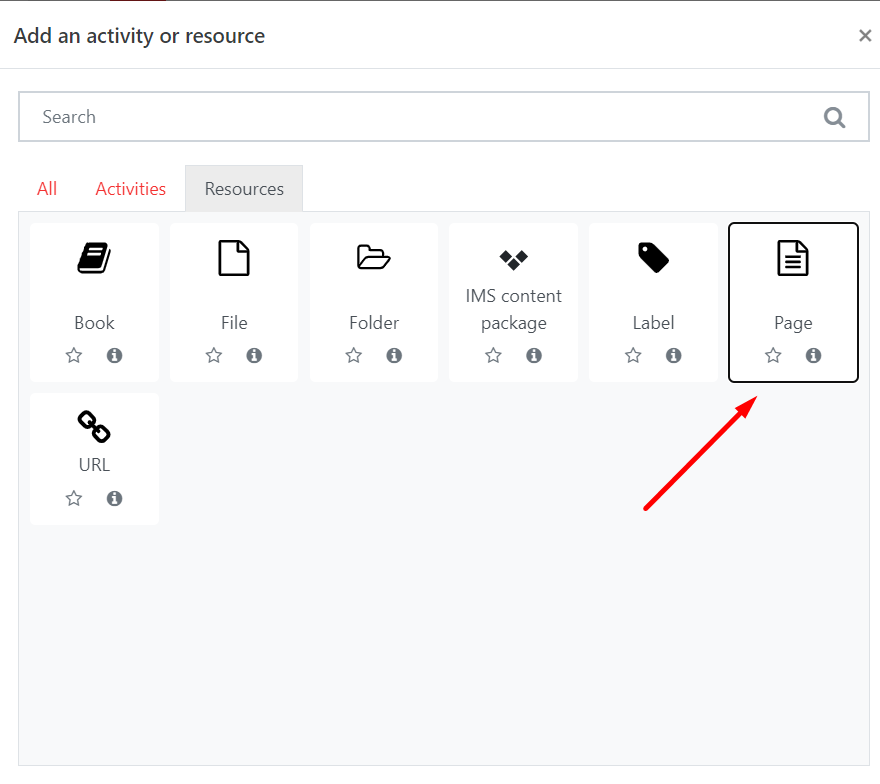
Step 1: Add a Page
Go to the course page and Turn editing on. Scroll to the section where you want your Page to be displayed, click Add an activity or resource and pick Page from the Resources tab.
Step 2: Settings
Tip: Click on the question mark icon ![]() next to any setting to display extra help or click on Moodle Docs for this page link at the bottom of each page in Moodle for accessing context-specific documentation.
next to any setting to display extra help or click on Moodle Docs for this page link at the bottom of each page in Moodle for accessing context-specific documentation.
General
Enter a meaningful Name and, if required, add a Description and click the check box to display the description on the main page. In most cases a clear name will be sufficient for a page without additional description.
Content
Use the text editor to add text or media as your Page content. Use text editor toolbar to include headings, embed pictures etc.
If you are adding a lot of text you may wish to first prepare it in a text editor and then copy it across so that you do not lose your work. Use a simple editor such as Notepad (on PC) or TextEdit (on Mac) to avoid copying over styling, which may look incorrect on Moodle.
On completion click Save and return to course.