Why use it?
Restricting access to Moodle activities allows you to control the student’s learning journey through your course materials.
Step 1: Edit settings and choose restriction type
Turn editing on, click on the cog icon ![]() next to the activity you wish to restrict, and select Edit settings. Expand the Restrict access section.
next to the activity you wish to restrict, and select Edit settings. Expand the Restrict access section.
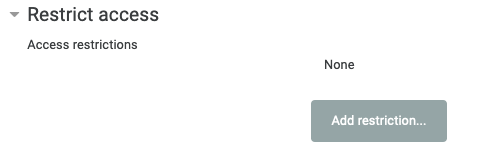
Click the Add restriction… button.
You can now choose from a number of restriction types, as follows. Note that some of these restriction types (indicated by *) will only appear if other settings in the course allow it.
Activity completion* - only appears if Completion Tracking is enabled at the course level. See Completion tracking for further details.
Date
Grade
Group* - only appears if one or more Groups exist in the course. See Groups and Groupings for details.
Grouping* - only appears if one or more Groupings exist in the course.
User profile
Restriction set
These restriction types are explained in the next section.
Step 2: Specify criteria
The sections below explain the criteria settings for each restriction type. Some settings are common to all restriction types, and these are covered in the first restriction type below.
Date (and common settings)
Once you choose Date, Moodle will add an access restriction to the form as follows:
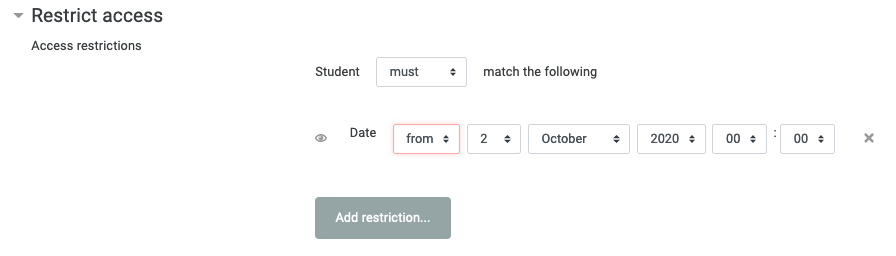
There are 3 settings:
“Must” or “must not” (this setting is common to all restriction types)
“From” or “until”
The date and time
If you want to set a date range, you will need to click Add restriction… again and add a second date.
Note that, once you have more than one restriction in place, the settings then look like this:
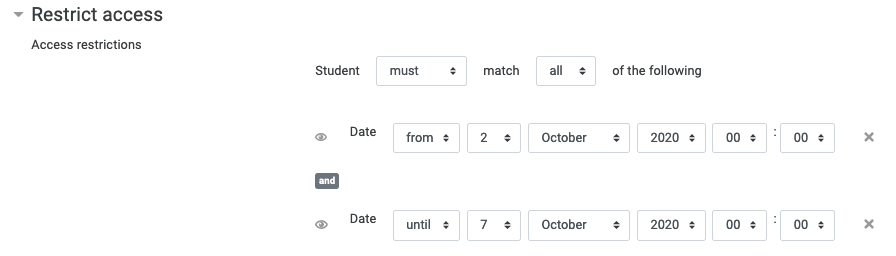
There is now an additional setting:
“All” or “any”, allowing you to control how the restrictions are to be combined (common to all restriction types).
Note that each restriction also has an 'eye' button ![]() to the left of the date (common to all restriction types). Click this button to toggle between:
to the left of the date (common to all restriction types). Click this button to toggle between:
 : meaning that students will see a notice telling them the nature of the restriction
- : meaning that the resource will be completely hidden
Finally, note also that any restriction can be removed by clicking the ![]() button on its right (common to all restriction types).
button on its right (common to all restriction types).
When all your date restrictions are in place, click Save and display or Save and return to course at the bottom of the page.
Activity completion
Upon choosing this option, Moodle will add the restriction to the form as follows:
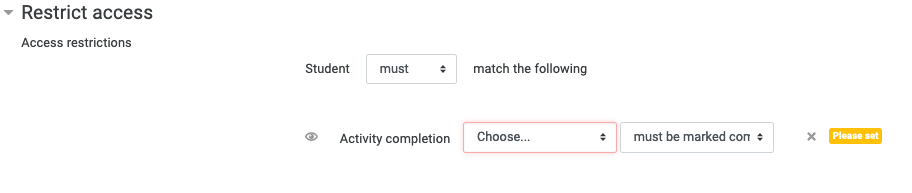
There are 2 settings:
The activity for which completion is to be checked
The state of completion required for access to be granted: either “completed”, “not completed”, “pass grade” or “fail grade”. (See Completion tracking for further details.)
Grade
Upon choosing this option, Moodle will add the restriction to the form as follows:
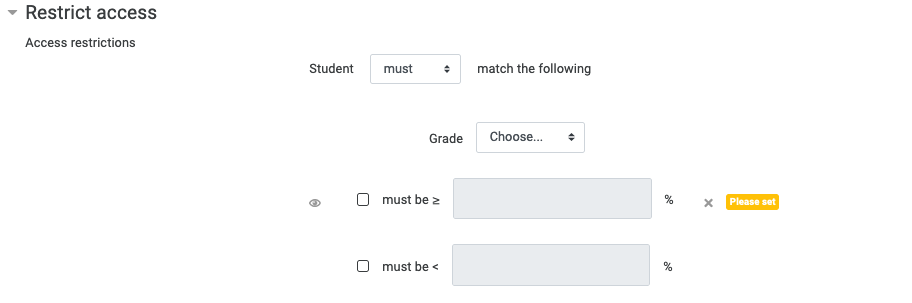
The settings are:
(After ‘Grade’) the activity for which the grade will be checked.
The upper and lower ends of the range of acceptable grades. Tick the checkbox at the start in order to add a value to one of these fields.
Students will only be able to access the current activity (the one we are editing) if they have achieved a grade within the specified range for the specified activity.
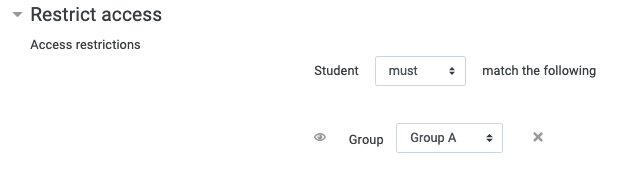
Group/Grouping
Upon choosing this option, Moodle will add the restriction to the form as follows:
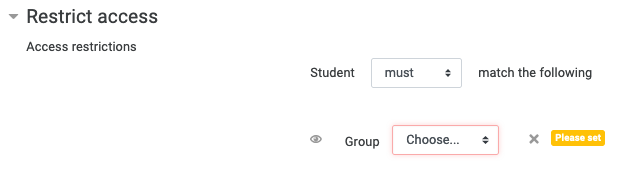
The only setting required is to specify the Group or Grouping that is allowed to view this activity.
Important: If you want to give each of the groups in a course separate access to an activity (such as a forum or assignment), this is not the way to do it. You can save yourself a lot of effort by using Group Mode instead. See How to use Groups and Groupings to manage group activities for details.
User profile
This restriction uses information in the student’s user profile to control access. This can be used to restrict access to specified individuals, by matching against their email address (which is unique to each individual).
Moodle will add the restriction to the form as follows:

The settings are:
Field from the user’s profile to check (usually ‘Email address’)
Nature of the comparison: “is equal to”, “contains”, etc.
The text to compare against the profile field
Only users whose profile fields match the specified comparison will be able to access the activity. This is useful when providing resources to individual students with specific requirements.
IMPORTANT: Always close the eye-icon ![]() , to hide the criteria when specifying individual students, so that their identities are not visible to other students. This is especially important when restricting access to students with Inclusion Plans (IPs).
, to hide the criteria when specifying individual students, so that their identities are not visible to other students. This is especially important when restricting access to students with Inclusion Plans (IPs).
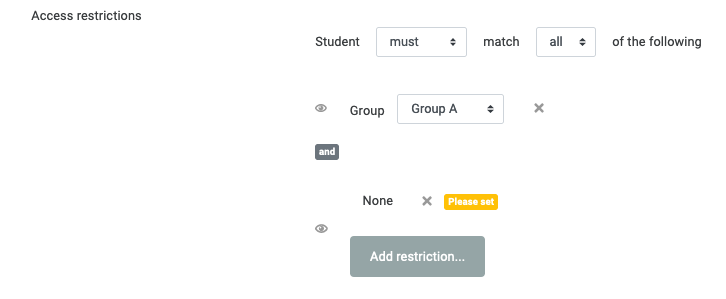
Restriction set
This is not really a restriction type, but simply a framework for adding hierarchy to your restrictions.
For example, suppose you wanted to restrict access to an activity such that it was available to all students within a given date range, but also available to members of a specific group outside of that date range.
First, you would add the group restriction as follows:
Next, click Add restriction… again and choose Restriction set. The form now looks like this:
You have created a subsection into which the date range can be set up. Add the start and end dates:
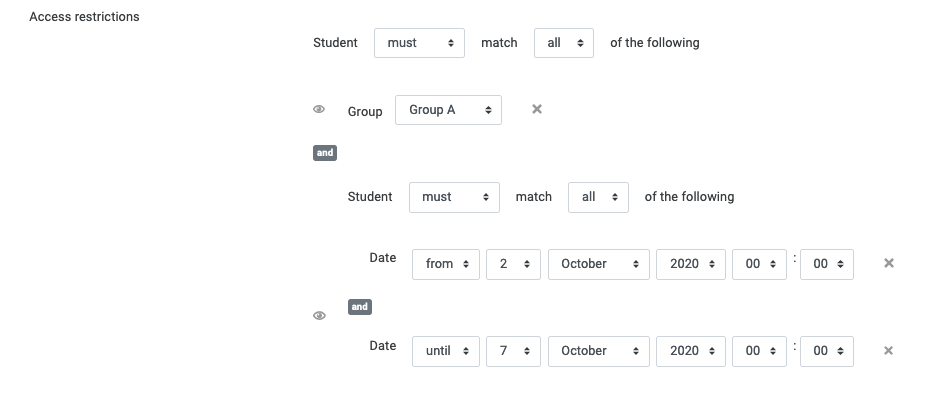
Finally, you would need to change the first “all” into “any”, so that students get access if they are members of Group A or the current date is within range.