Why use it?
Groups can be used to manage group activities or to restrict access to course sections, activities and resources to members of a group.
Groupings are collections of Groups within a course.
Step 1: Add Groups
Note: When a student chooses a seminar group or is assigned to one in LSE For You, the group will be created in Moodle and the student will be added to it automatically.
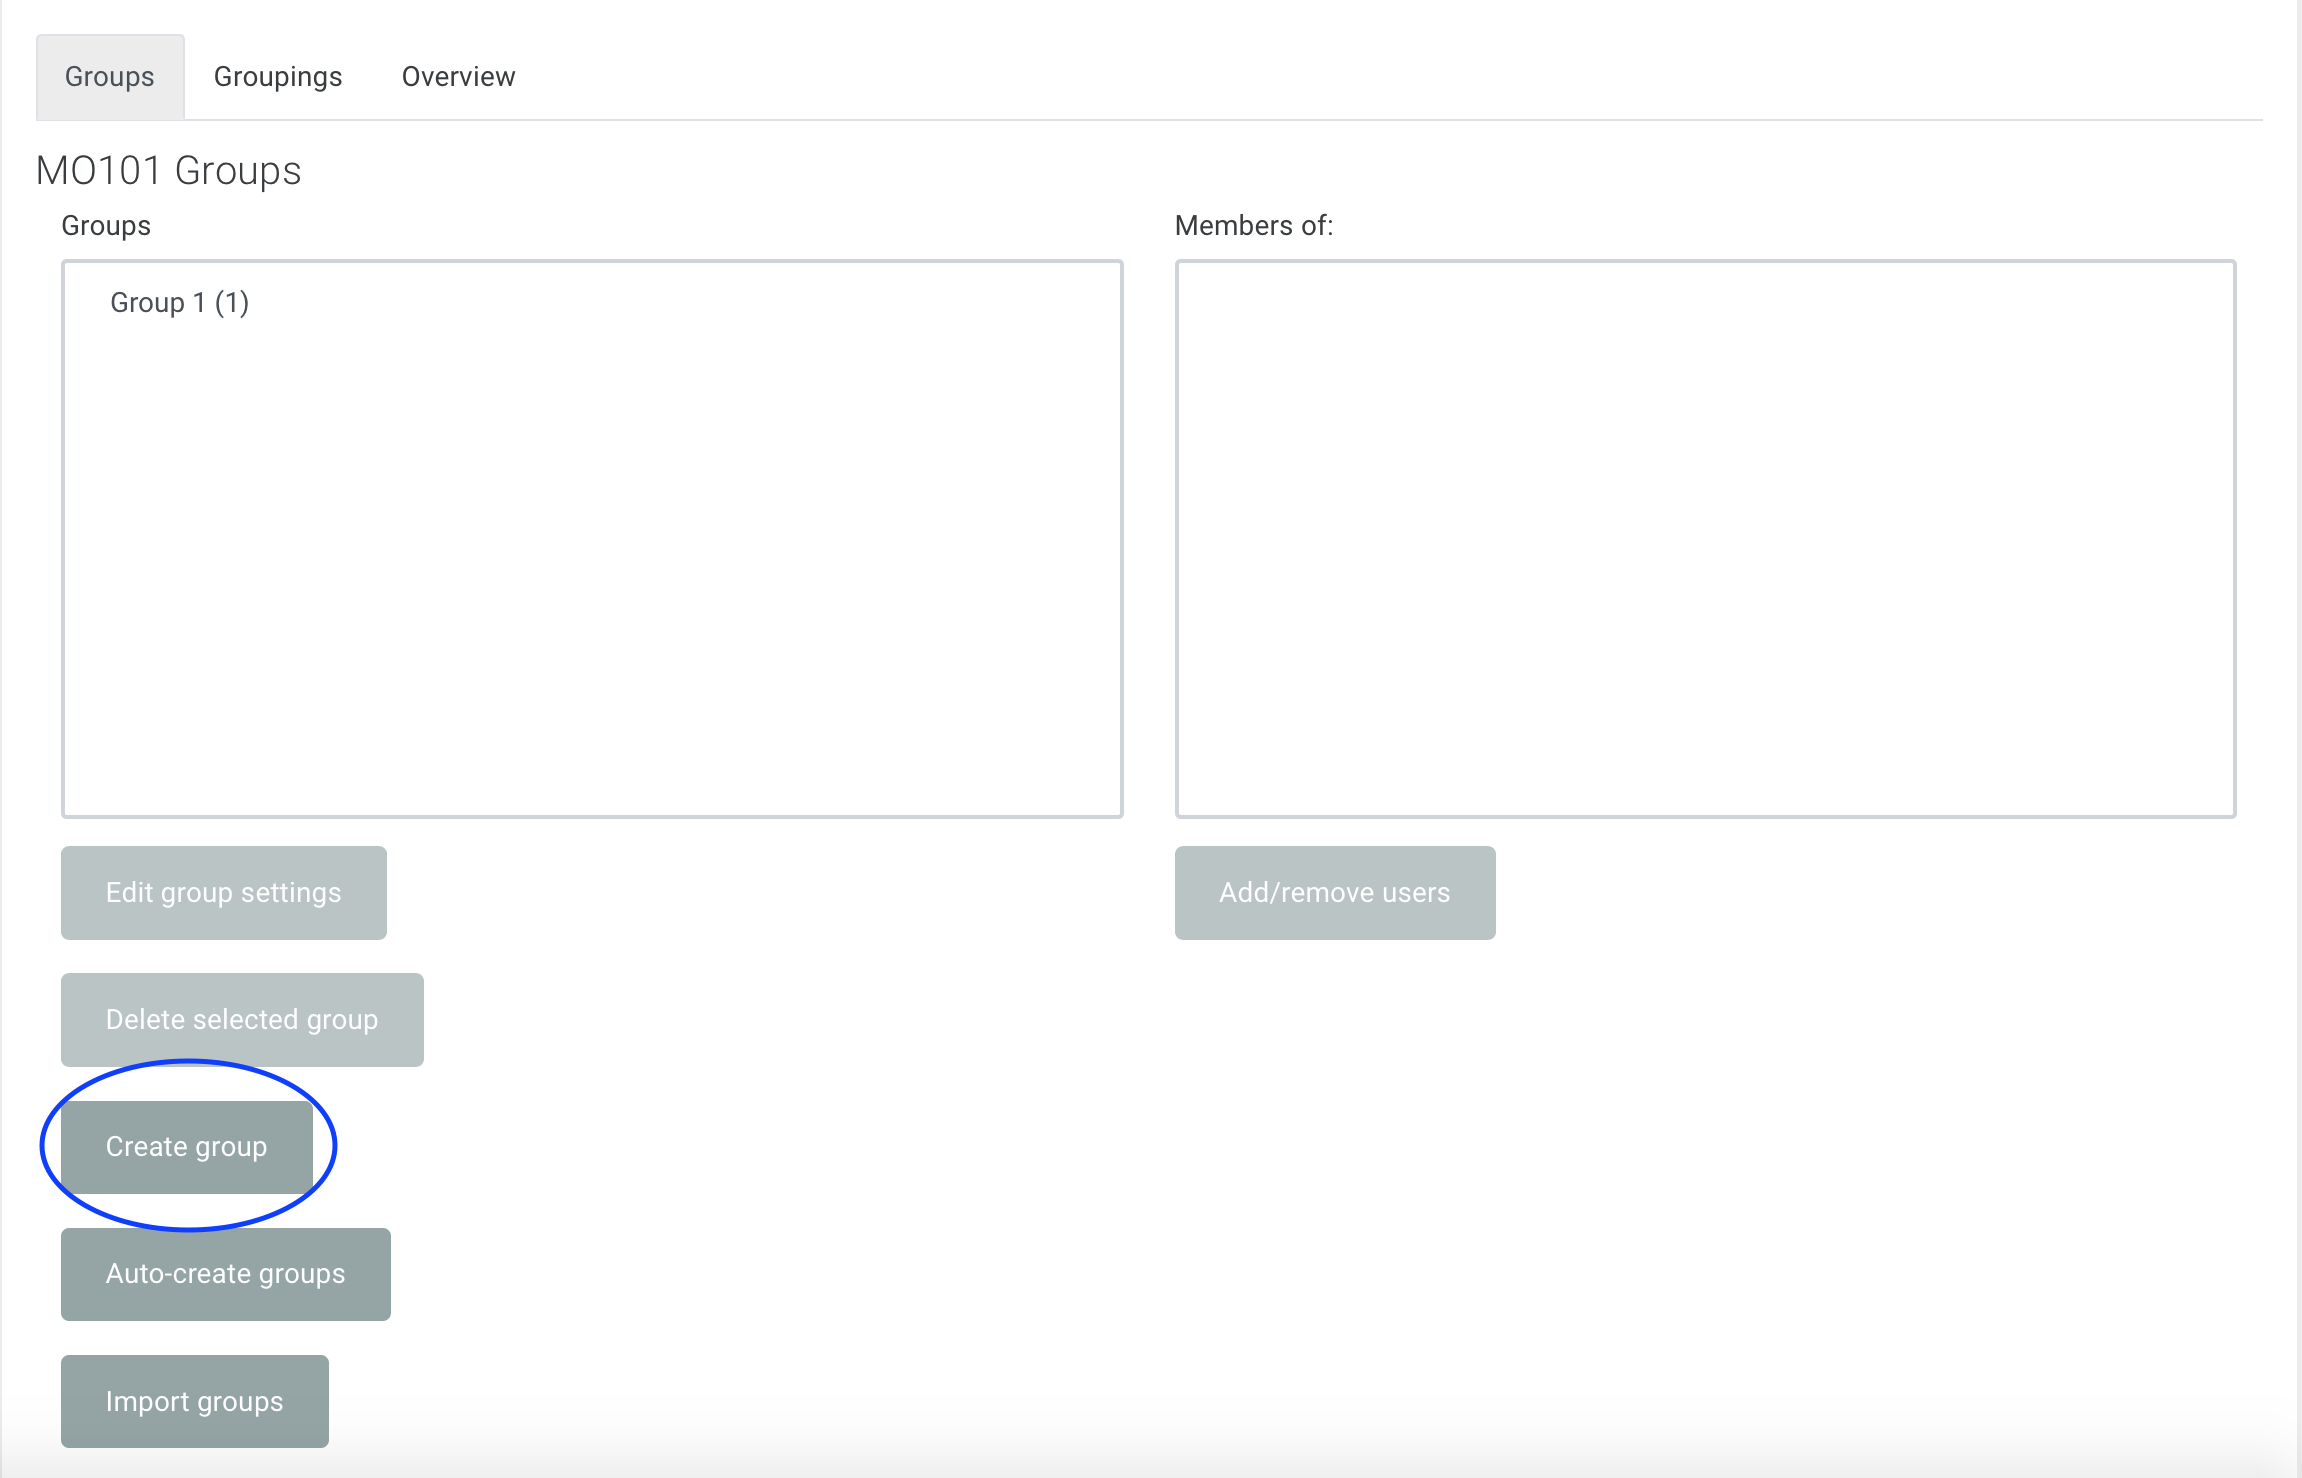
Go to the course page and from the Administration block on the left-hand side of the page, click Users > Groups. You will be redirected to the Groups page.
Click the Create group button.
Step 2: Group settings
Tip: Click on the question mark icon ![]() next to any setting to display extra help or click on Moodle Docs for this page link at the bottom of each page in Moodle for accessing context-specific documentation.
next to any setting to display extra help or click on Moodle Docs for this page link at the bottom of each page in Moodle for accessing context-specific documentation.
Enter a Group name. Optionally, enter a Description to remember what the group was created for.
Click Save changes.
Step 3: Add or remove users to/from a Group
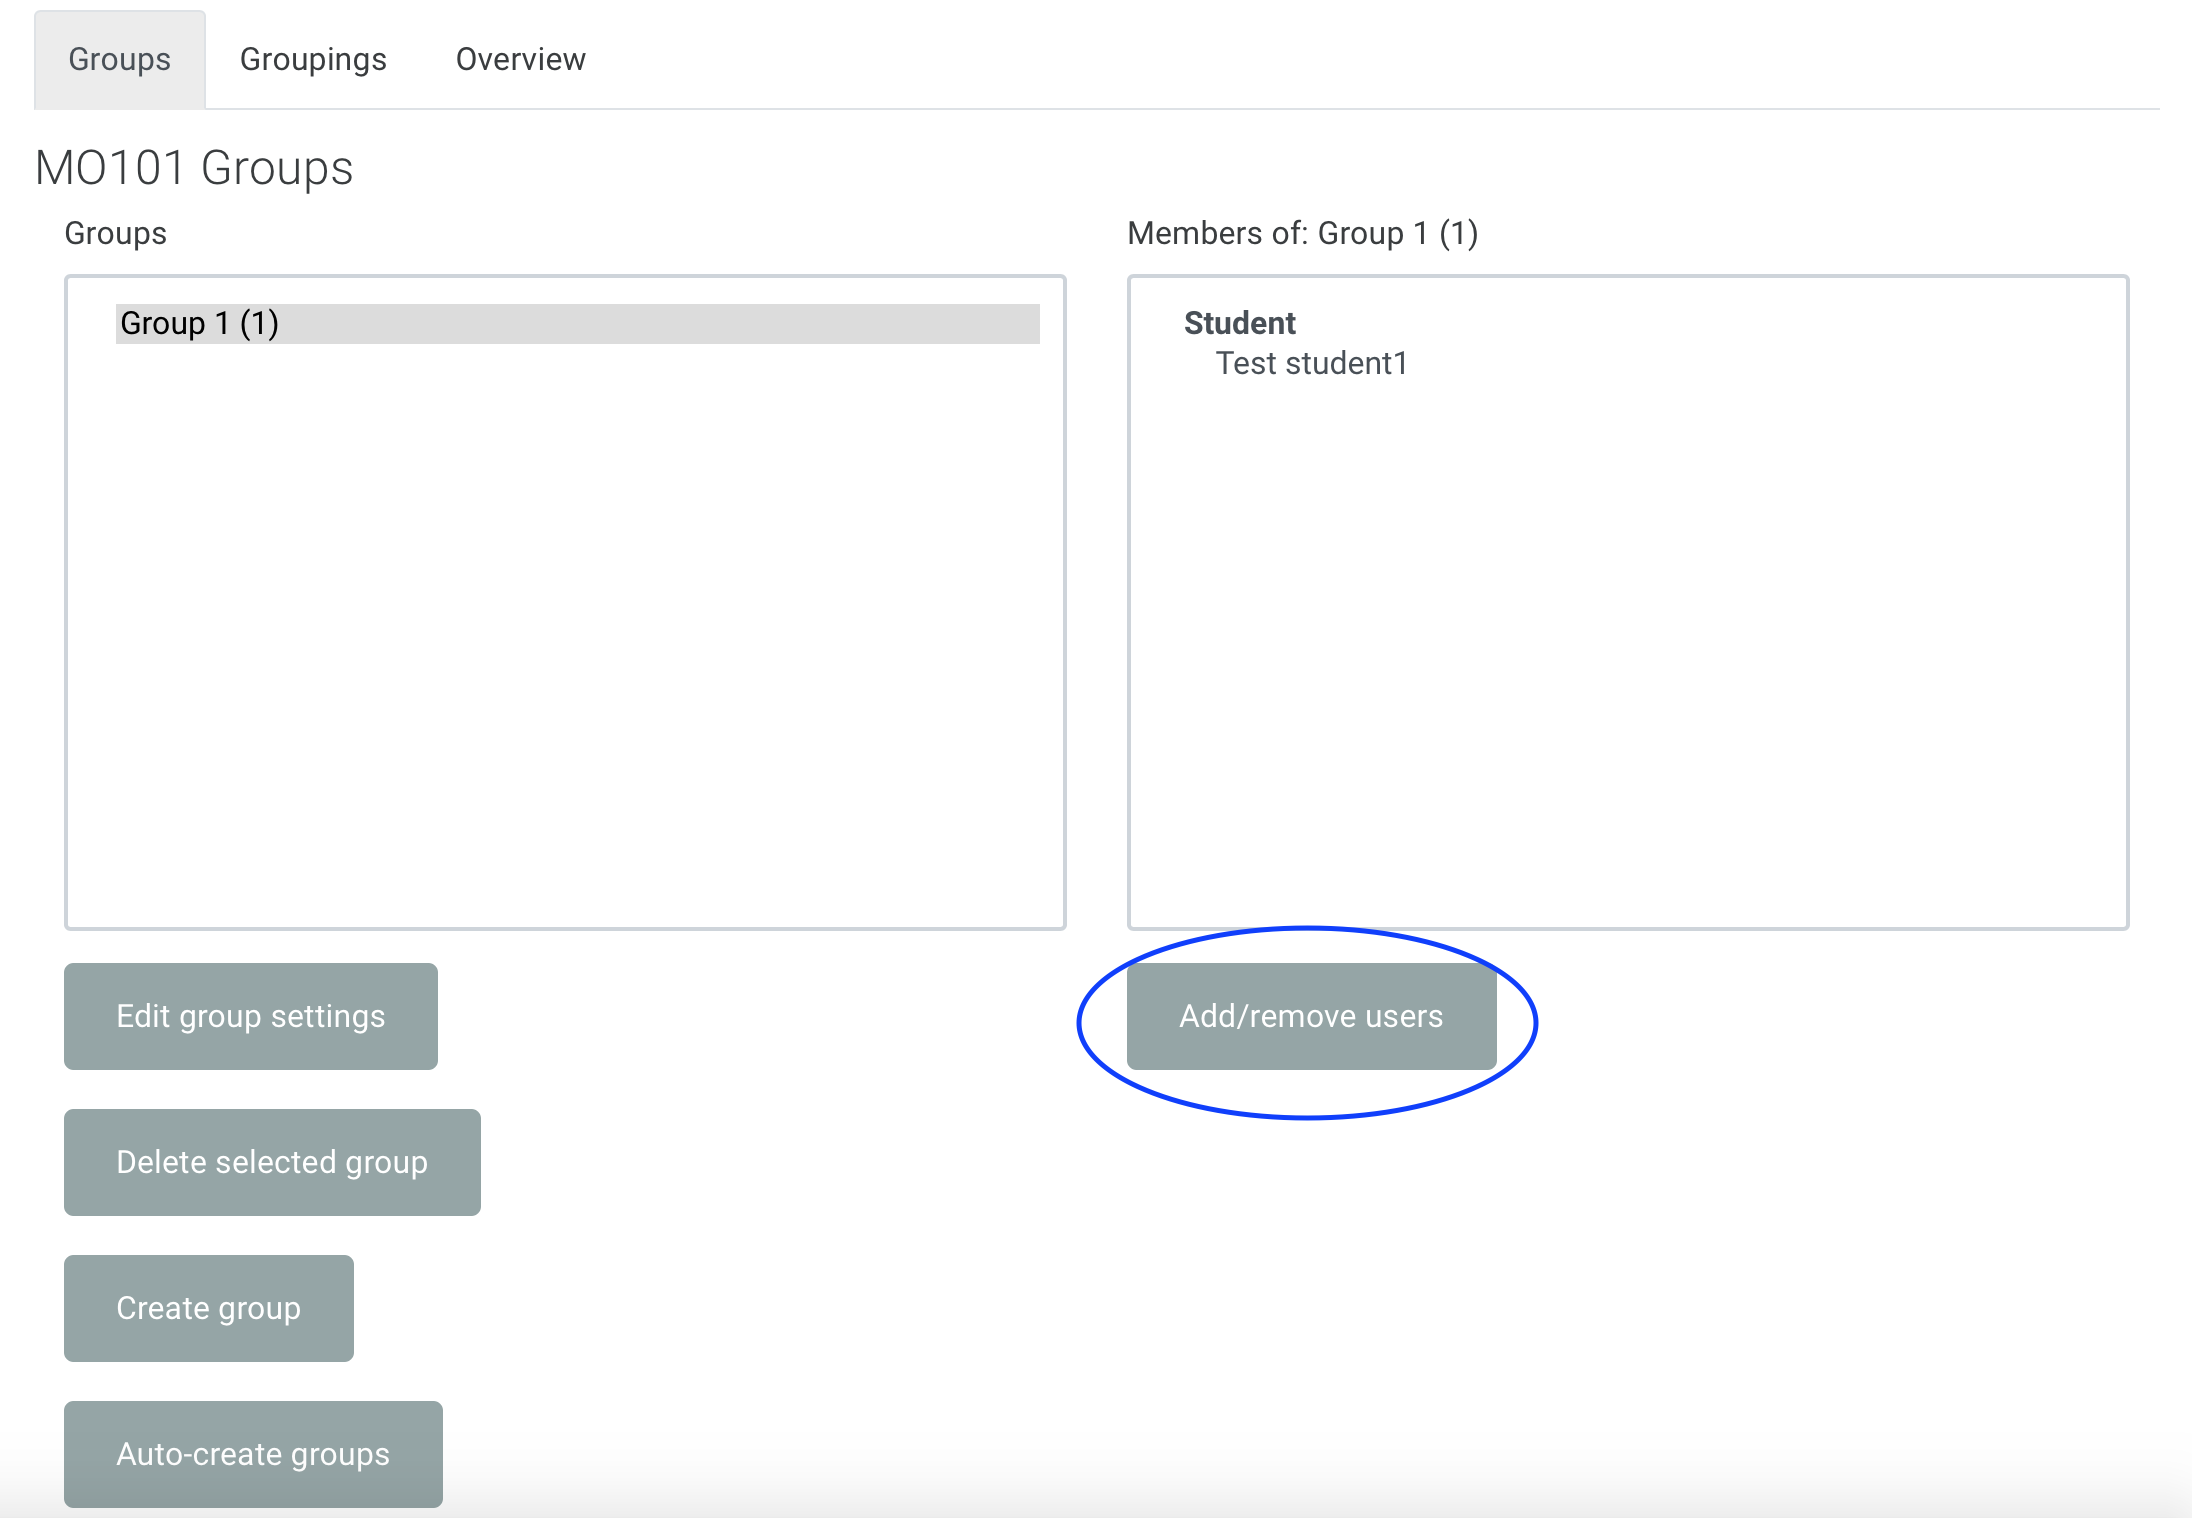
Select the Group where to add or remove users from, and click the Add/remove users button.
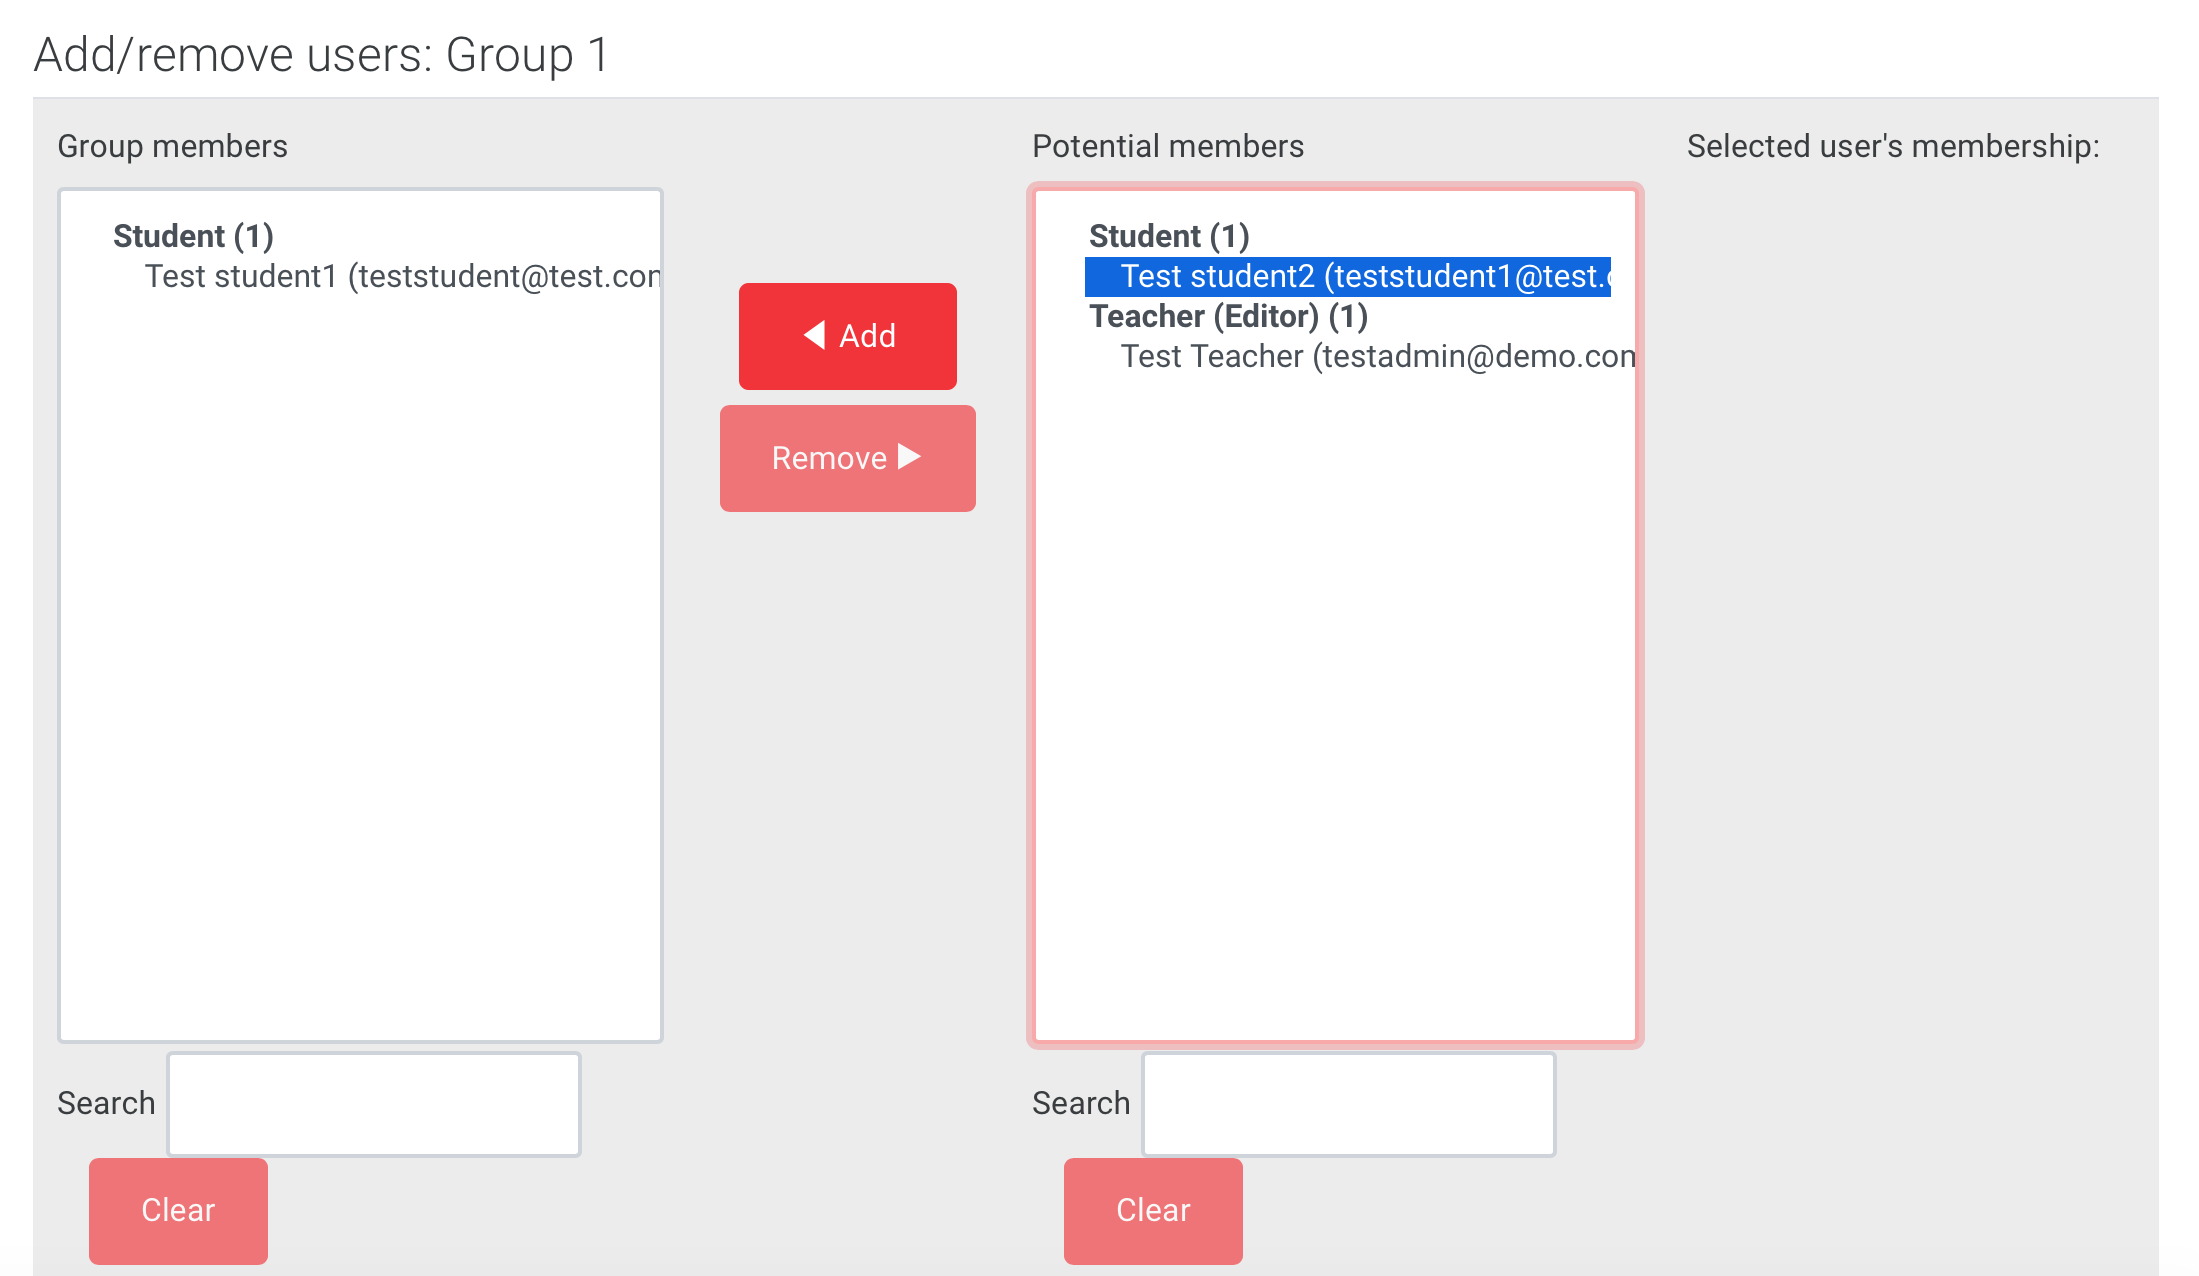
Select the user or users from the left box and click Add or select them from the right box and click Remove.
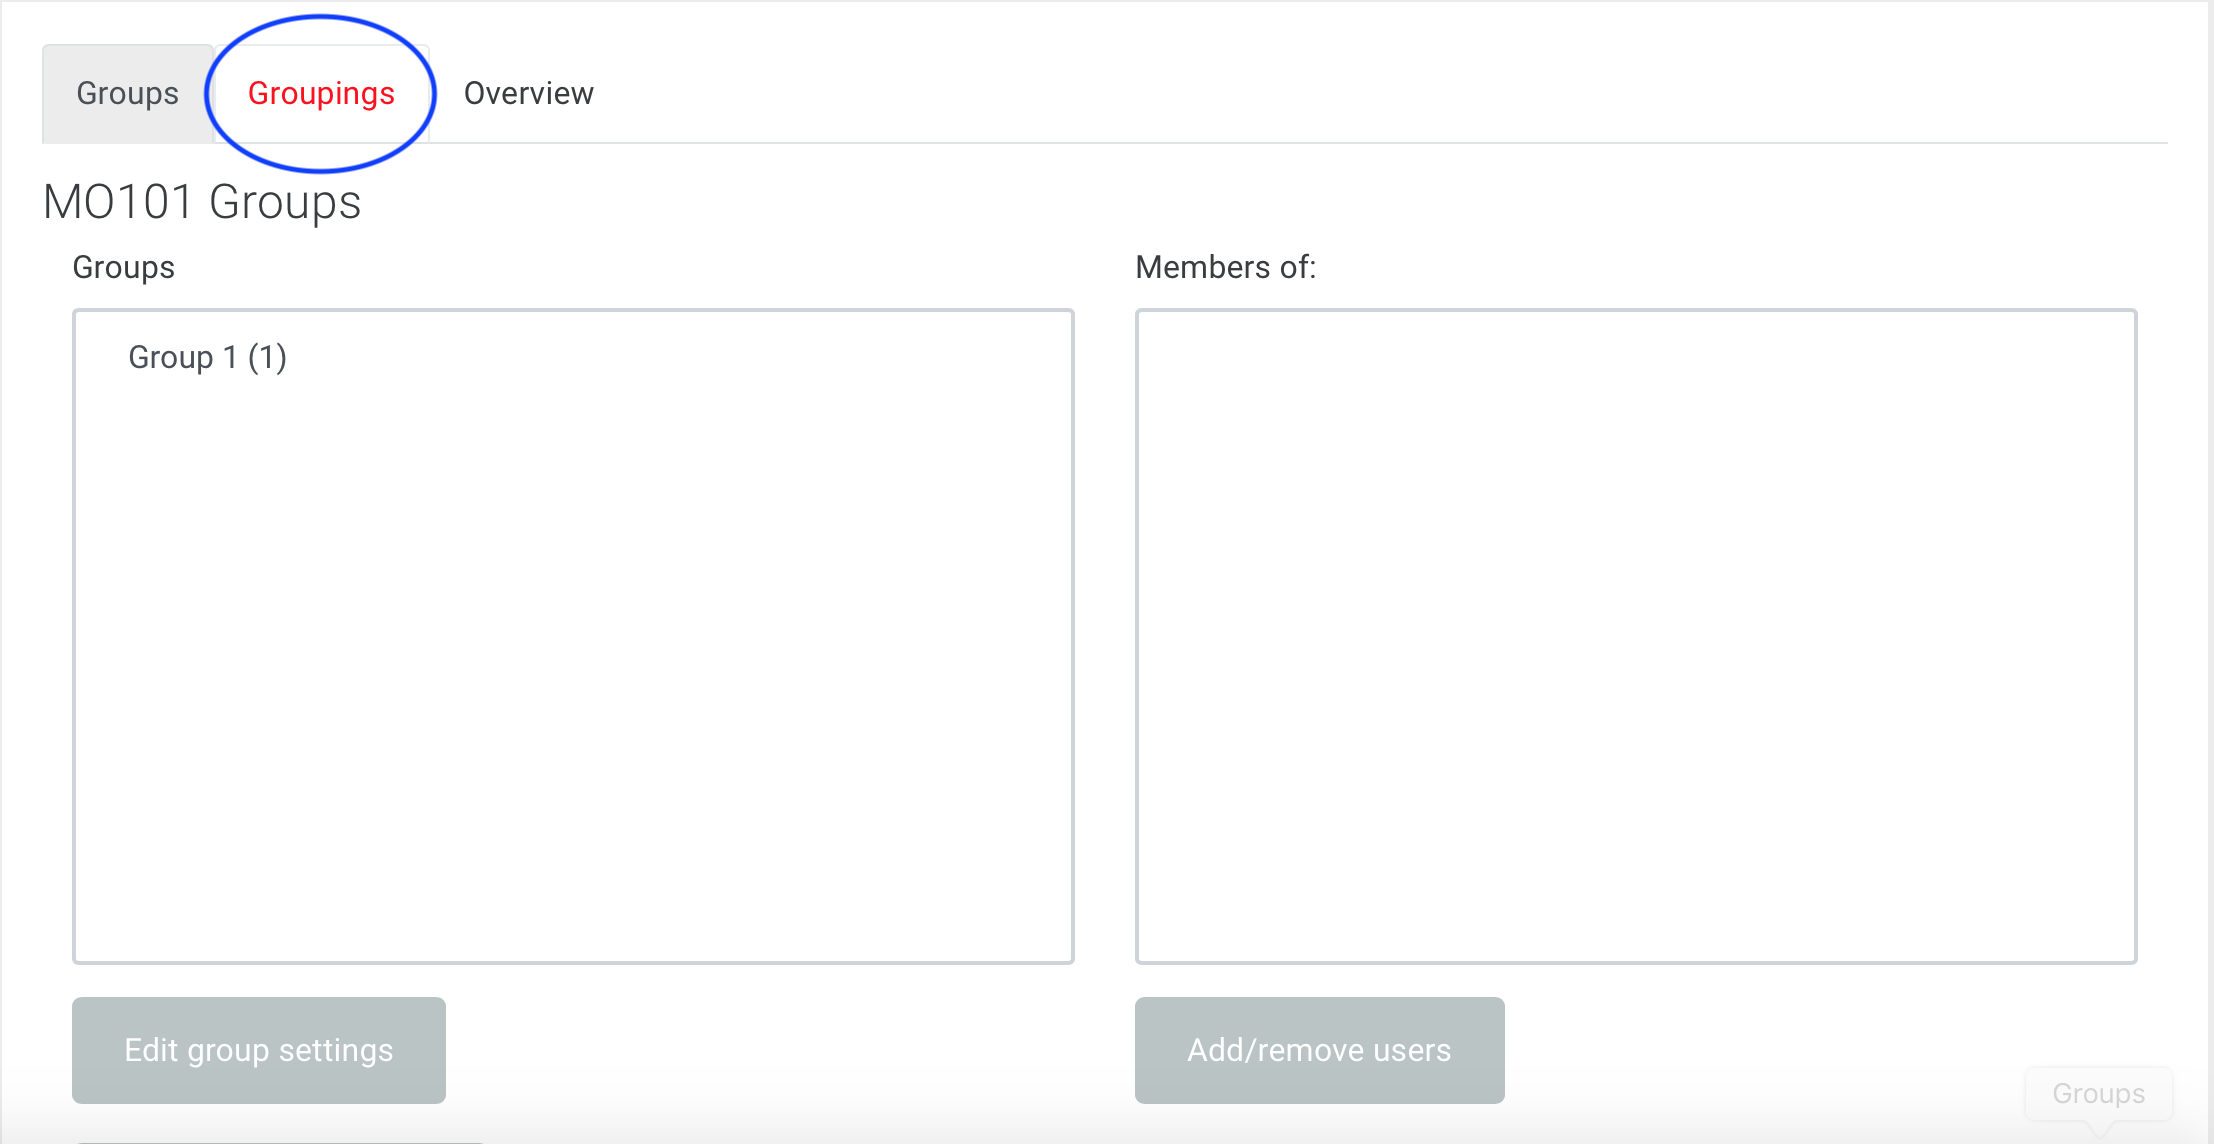
Step 4: Add Groupings
Go to the course page and from the Administration block on the left-hand side of the page, click Users > Groups.
Click on the Groupings tab and once redirected to the Groupings page, click the Create grouping button.
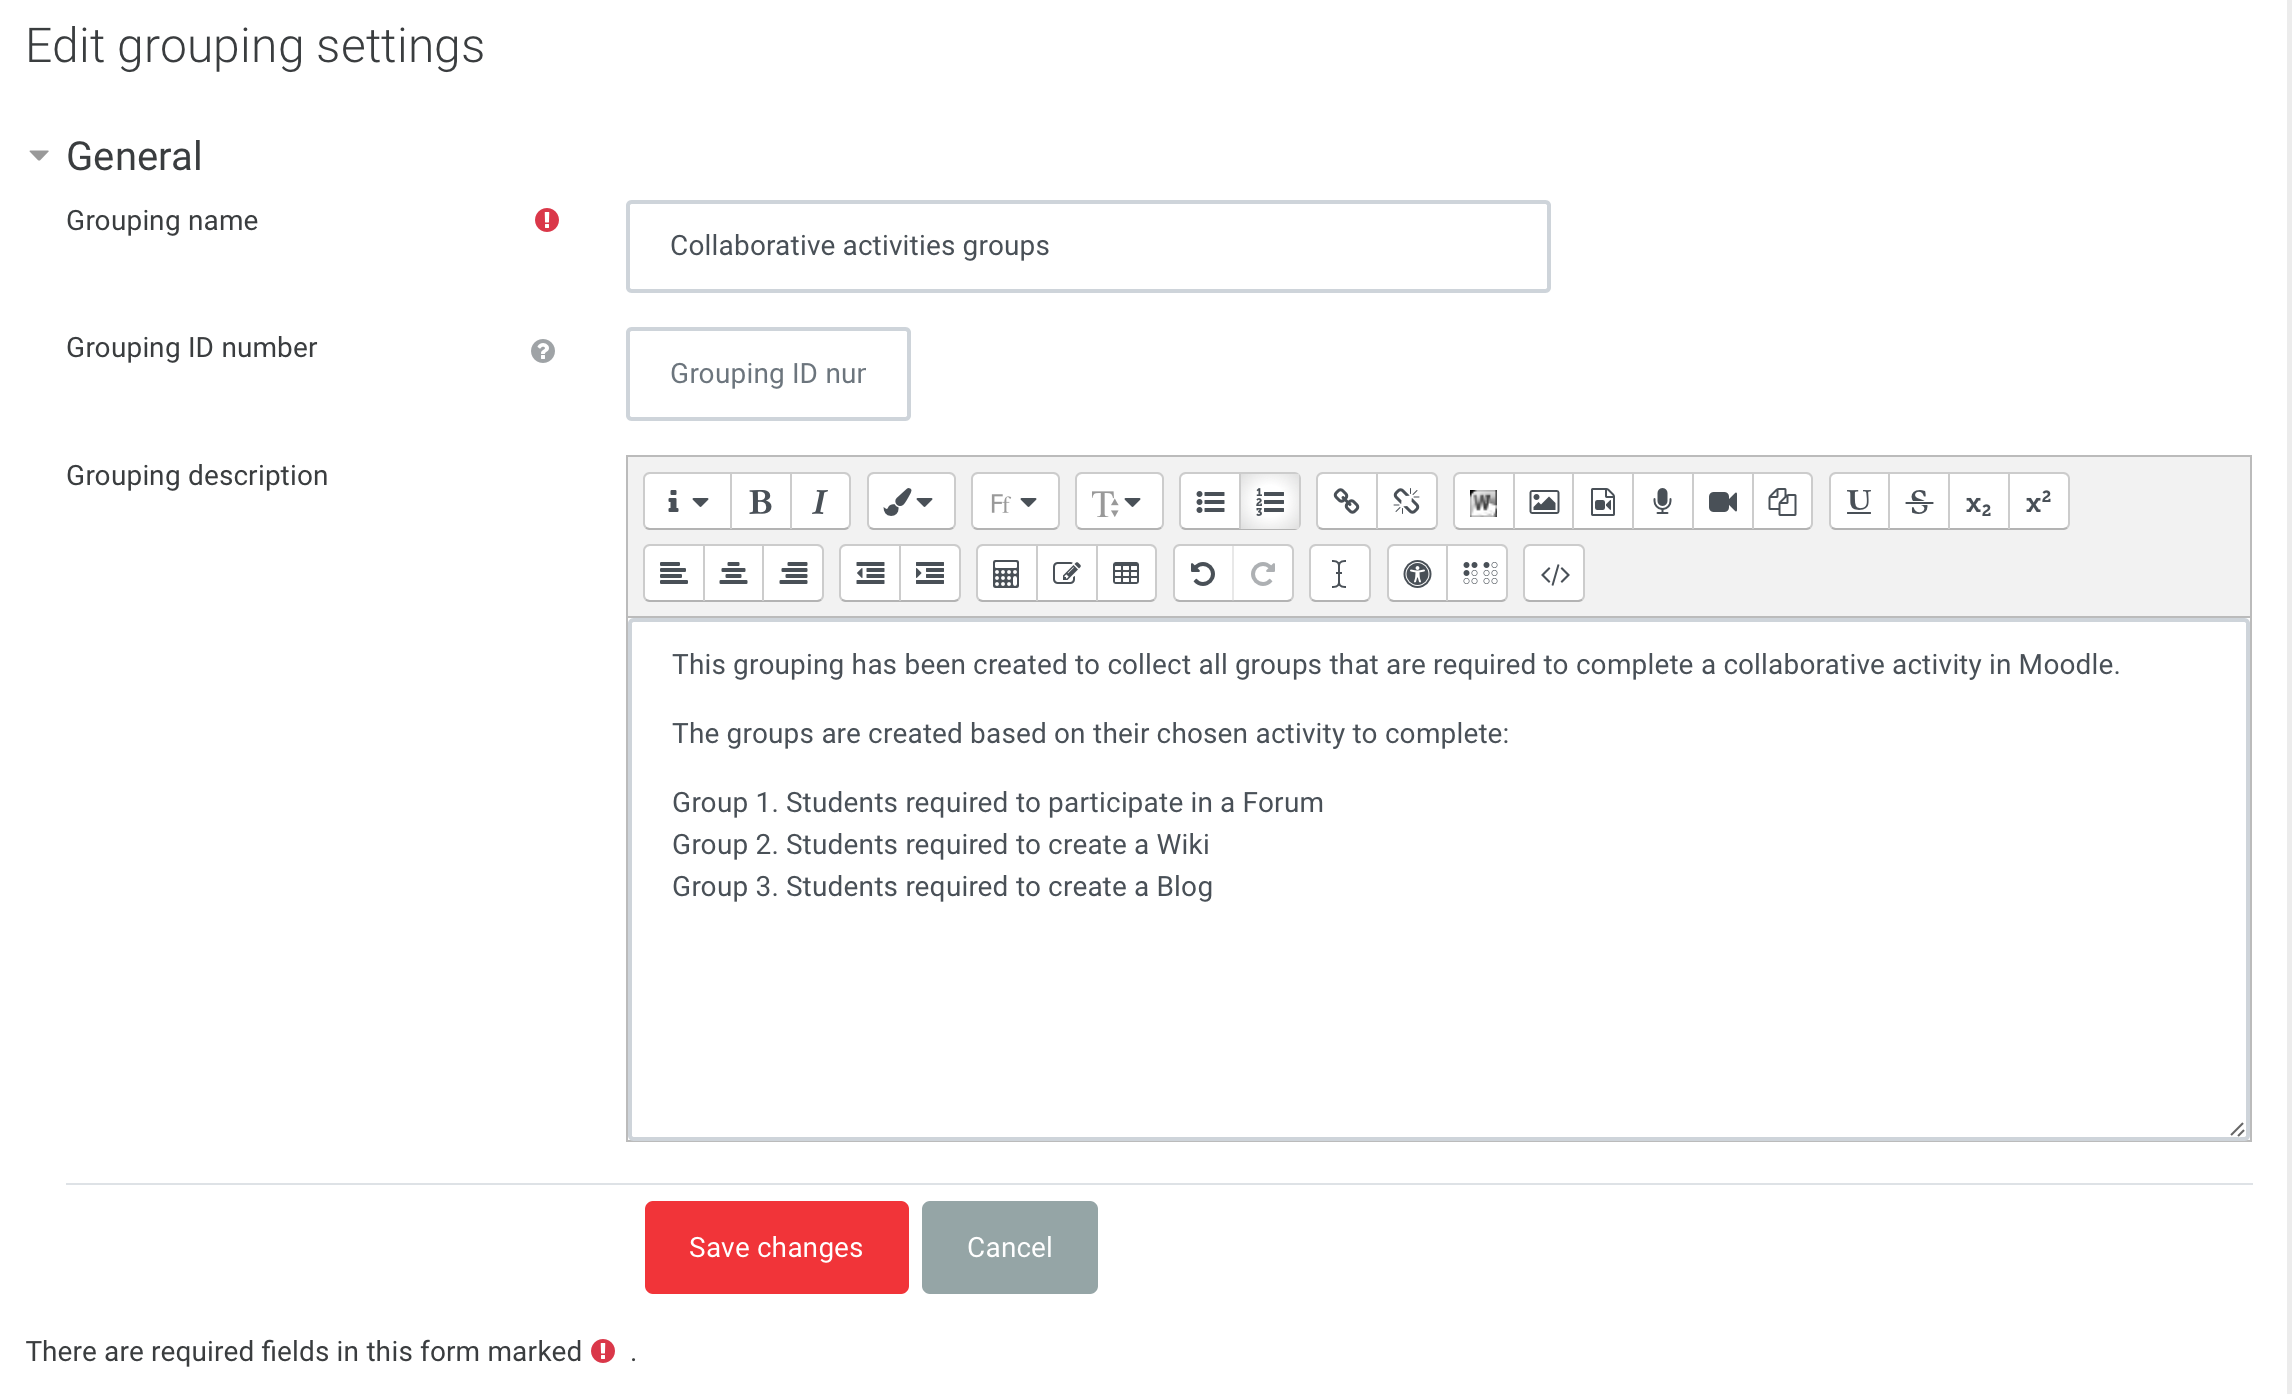
Step 5: Grouping settings
Tip: Click on the question mark icon ![]() next to any setting to display extra help or click on Moodle Docs for this page link at the bottom of each page in Moodle for accessing context-specific documentation.
next to any setting to display extra help or click on Moodle Docs for this page link at the bottom of each page in Moodle for accessing context-specific documentation.
Enter a Grouping name. Optionally, enter a Description to remember what the grouping was created for.
Click Save changes.
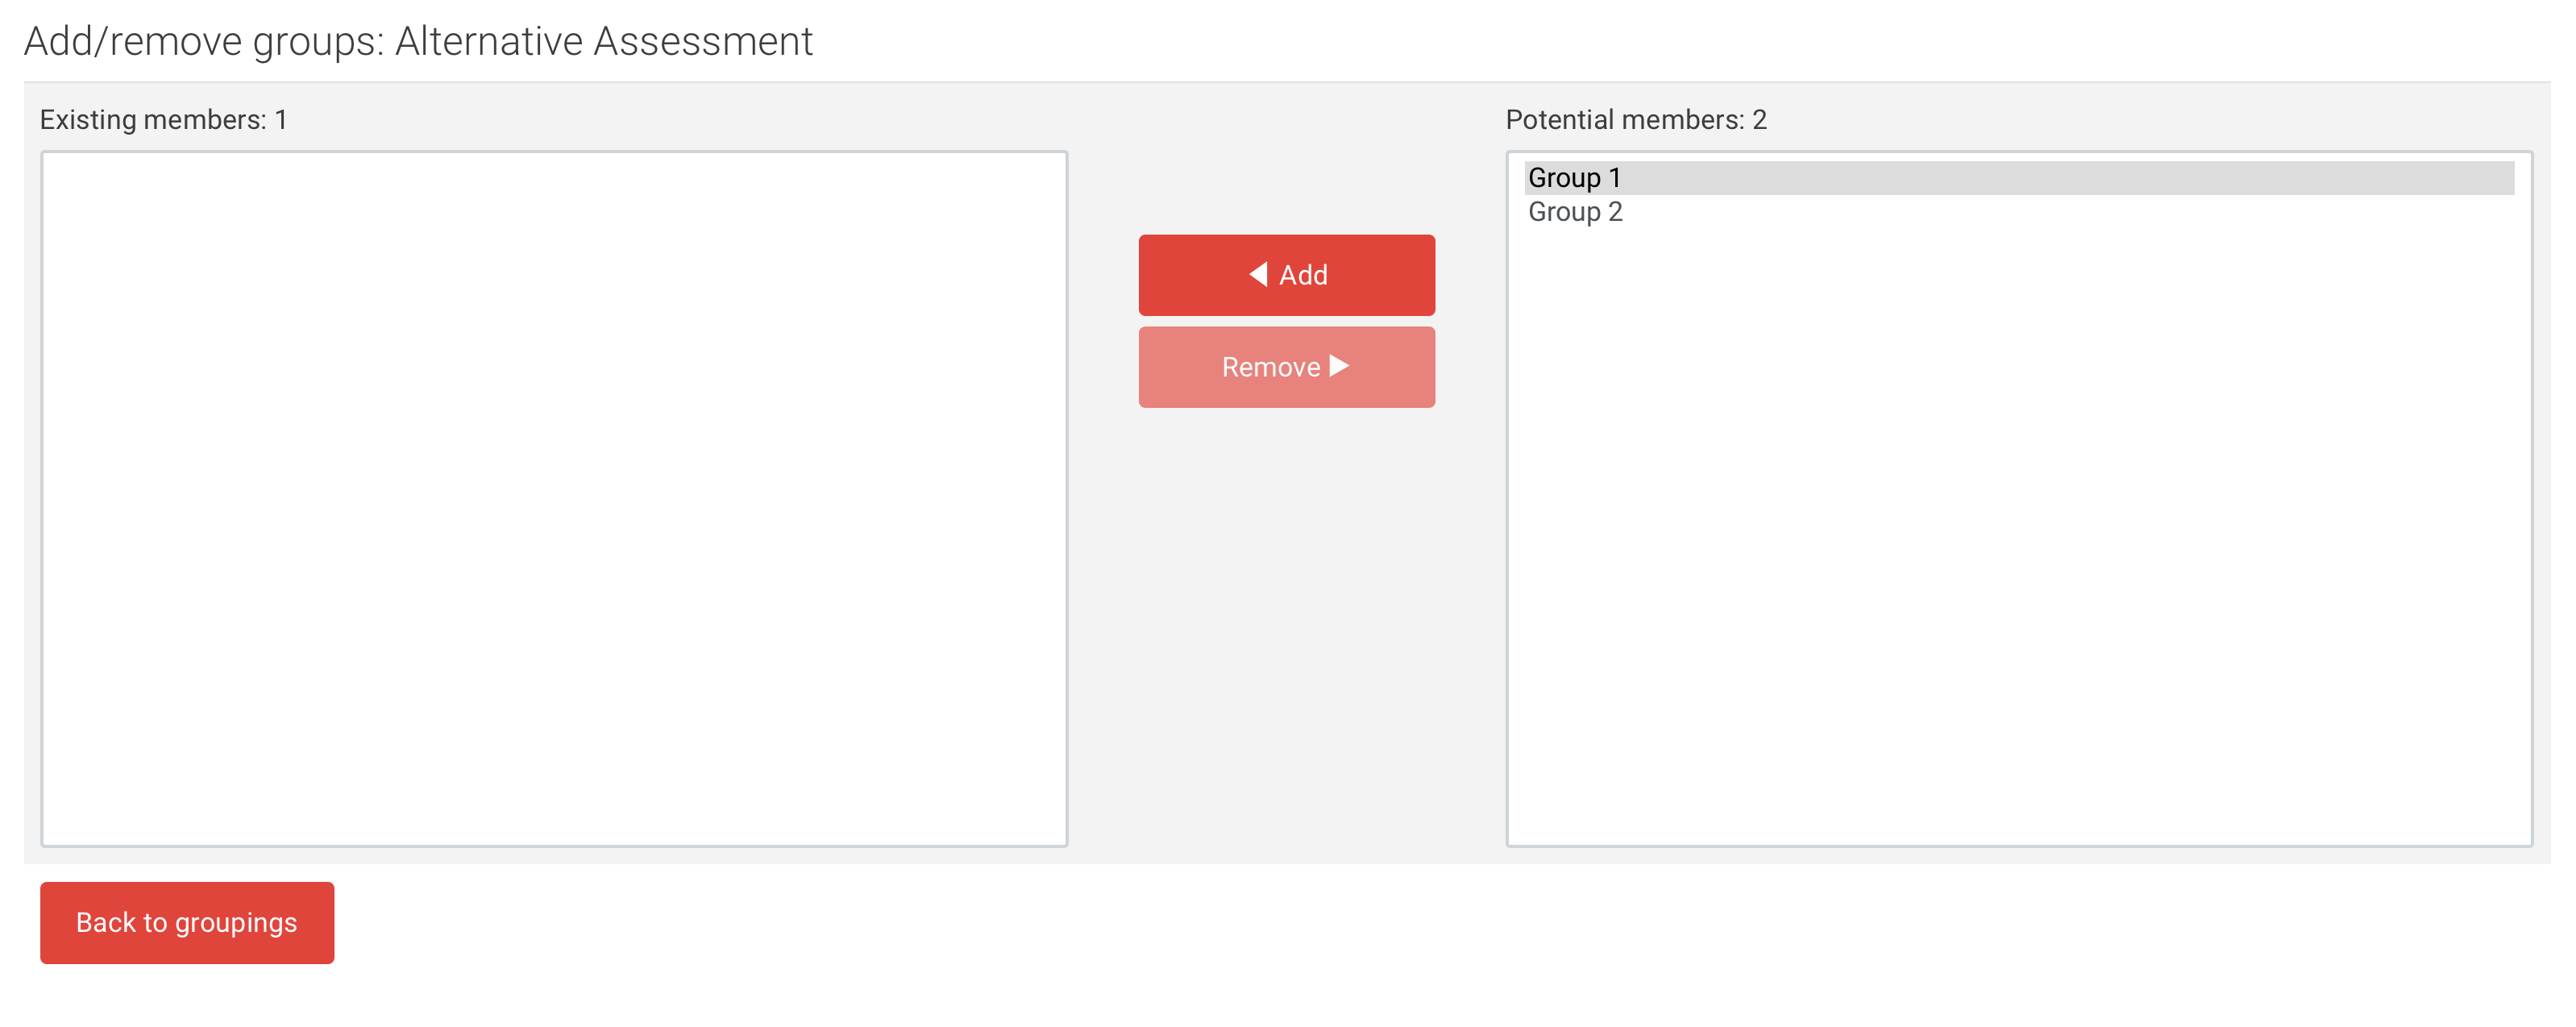
Step 6: Add or remove Groups to/from a Grouping
Go to the course page and from the Administration block on the left-hand side of the page, click Users > Groups.
Click on the Groupings tab. You will be redirected to the Groupings page.
Underneath the Edit column, click the show groups in groupings icon: ![]()
Select the group or groups from the Potential members box on the right and click Add or select them from the Existing members box and click Remove.
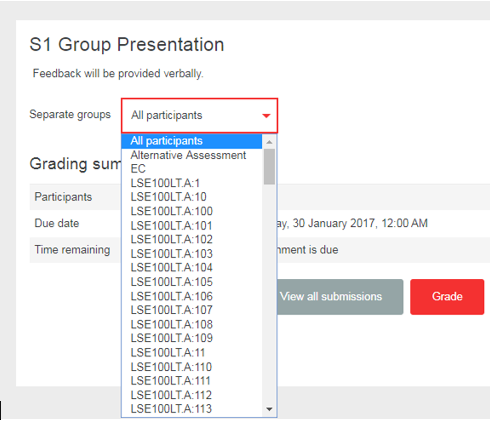
How to use Groups and Groupings to manage group activities
Once you have created groups within your course, you can set up group activities.
The most common Moodle activities to which groups apply are Forums, Wikis and Assignments.
On the settings page of the chosen activity, scroll down and expand the Common Module settings.
Use Group Mode to enable groups. Select Separate or Visible groups. If you choose Separate Groups, students work in private groups. Visible groups means members of other groups can view, but not participate in the activity. In most scenarios, we advise to select Separate Groups.
If your groups are in a Grouping, select it from the Grouping drop-down.
Note: Once saved, the activity is available to each group on the course. You do not need to create the activity multiple times.
Once a group activity is set up, you can filter by groups using the drop-down menu at the top of the activity.
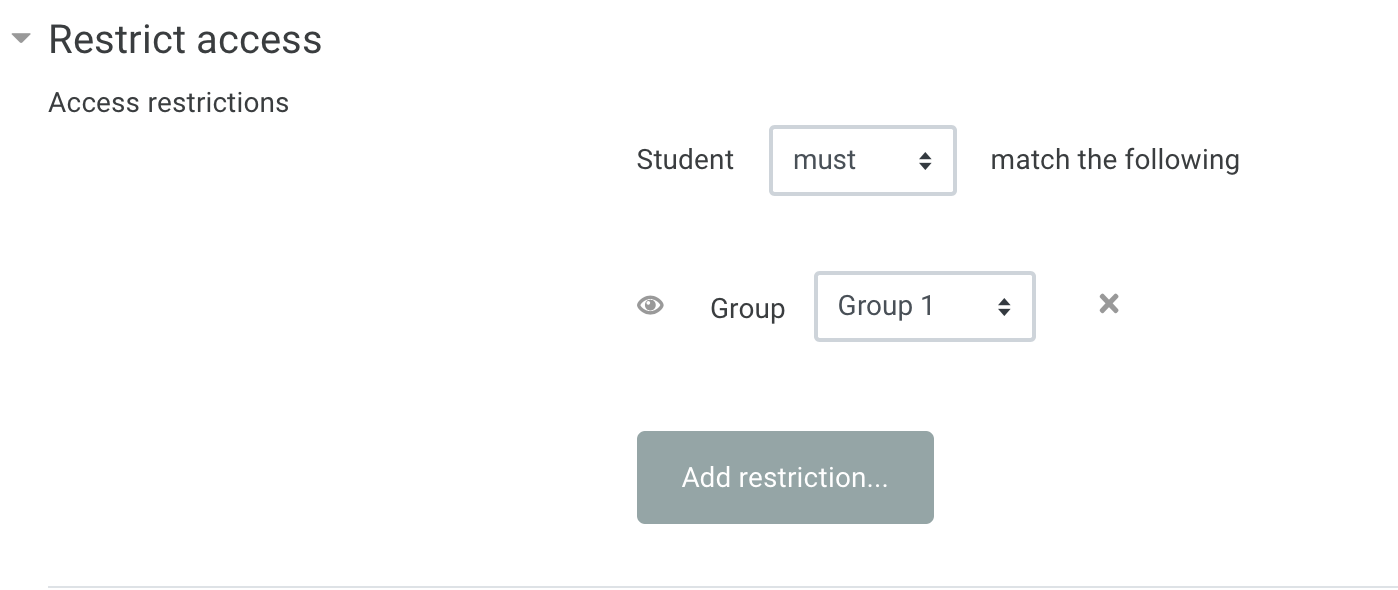
How to restrict access to course sections, activities and resources to a group
On the settings page of a course section, activity or resource, enable the Restrict access setting.
A group restriction can then be added as the criteria. (Group is only one of the ways to restrict access; see Restrict access for more details.)
IMPORTANT: Make sure you click on the eye-icon ![]() to hide the criteria, especially if you restrict access to students with Inclusion Plans (IPs) so that their identities are hidden (i.e. their names will not appear under the activity from Moodle’s homepage for everyone to see).
to hide the criteria, especially if you restrict access to students with Inclusion Plans (IPs) so that their identities are hidden (i.e. their names will not appear under the activity from Moodle’s homepage for everyone to see).