Tip: Click on the question mark icon ![]() next to any setting to display extra help or click on Moodle Docs for this page link at the bottom of each page in Moodle for accessing context-specific documentation.
next to any setting to display extra help or click on Moodle Docs for this page link at the bottom of each page in Moodle for accessing context-specific documentation.
Rubrics are advanced grading forms used for criteria-based assessment. There is an alternative to the rubric called a Marking guide which is a simpler form of what is described below. See Creating a new Marking guide on Moodle Docs.
See our Assignment set-up guide (individual and group) for the settings.
Tip: Click on the question mark icon |
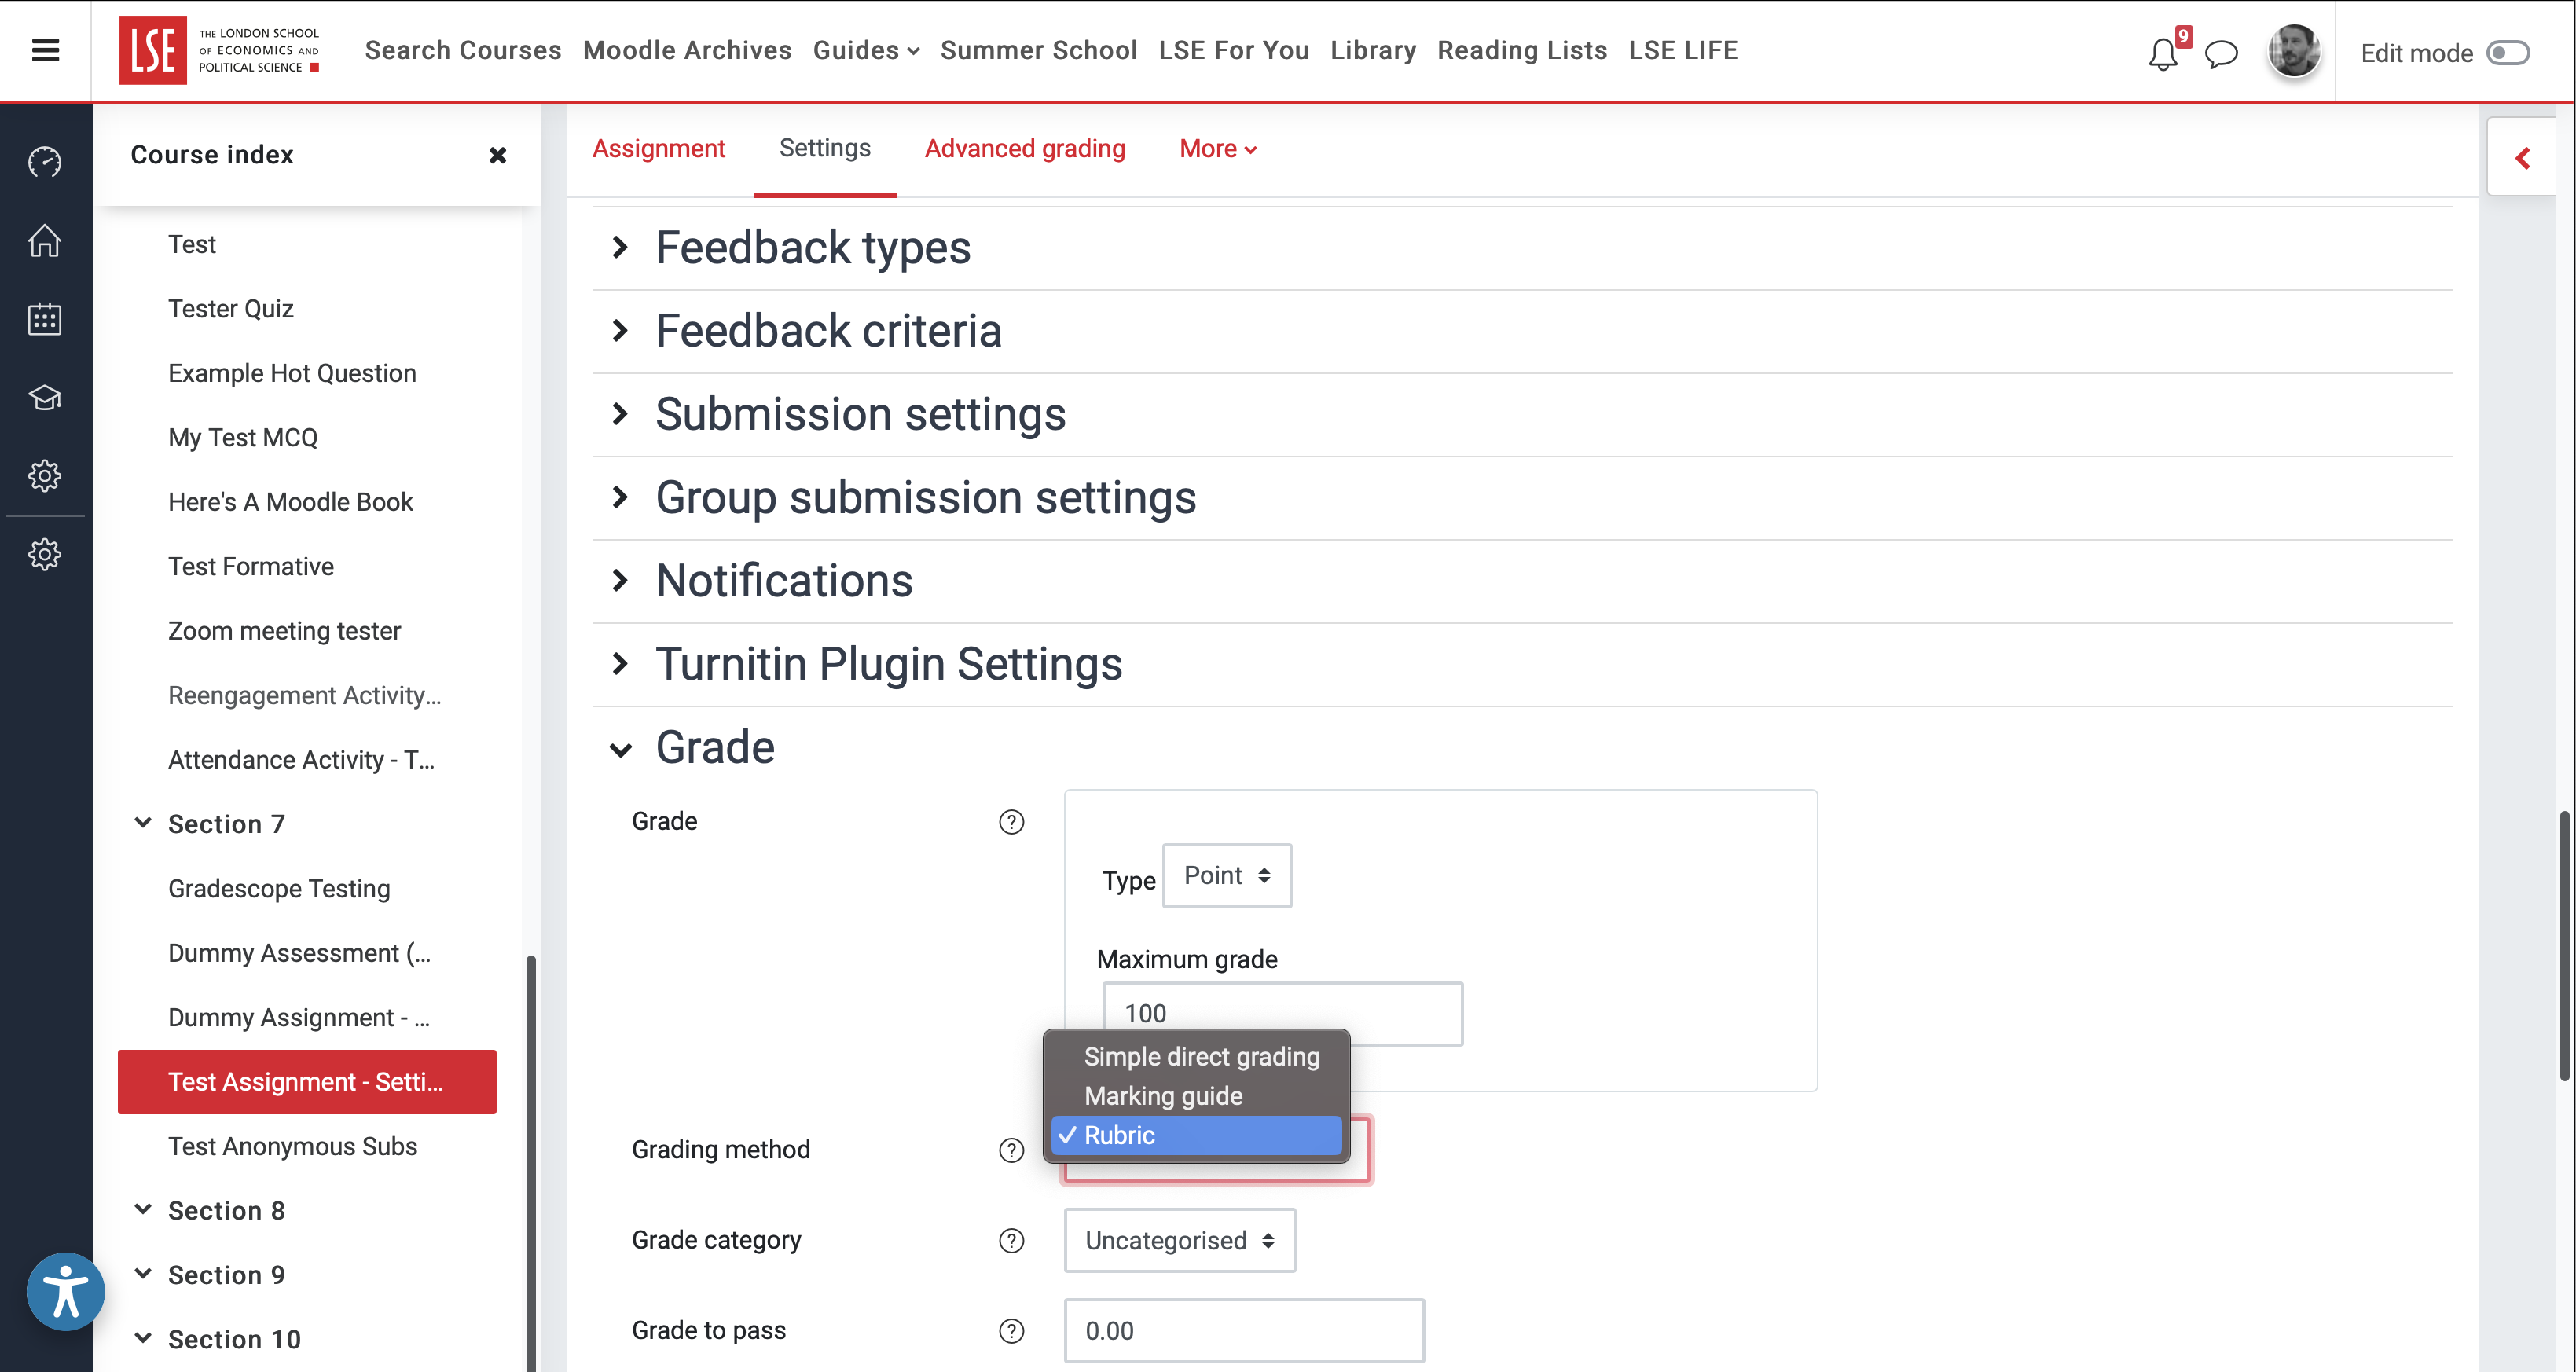
In the edit settings of the assignment under the Grade section on the Grading method select Rubric. Then Save and display.
 |
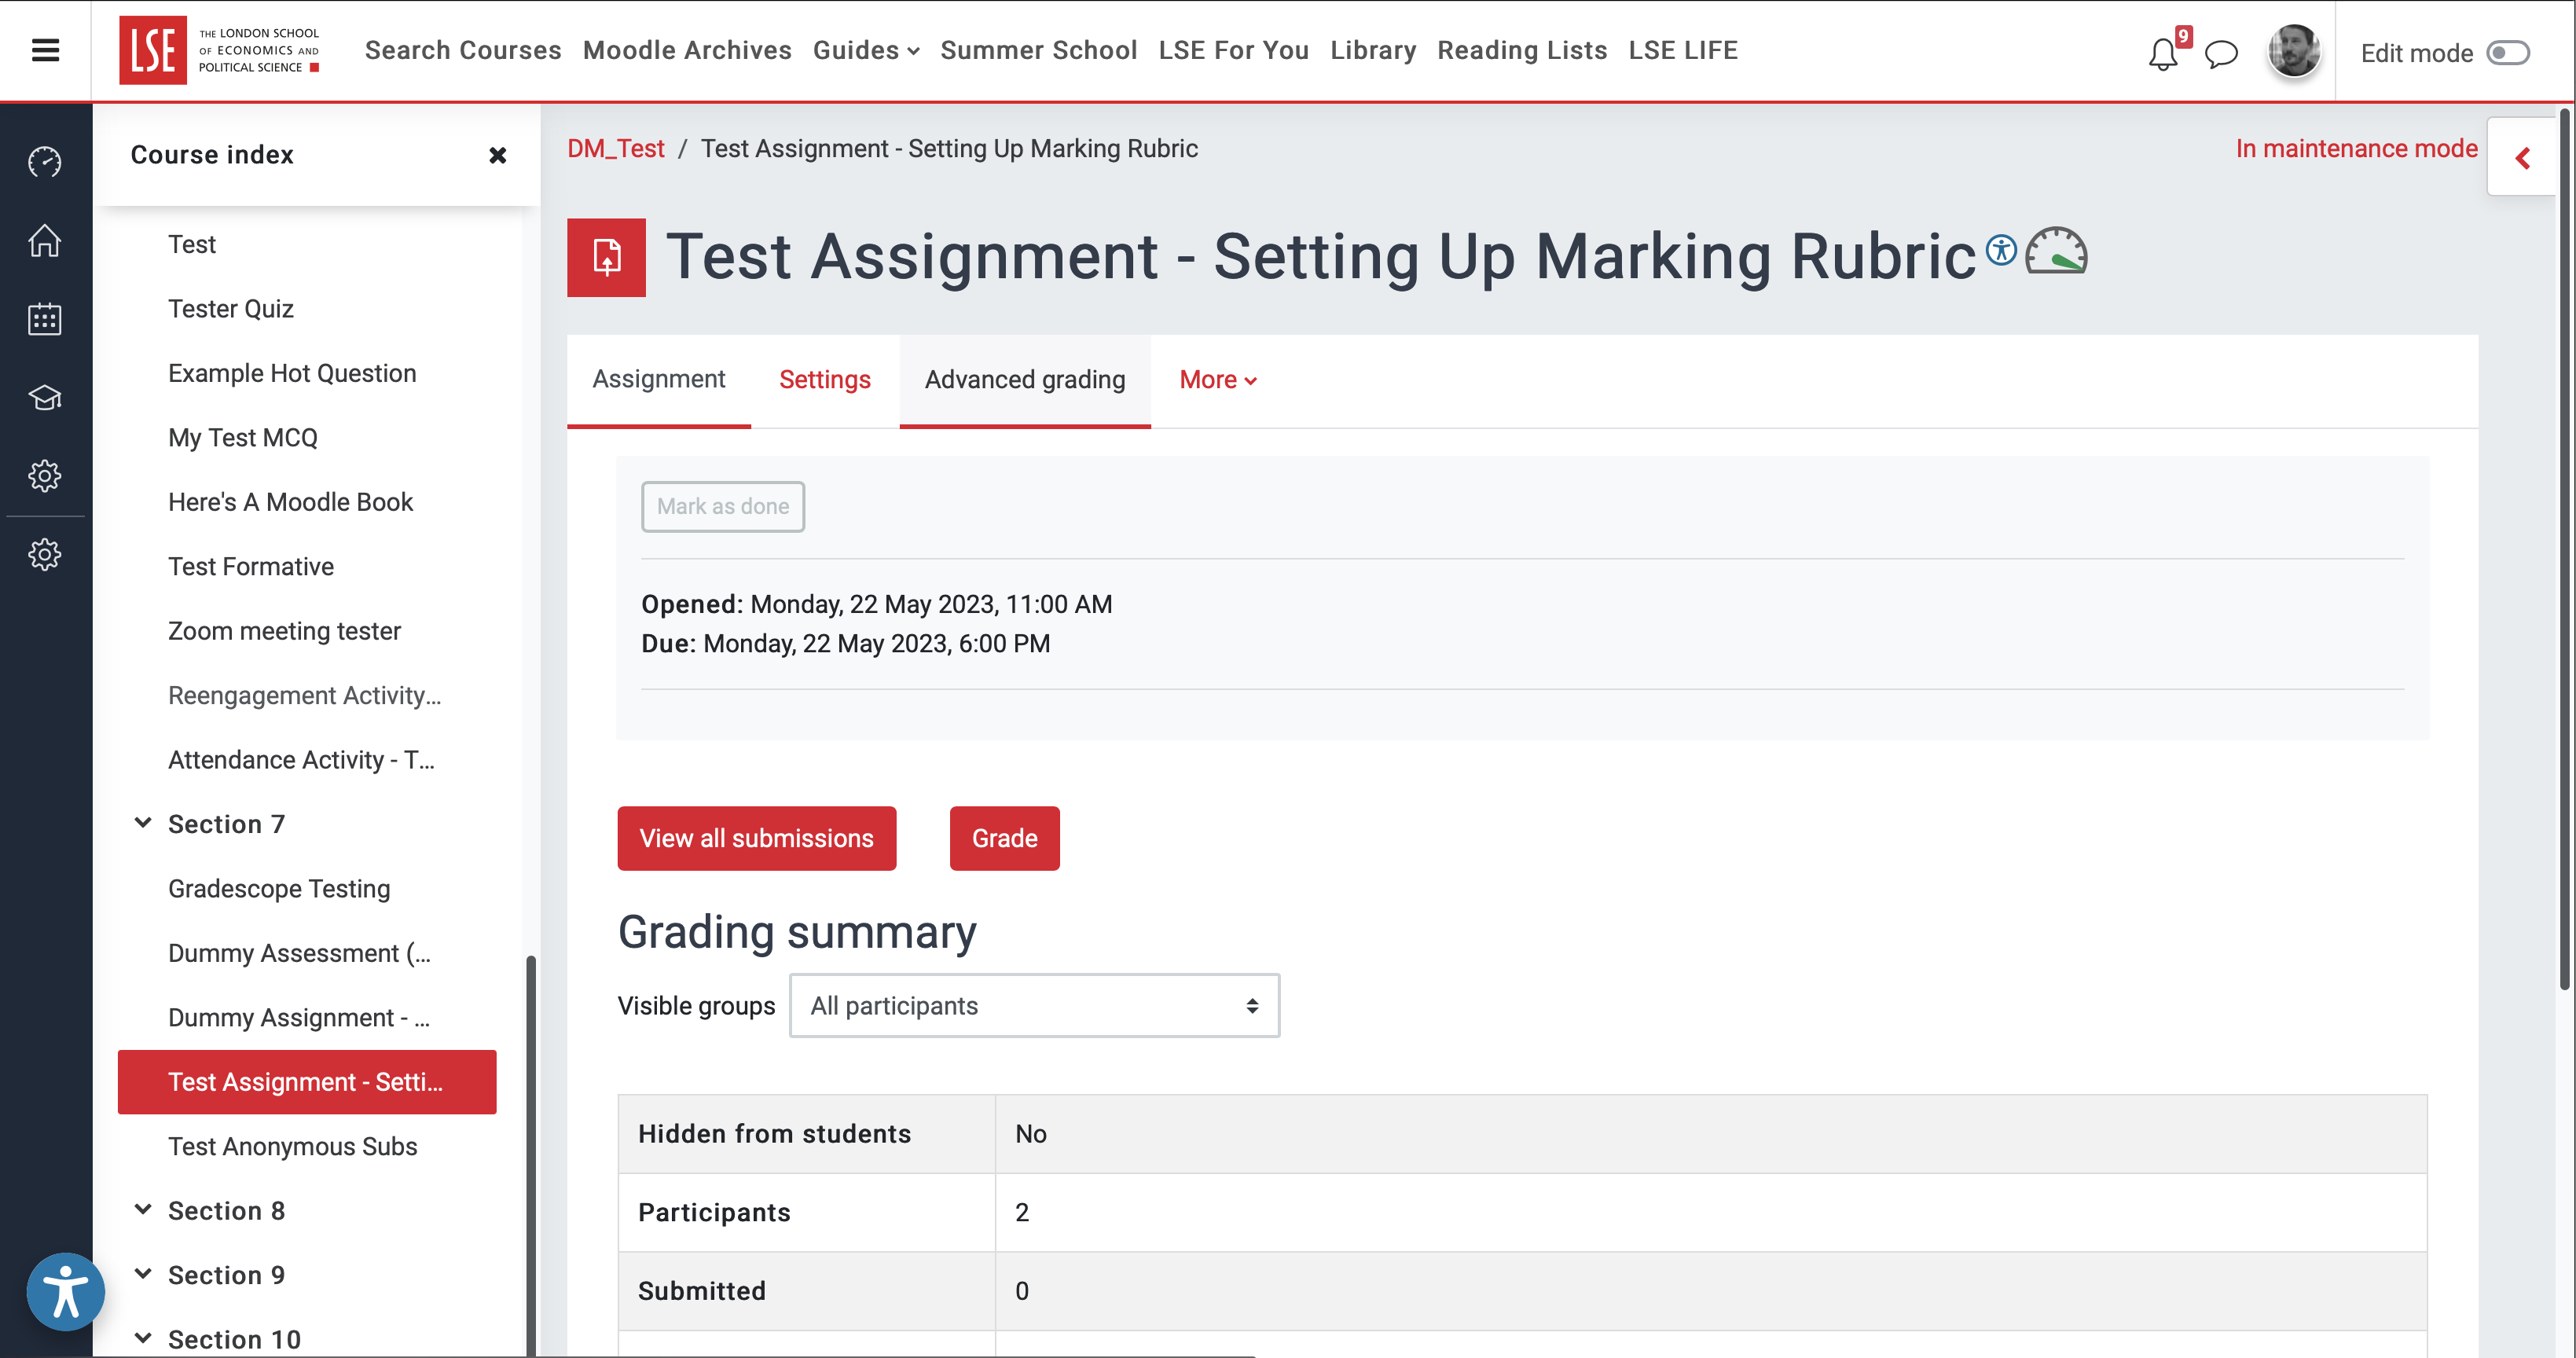
Then select Advanced grading from the Assignment administration menu on the left.
OR
Open an assignment that has been set up to use a rubric and select Advanced grading from the assignment menu options.
 |
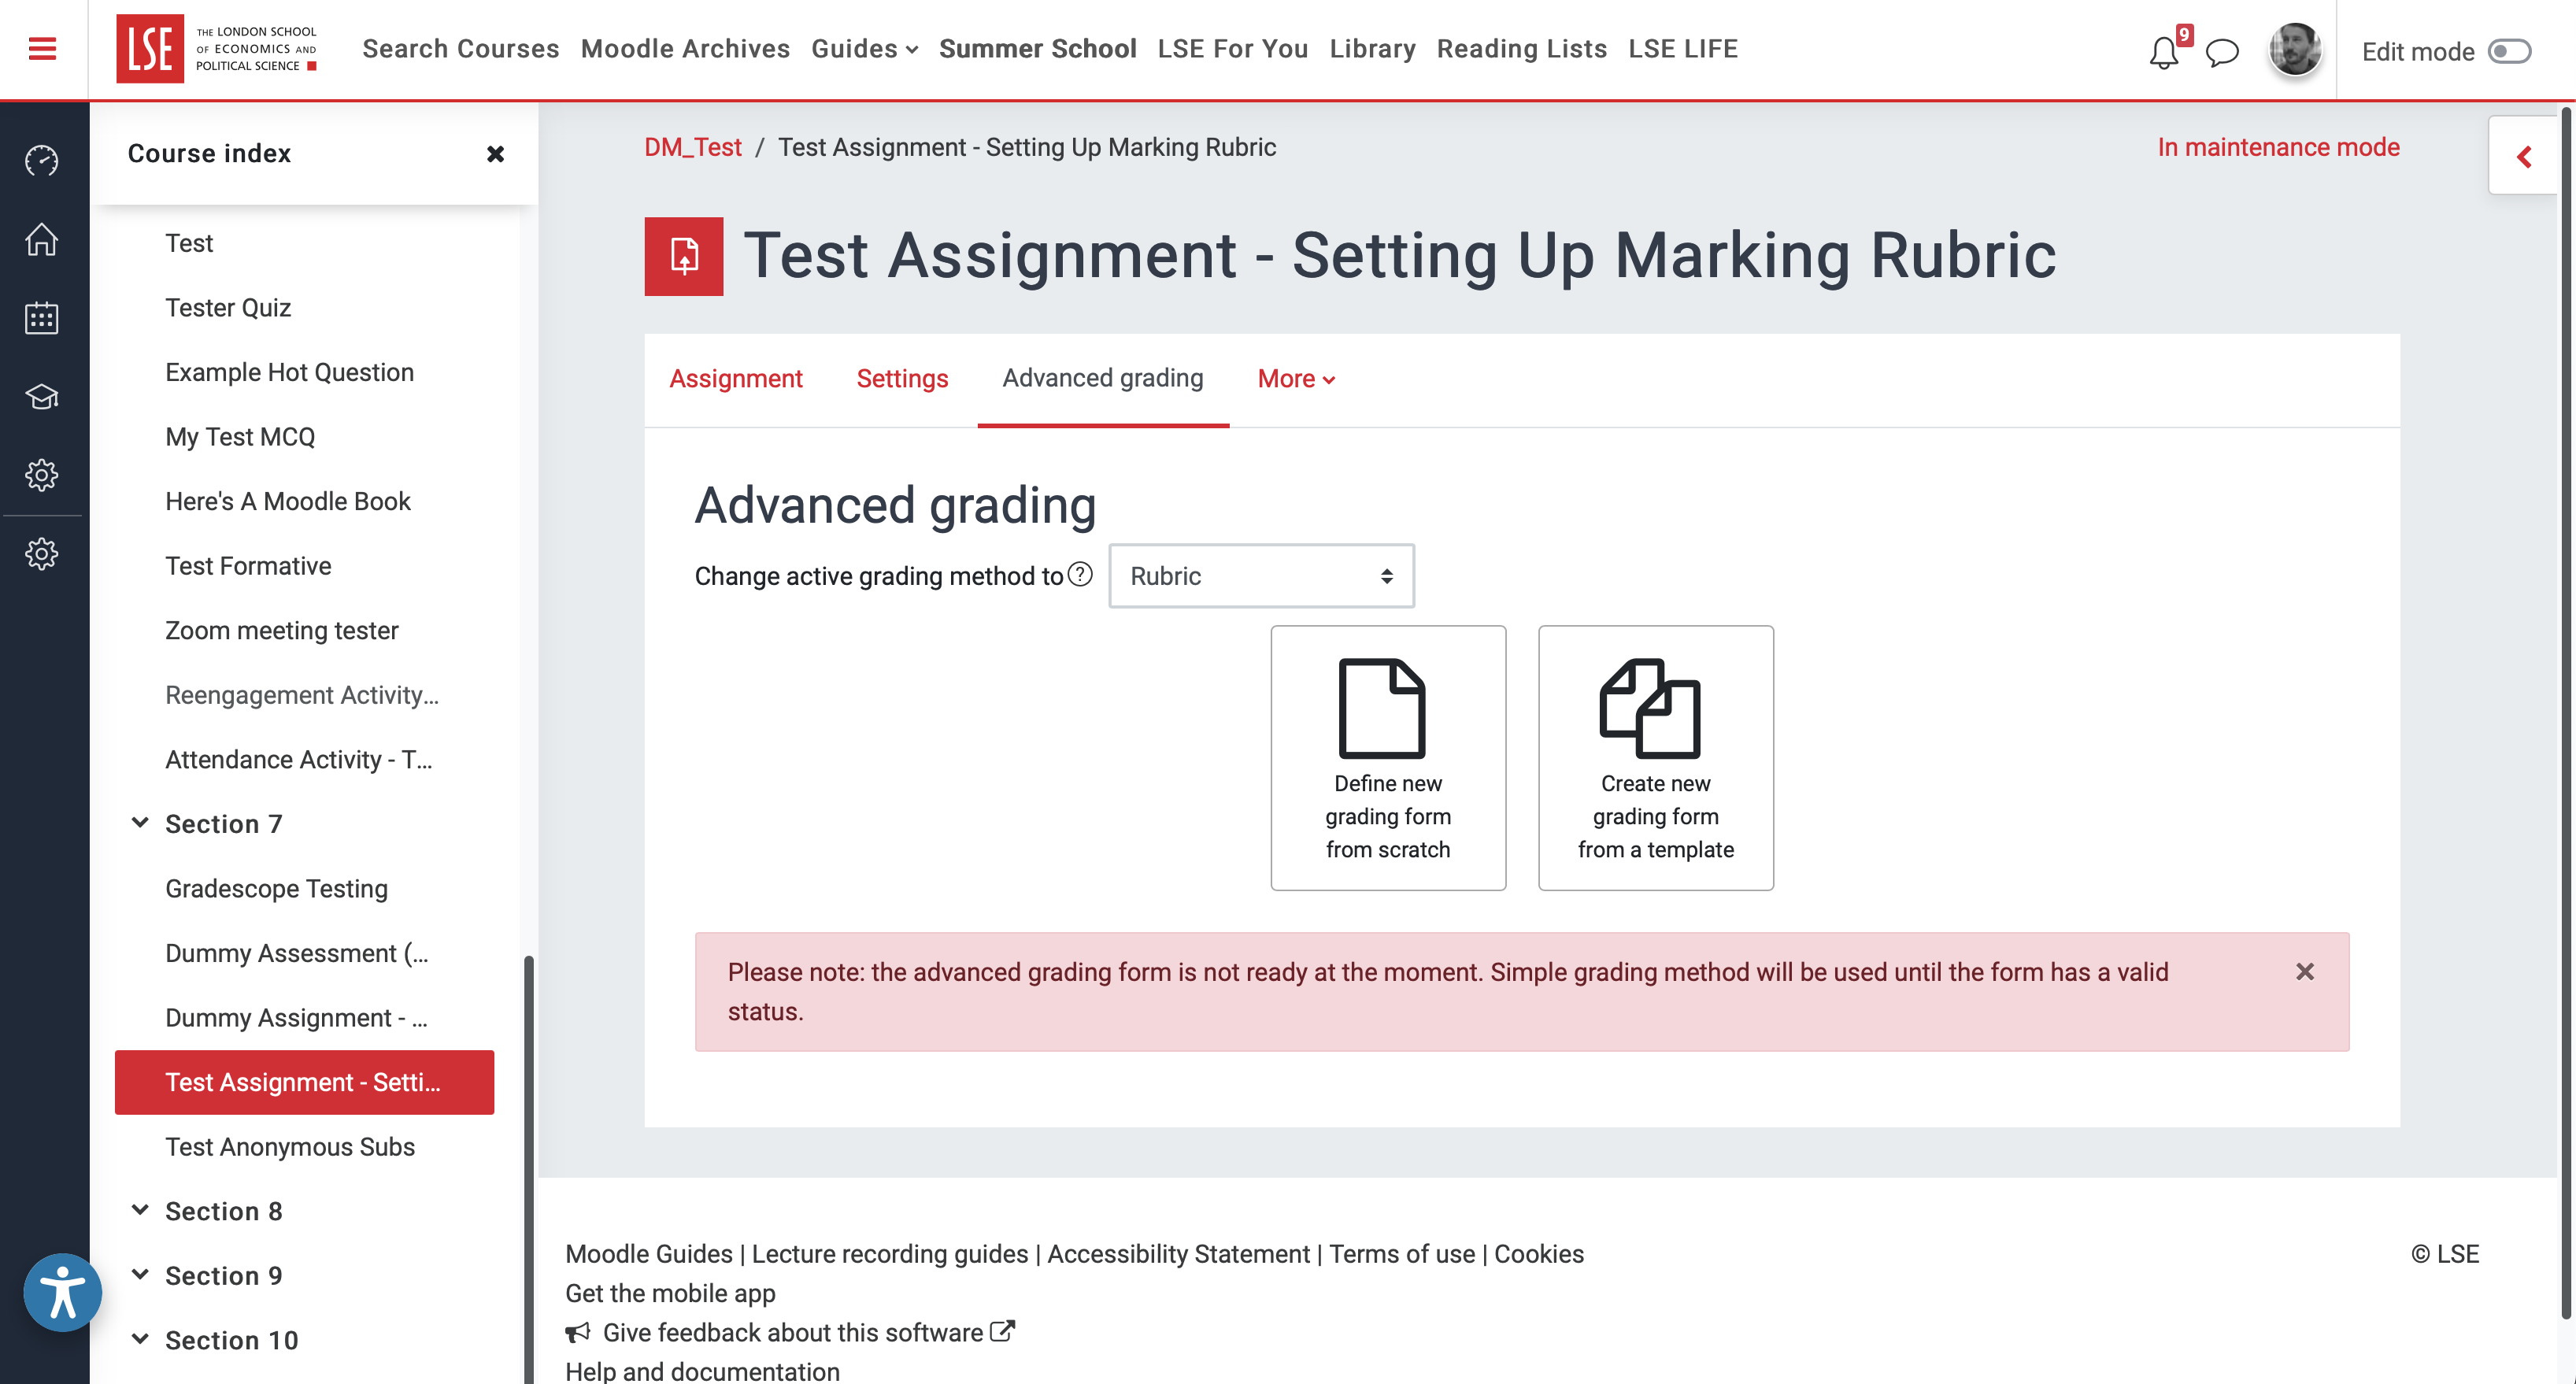
From the advanced grading settings you will be asked to select rubric from the drop down list
On the next screen you get the option to work from a template or create a new rubric. Unless you are aware of an existing template that might be suitable, select Define new grading from scratch.
 |
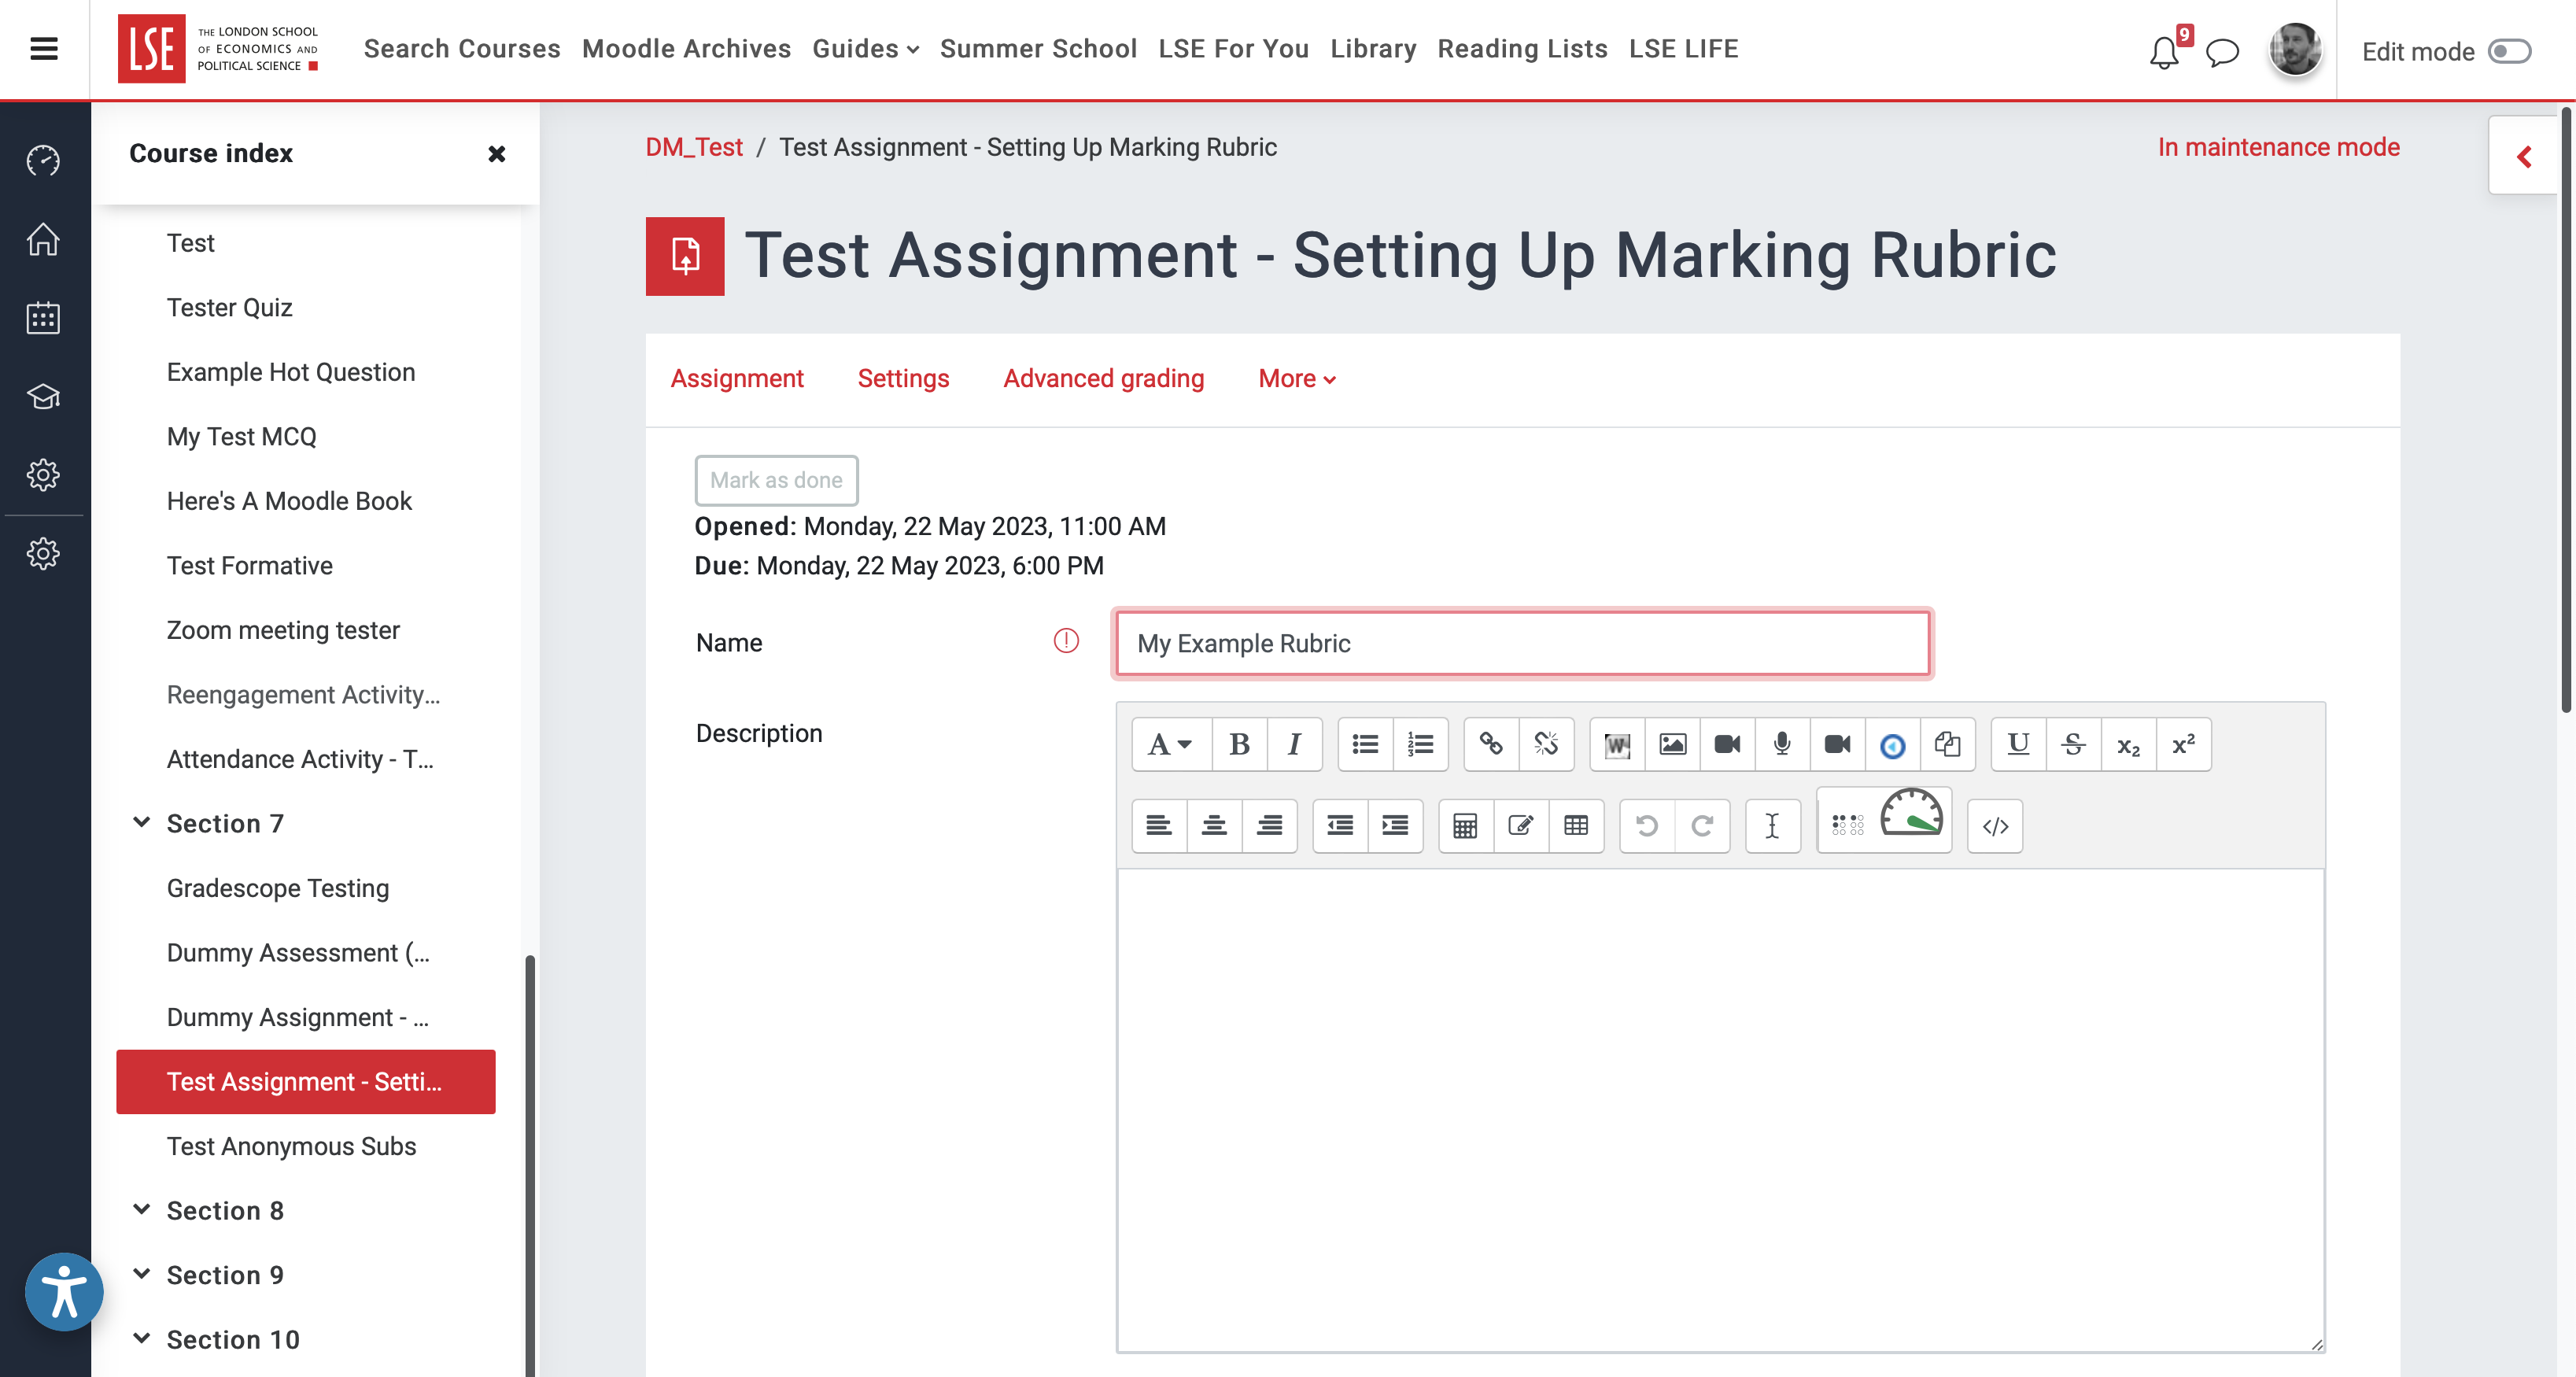
Give it a meaningful Name and add a description if required. (It is best to have your rubric available in electronic form so you can copy and paste the elements to Moodle).
 |
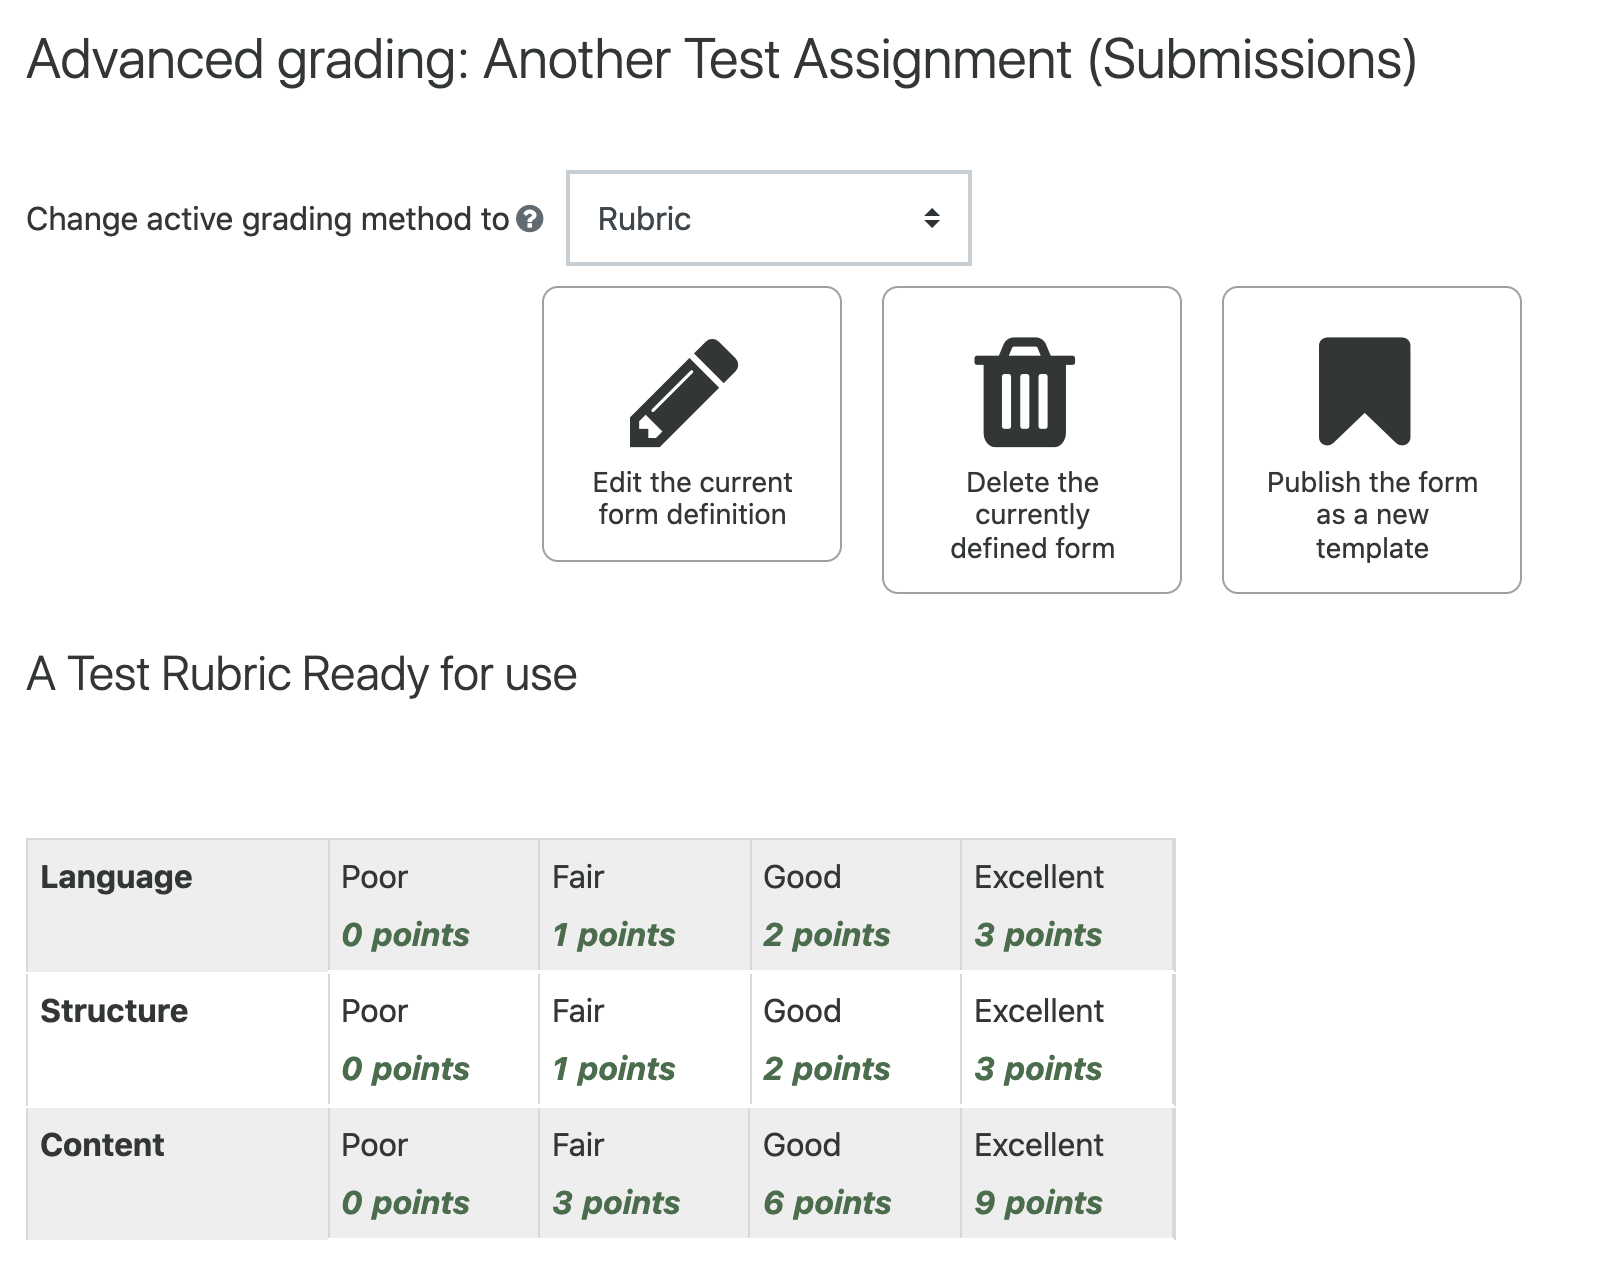
Start to add the Rubric by clicking Click to edit criterion and add your first criterion e.g. Language, Structure & Content as per the example below.
 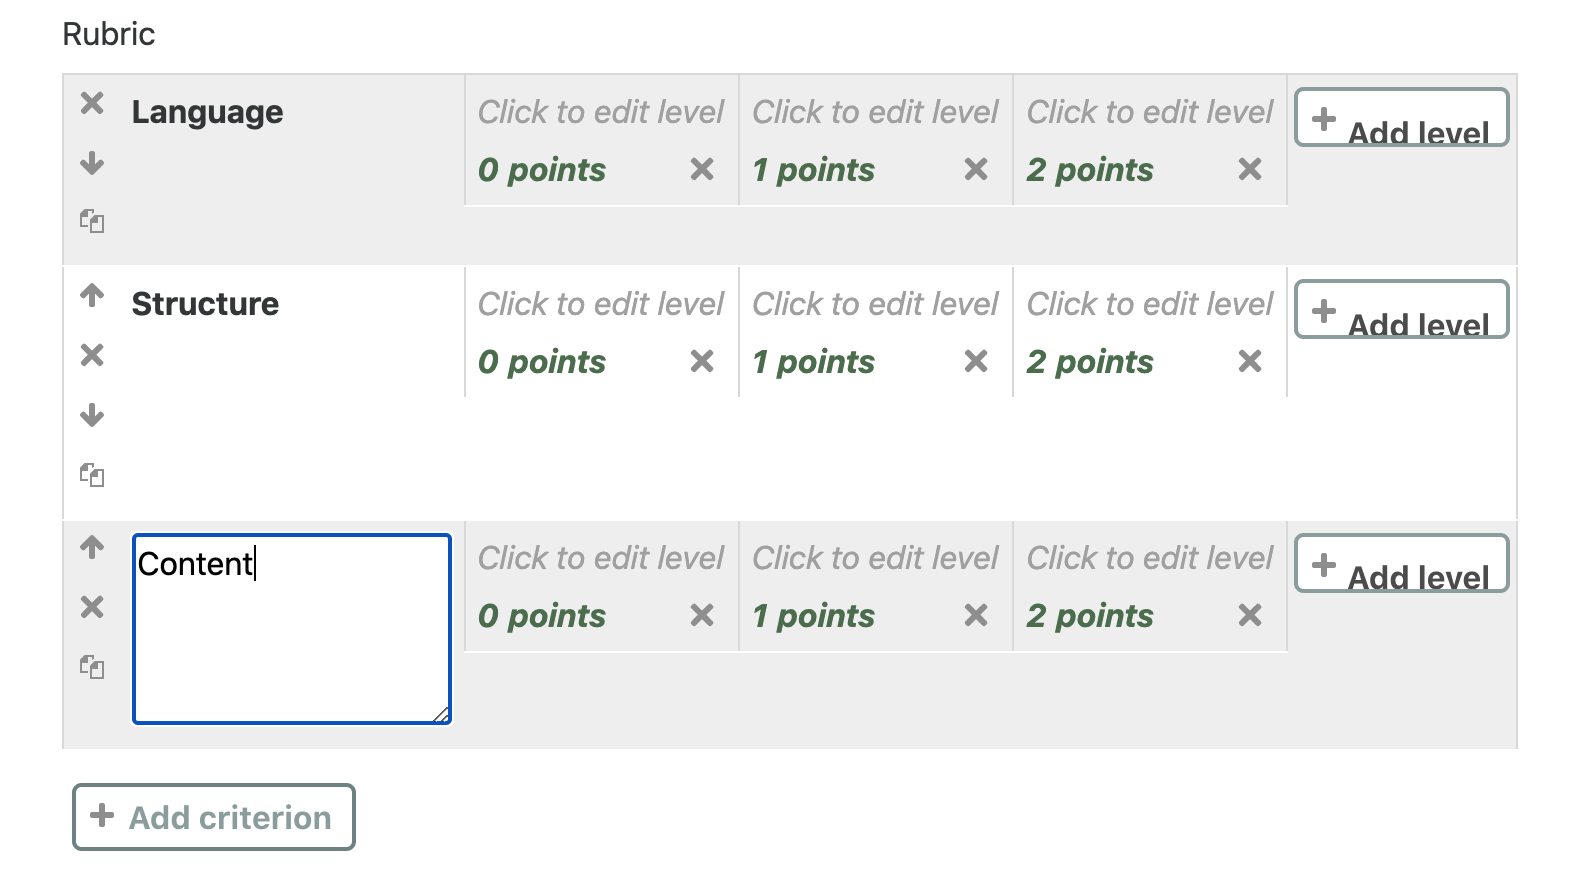 |
Add each level and the points to be attributed. You can work lowest to highest (default) or vice versa. You can have as many levels as you wish – the default is 3. Use Add level to add more. The lowest level must always be scored as 0 (zero), otherwise the grade will not be calculated correctly.
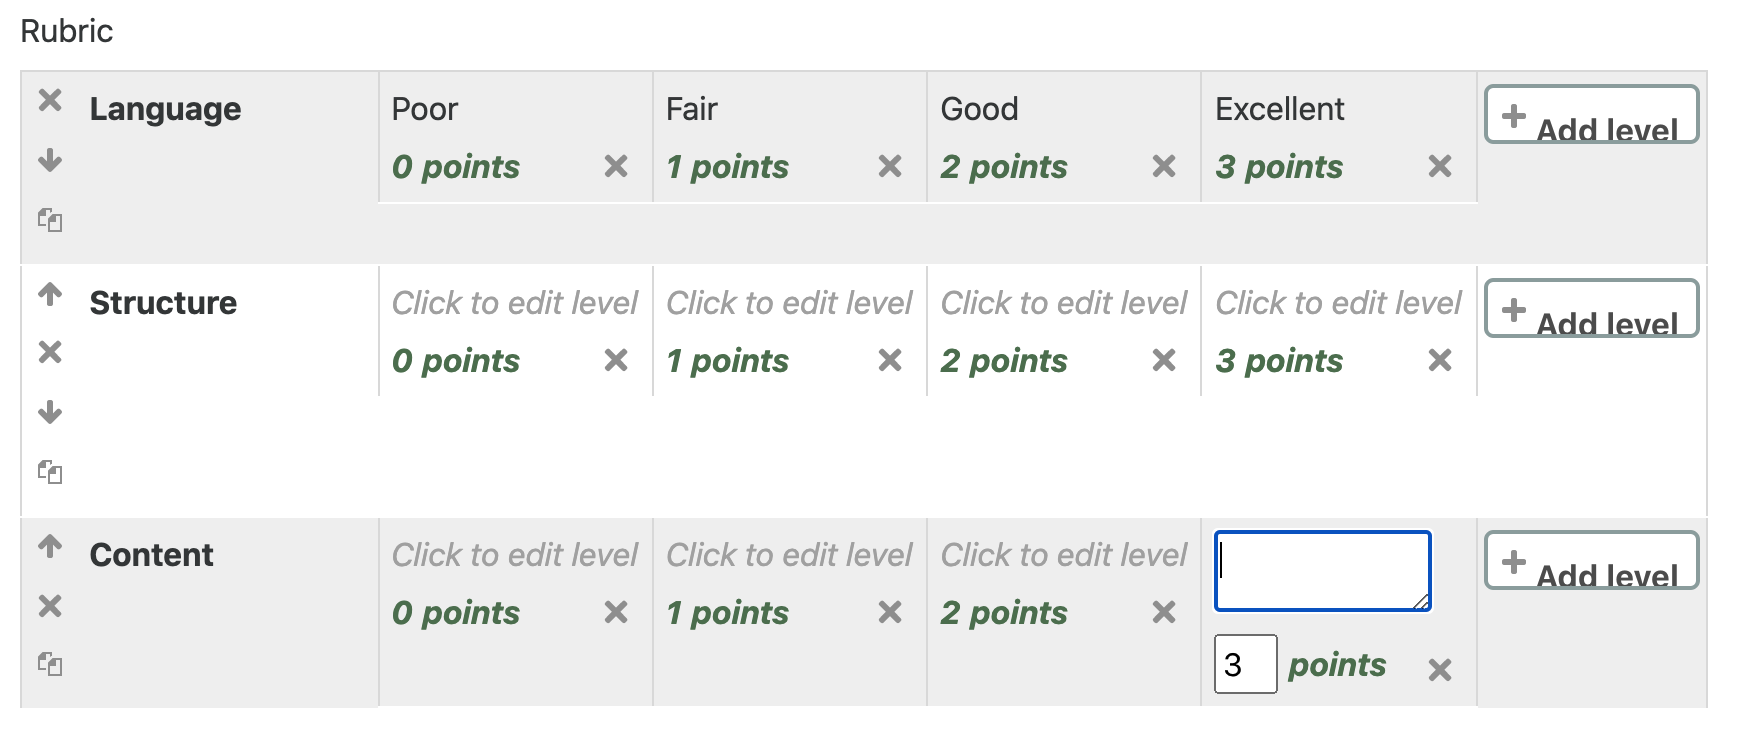 |
Continue to add criteria and associated levels with point scores. N.B. The points for each level will default to the same as the first criterion but you can adjust them by giving different weighting to different criteria e.g. the Content criterion is weighted at 3 times Structure in the example below.
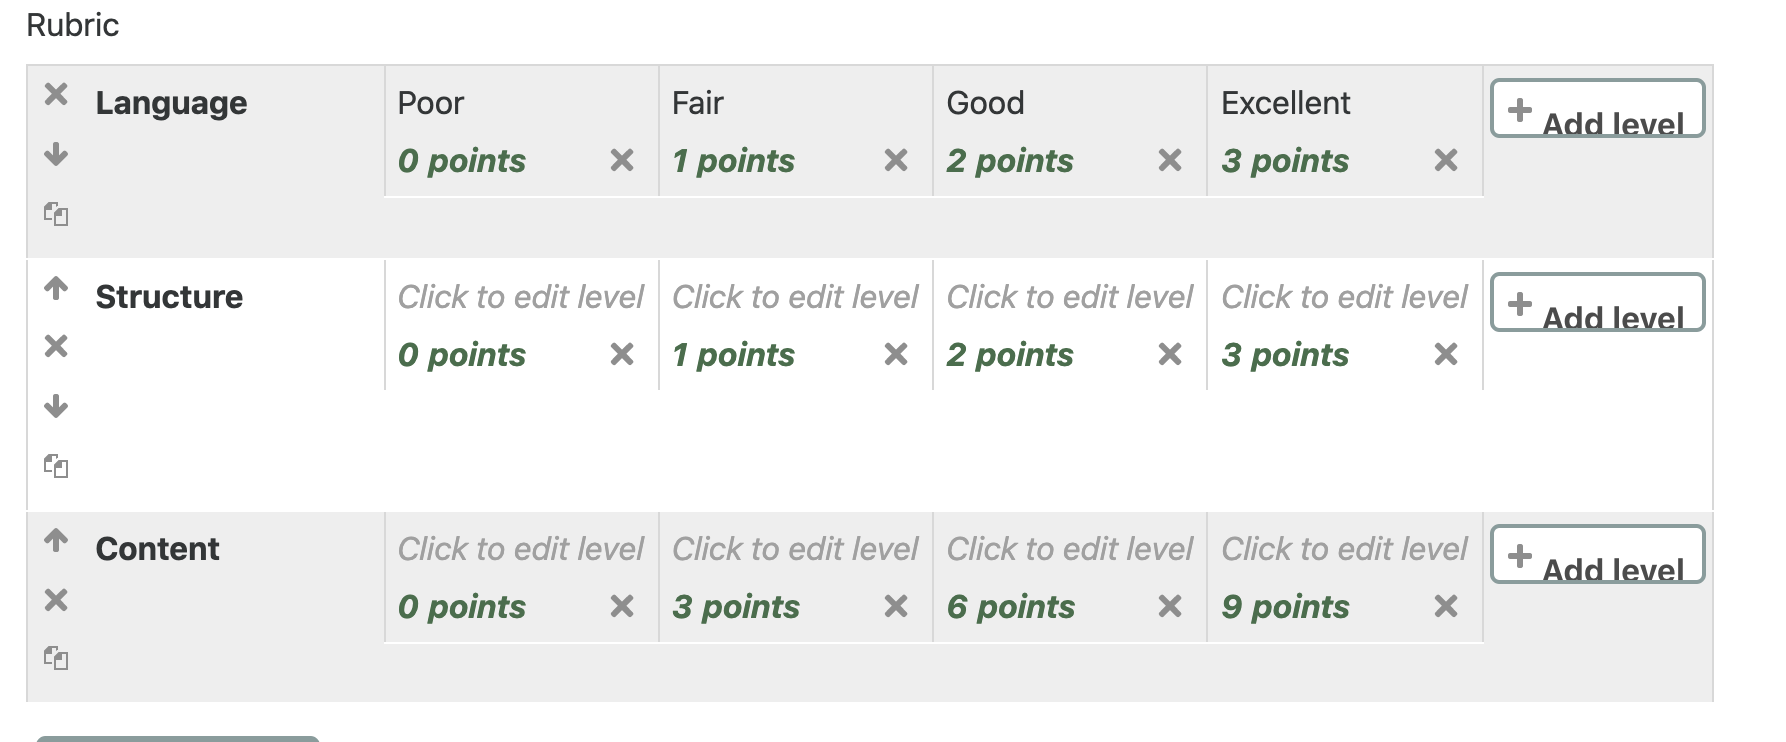 |
It may take some time to build your rubric, so use Save as draft on a regular basis to make sure you do not lose it as you proceed. Once a draft is saved, just Edit the current form definition to continue. N.B. If you leave the Advanced grading page, you will need to reselect Advanced Grading from Assignment administration.
 |
Once you have added all your criteria, make sure Sort order for levels corresponds to how you have entered your levels. The default Ascending by number of points applies to the example. (If you enter levels from high to low, select Descending by …).
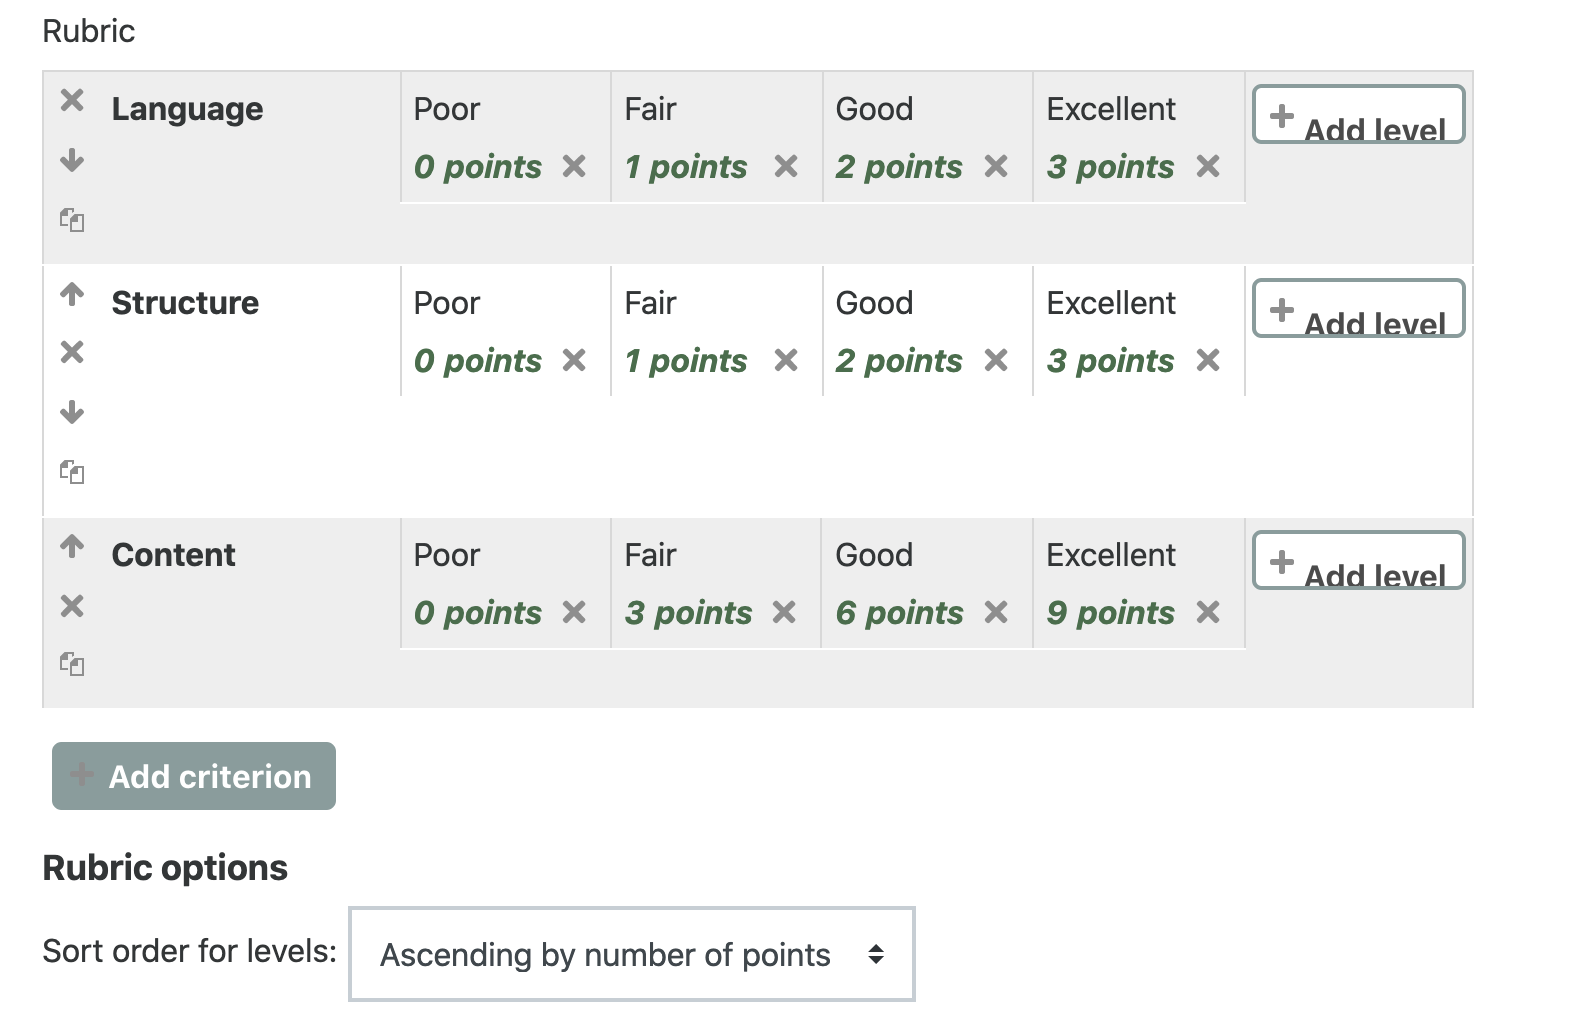 |
Leave all other options selected unless you have reason not to. See ‘Rubric options’ below for explanation.
Finally, click Save rubric and make it ready.
The rubric will then appear as below. To make any further changes, just Edit the current form definition. You also have the option to Publish the form as a new template. This means that other editors of LSE Moodle will be able to create activities using that template.
 |

N.B. Please be aware that you cannot mark offline if you are using a rubric.
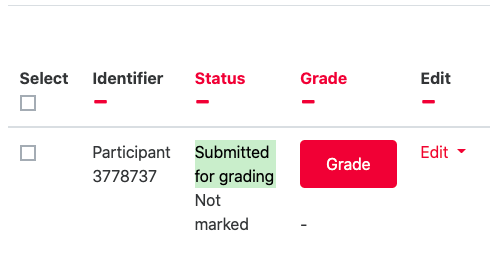
Once students have submitted, open the Assignment and select View submissions. Then click the Grade button to open a submission for grading.
 |
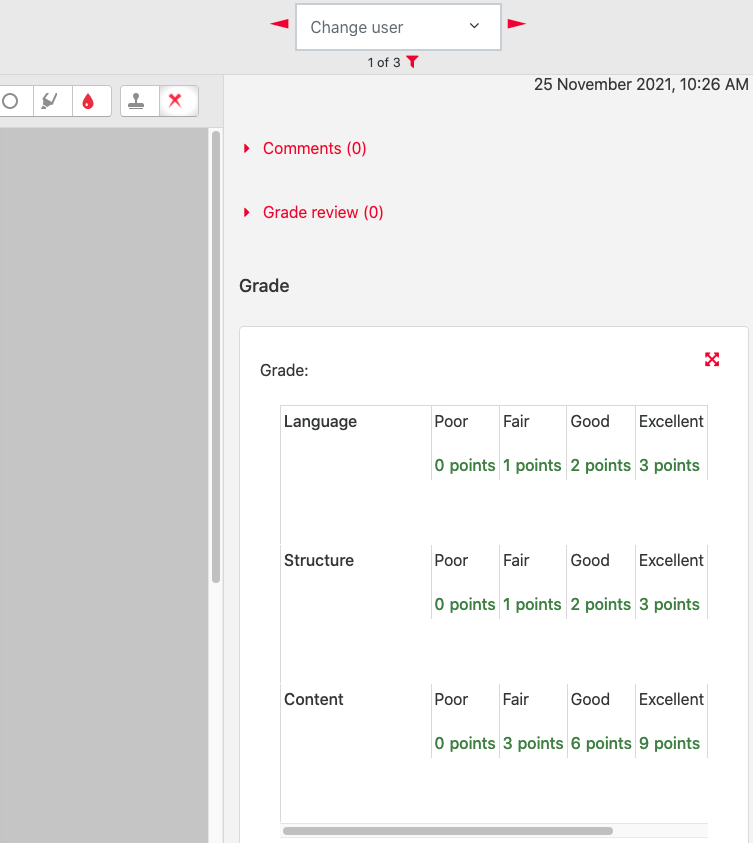
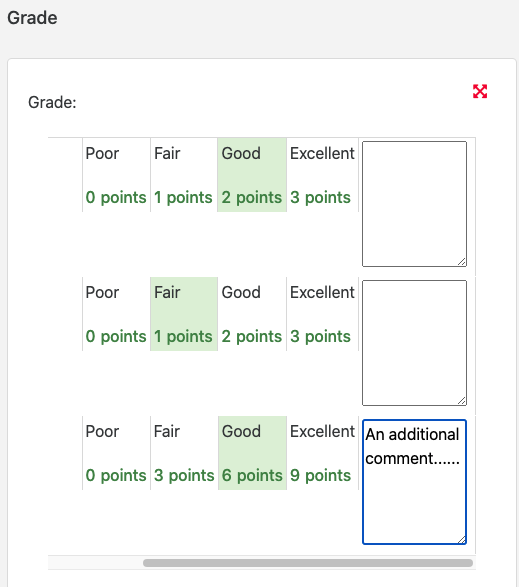
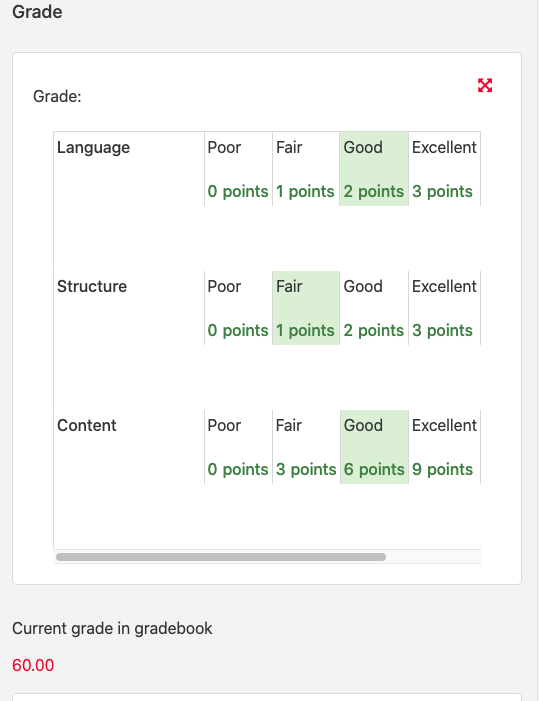
Scroll down to the Grade section where the rubric will be displayed. Work through the rubric and highlight a level for each of the criteria by clicking on the relevant box. Add a note in the final columns if you wish.
  |
Once you have finished selecting the levels, you will see that the Grade has been calculated as a percentage based on the relative point scores.
N.B. If you have ‘anonymous submissions’ enabled for your assignment, the grade will not show on this screen until you reveal student identities.
If marking workflow is enabled, it must be set to released before grades are displayed here.
 |
Add any feedback comments or files as required and Save changes or Save and show next to continue grading.
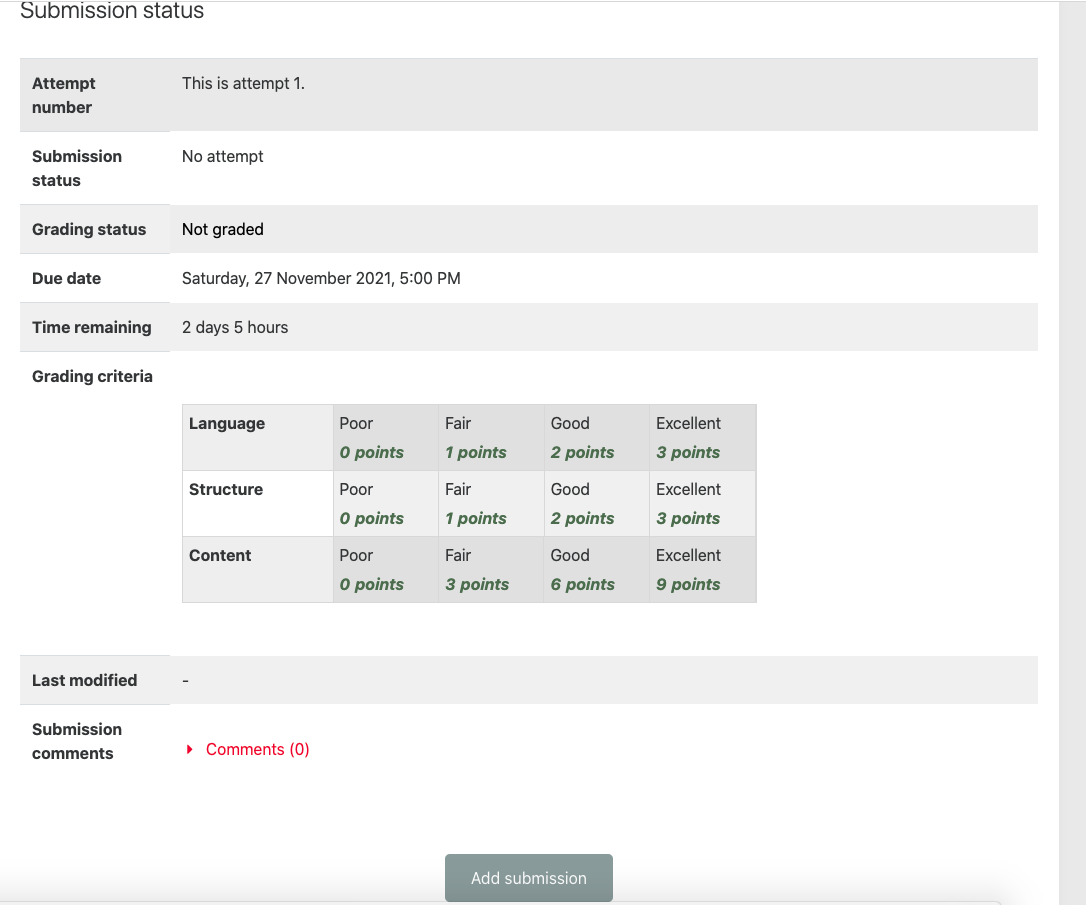
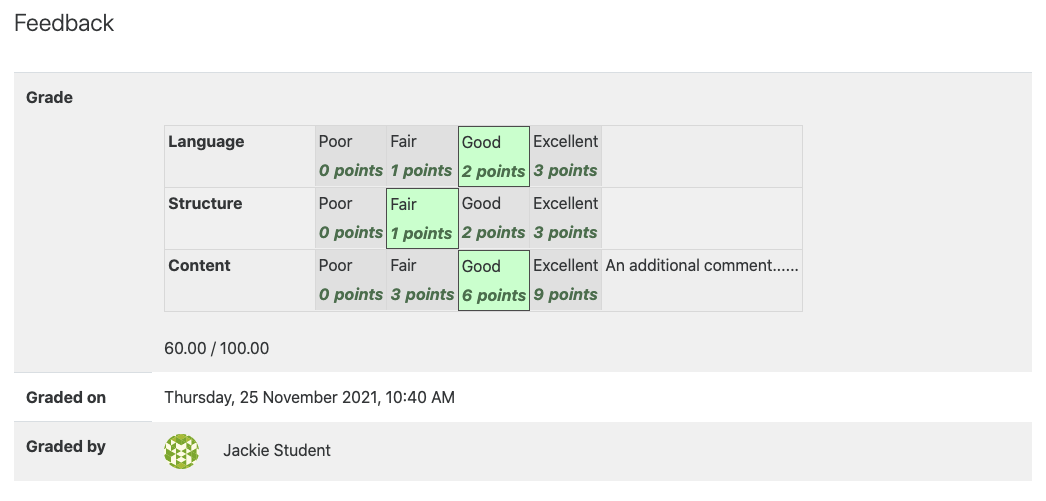
If you have chosen all relevant options, students will have the following views of the rubric:
Full description with points.
 |
Highlighted levels awarded, points and any comments.
 |