...
Annotation can only take place on PDF files. While Moodle automatically attempts to convert submitted files to PDFs, there are occasions when this isn’t successful. Therefore, it is recommended that students submit PDF files. When setting up the assignment, in the Submission types setting, it is possible to restrict the file types that students can submit. Under accepted file types,select pdf file. See our guide on adding an individual assignment for more information.
| Expand | ||
|---|---|---|
| ||
 |
Step 2: Students submit
Step 3: View the submissions table
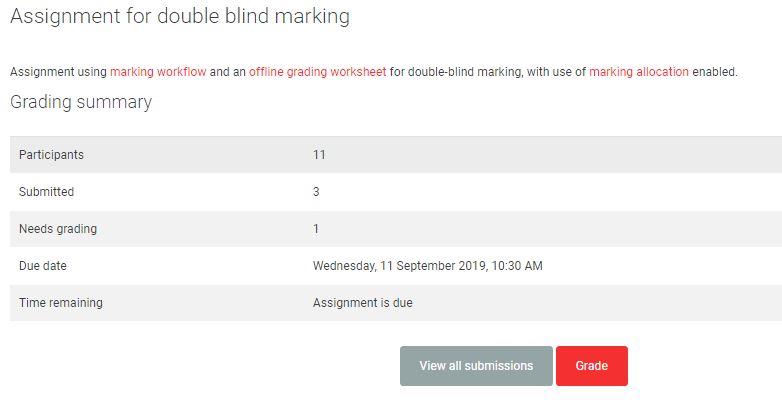
Once the deadline for students to submit has passed, click on the assignment. This will bring up the Grading summary which will show the number of participants and submissions. Click on View all submissions to view the submissions table.
| Expand | ||
|---|---|---|
| ||
 |
The marking/submissions table lists all students and their submissions. If ‘anonymous submissions’ is enabled submissions are identified by a number unique to this assignment. N.B. Those with a Manager role can view student identities even when ‘anonymous submissions’ is enabled.
The table has a variety of filters and columns - see more details on the submissions table guide.
...
Clicking on Grade will bring up a marking screen with grading options on the right hand side. If the student submitted a PDF file, the individual piece of work will appear in a window on the left hand side. If the student submitted a Word document and the conversion to PDF was unsuccessful, this window will be blank. The window will also be blank if the student did not submit anything.
| Expand | ||
|---|---|---|
| ||
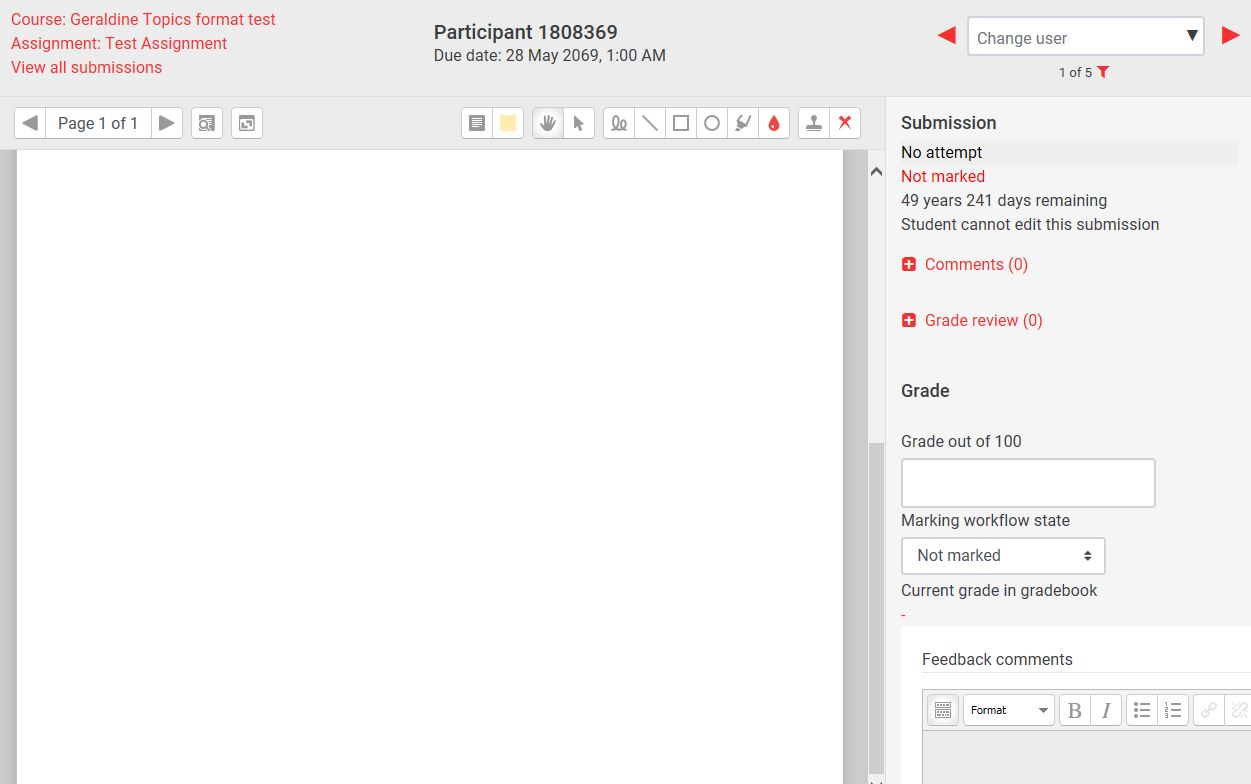 |
Grade
Depending on your assignment settings you can enter a grade out of 100 or a scale.
...
Going from left to right the tools are listed below.
| Expand | ||
|---|---|---|
| ||
 |
Text comment
...
Select the text comment icon and then click on the doc where you would like to add a text box. Click and drag the mouse to expand out the box and then you can type comments directly into the box using your keyboard. Clicking on the right hand corner will bring up the option to either delete comment or Add to quicklist. Add to quicklist allows you to save a text comment to use again.
Once you have finished click outside the text box and it will reduce down to a speech bubble which can be expanded.
...
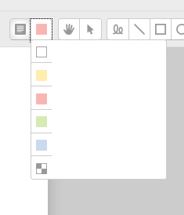
Select this icon to choose the colour that you would like the text comment box to be. The drop down list includes; pink, yellow, green, blue, clear and white.
| Expand | ||
|---|---|---|
| ||
 |
Hand tool
...
This simply allows you to move the PDF around in the window.
...
Click on the icon to choose the colour for annotations. The drop down list includes; white, yellow, red, green, blue and black.
| Expand | ||
|---|---|---|
| ||
 |
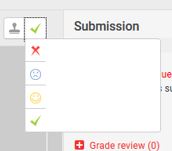
Stamp
...
Click on the icon to select one of the designs from the drop down list. The four options are: tick, cross, sad face and happy face. Use the mouse to click where on the document you would like to add the stamp.
| Expand | ||
|---|---|---|
| ||
 |
Step 5: Save the marks and feedback
...