...
Log into Moodle and access your recording.
After accessing your Moodle course, click on the lecture recording activity.
Note: If you have not yet added the Moodle activity please follow our guide on how to Add a Moodle link to lecture recordings (Echo 360 recordings) to do this.
After linking the Moodle course to the lecture recordings you should see a list of lecture recordings associated with that course.
Note: If you are logging in directly to the Echo360 website, as opposed to starting in Moodle, you should be able to choose your course from the courses drop-down, providing you are a listed ‘Instructor’ for the course. Either way will take you to the same screen as in the image below. Please contact Eden.lecturerecording@lse.ac.uk if you need to be added to a course as an Instructor or if you have problems logging into your Echo360 account.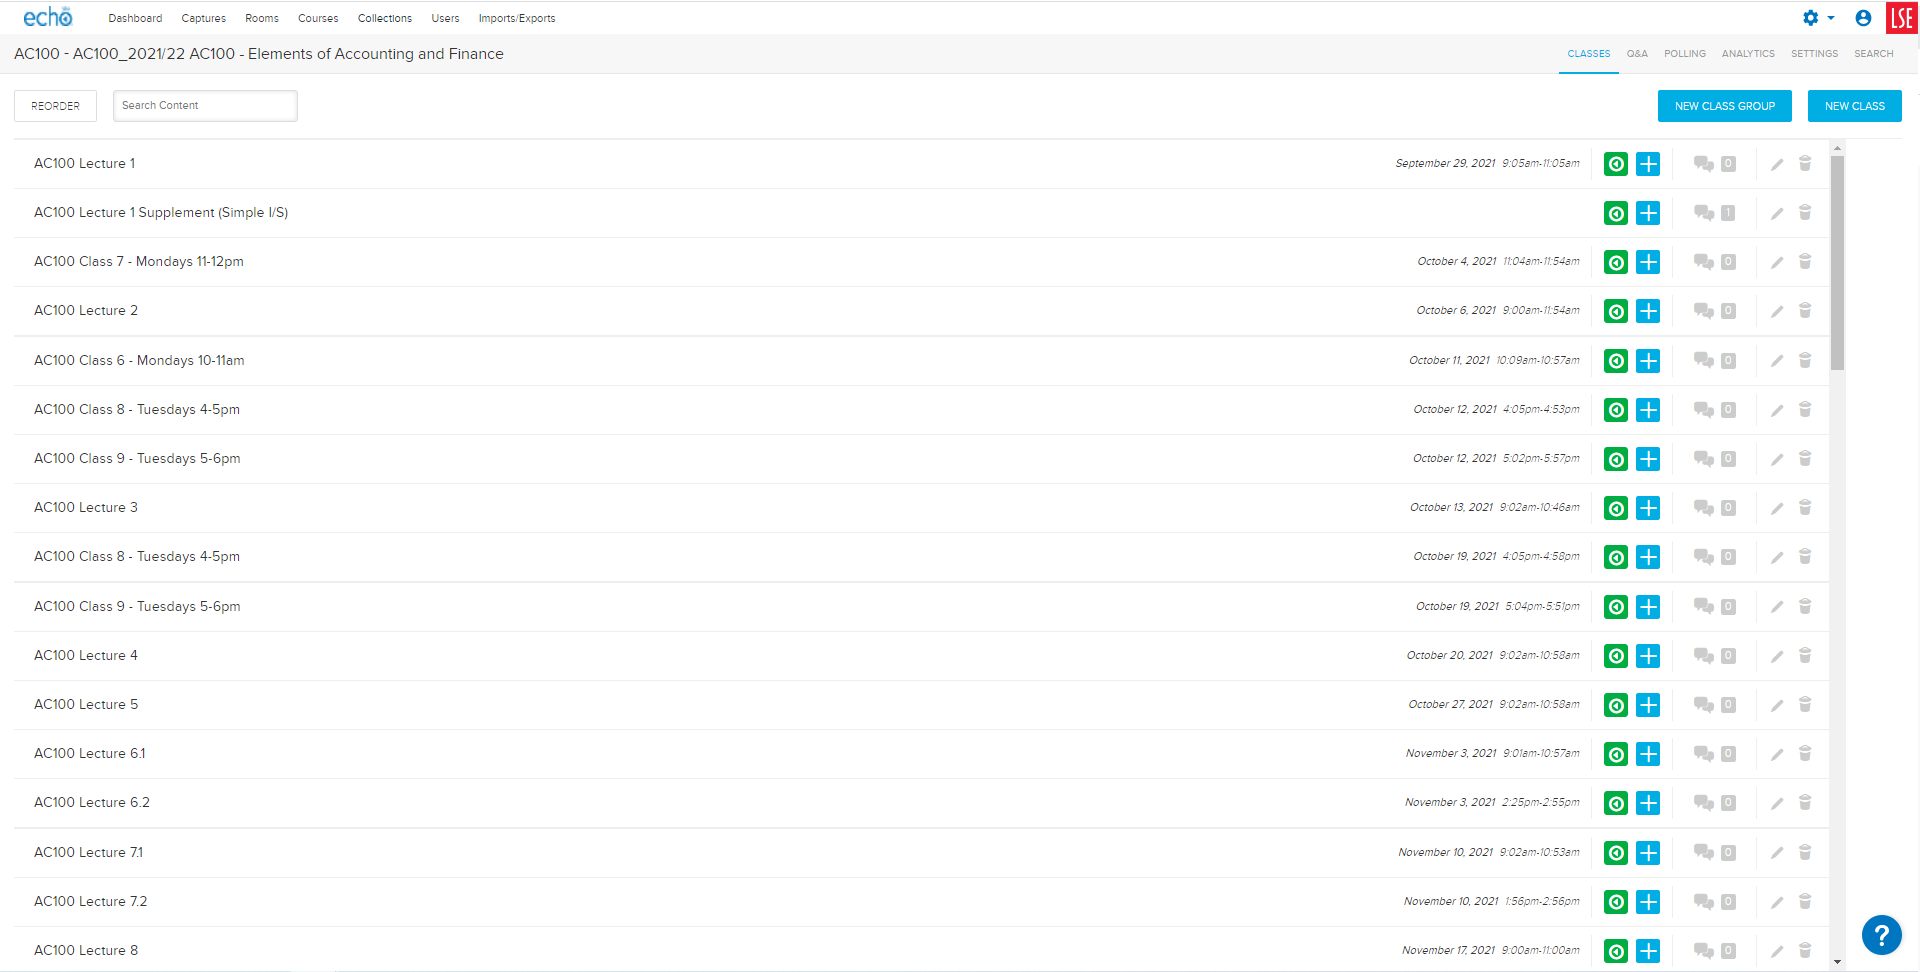
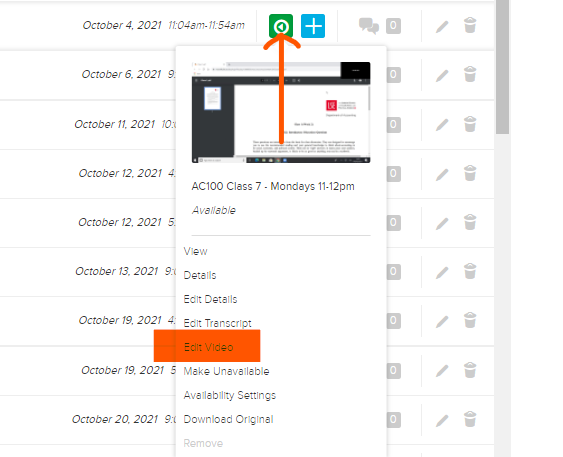
From the list click on the green icon to the right of the video you wish to edit and choose Edit Video from the menu that appears (See below)
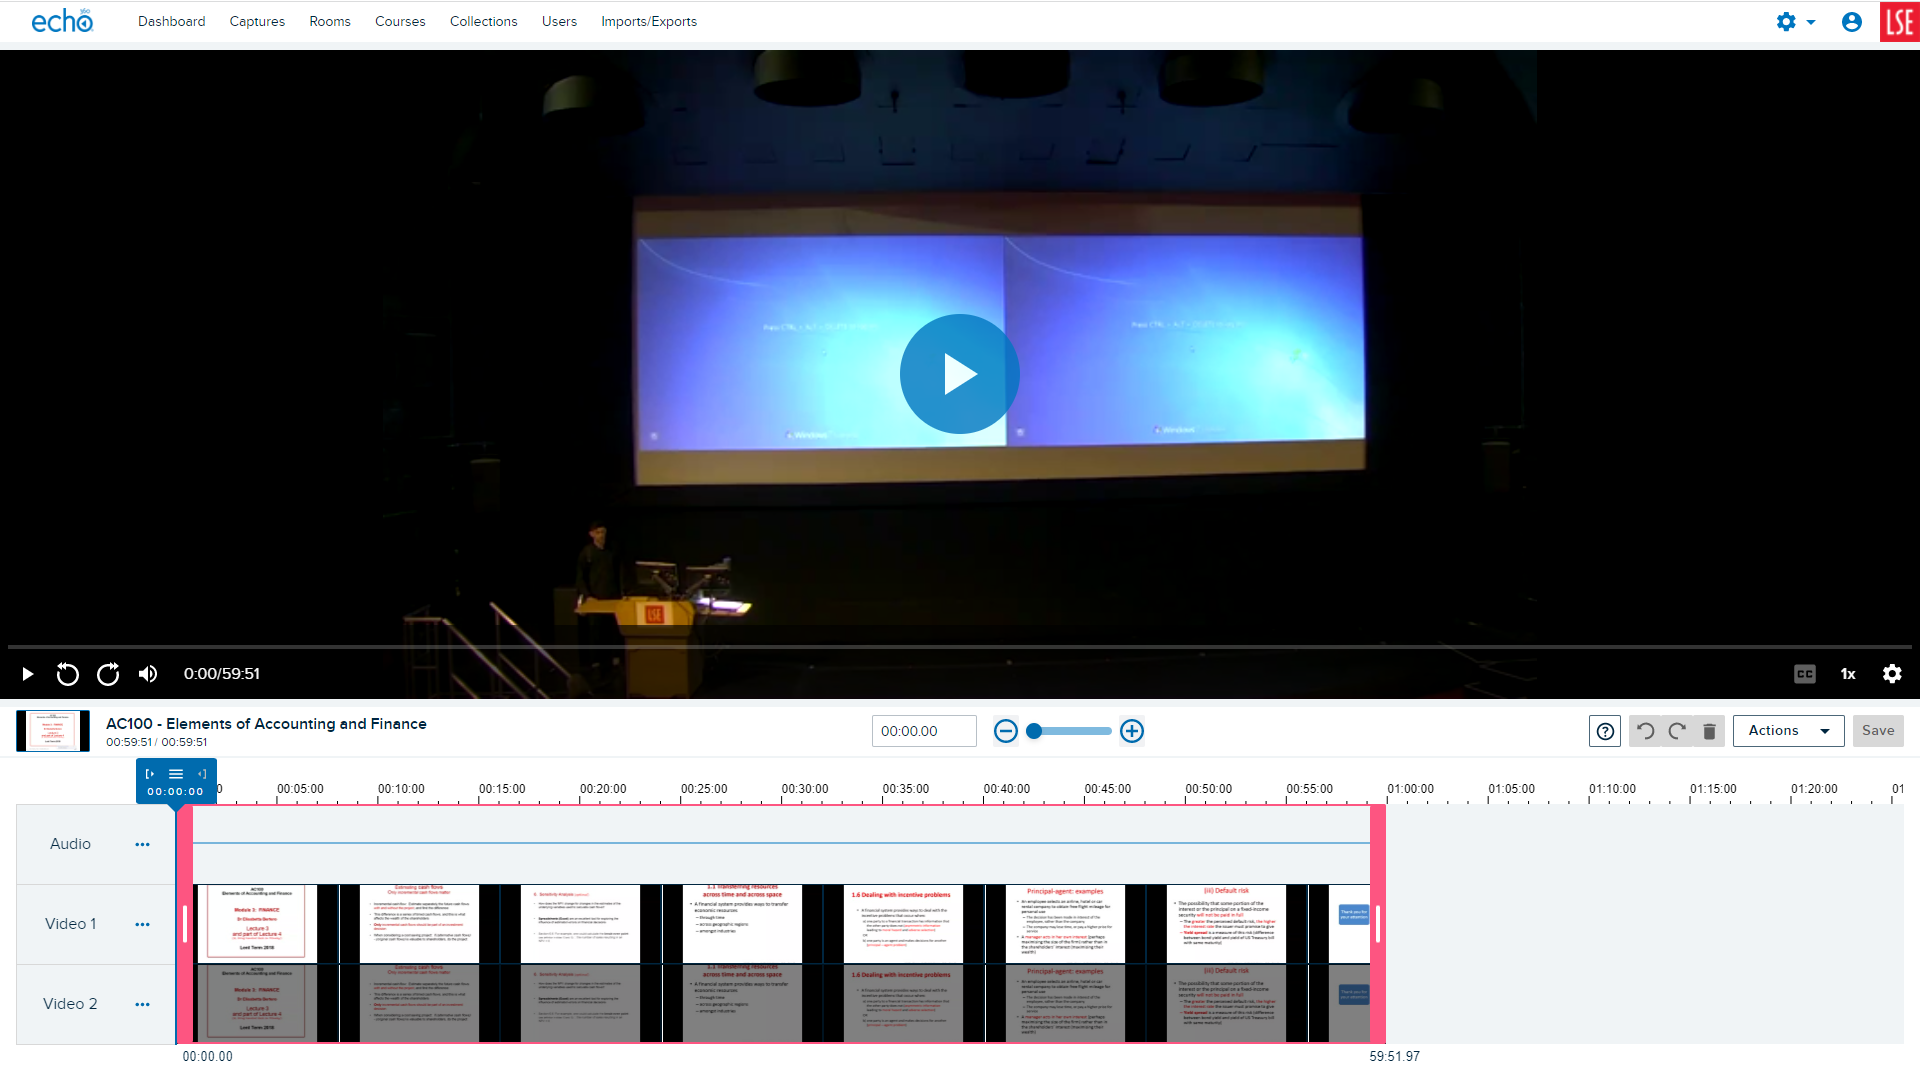
You will then be presented with the editing screen, like so:
Move the cursor to the position in the recording that you want to remove from the recording, and then click on three horizontal lines before selecting Split Clip (See below).
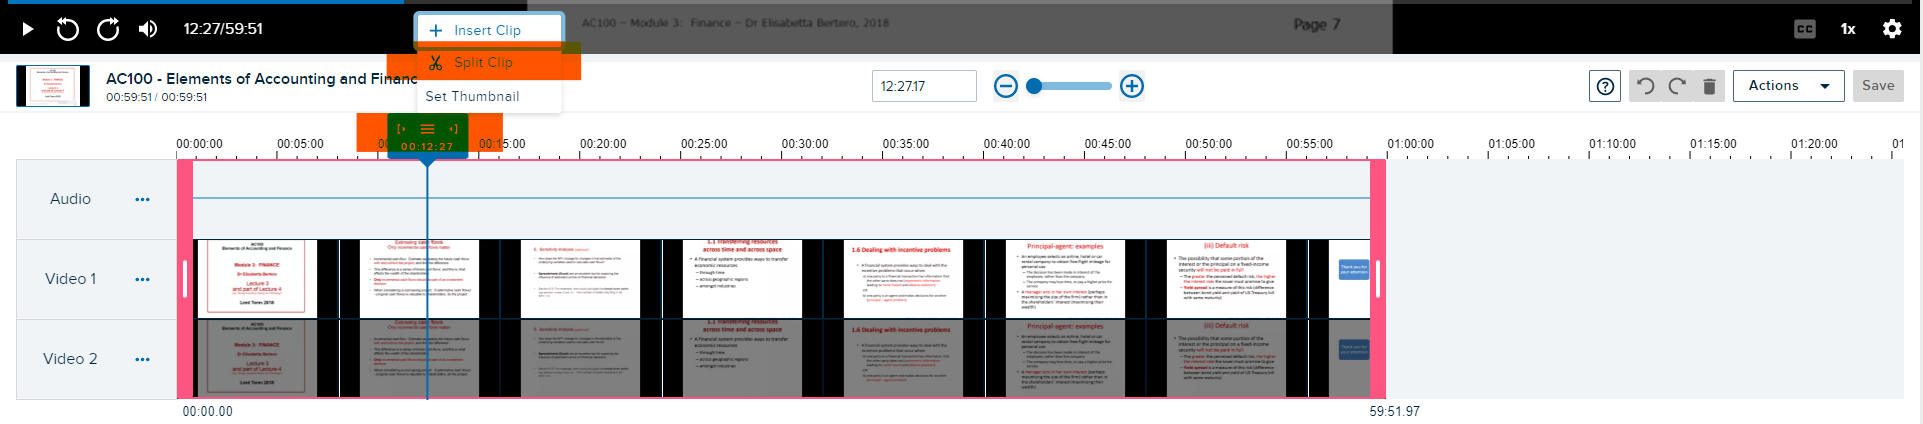
Move the cursor to the end of the section of the portion you want to remove from the recording, and then click on Split Clip again.
Click on the section of the timeline in between where you have made the splits, then click on The Bin icon to remove the section (See below).

Repeat this step as many times as is necessary.
Click on Save, which is at the top, to the right of the Bin icon.
Note: Your edited recording will display as the original version until it has finished processing - at which point you and the students will then see the edited version. You can restore your classroom capture to how it was before any edits were made, by going to the ‘Actions’ tab and choosing ‘Restore to Original’ (See below)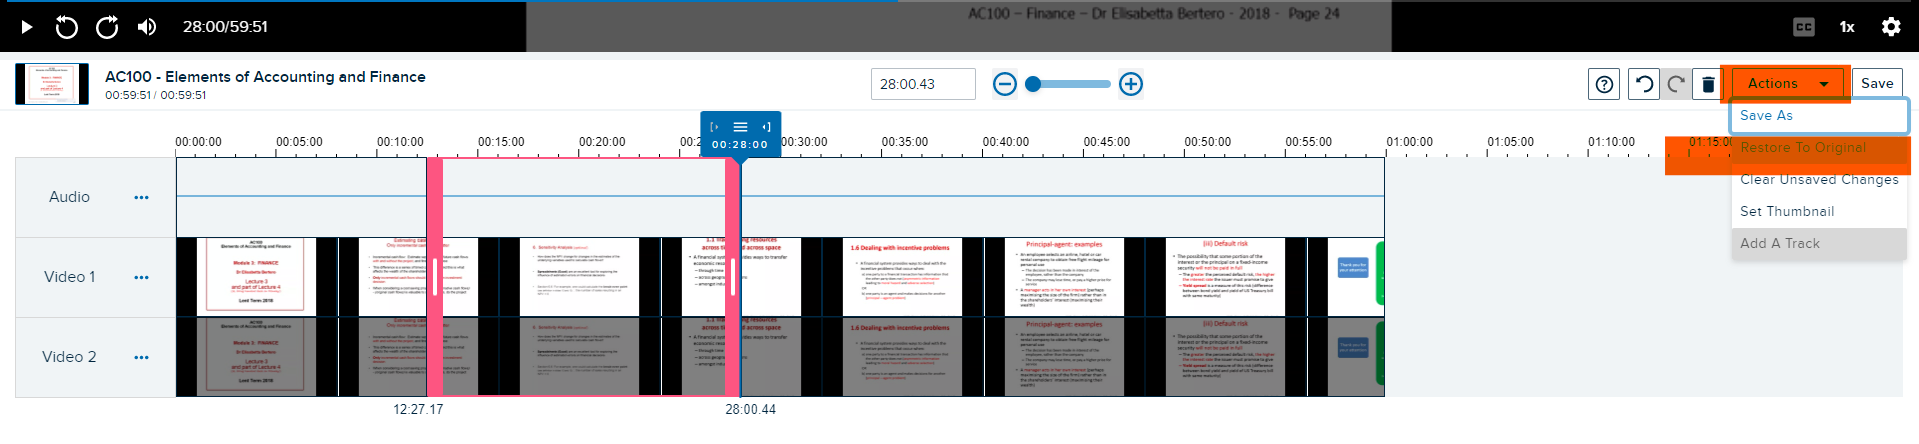
...