| Table of Contents | ||||
|---|---|---|---|---|
|
Why use it?
A Moodle book is useful for displaying lengthy information. It is a multi-page resource organised into chapters and sub-chapters, which can contain text as well as embedded images and videos.
We highly recommend putting all administrative information into a book, which can be easily accessed by students without cluttering up your Moodle space.
A book within a Moodle space is much more accessible for students (compared to a series of PDFs or links), and easier for editors to update.
A short video demonstrating the use of a Moodle book.
The following screenshots show examples of books used on LSE courses. Students can page through information or use the table of contents seen below in the left-hand panel. (Expand to view)
| Expand | ||
|---|---|---|
| ||
Example 1: revamp suggestion for GV101 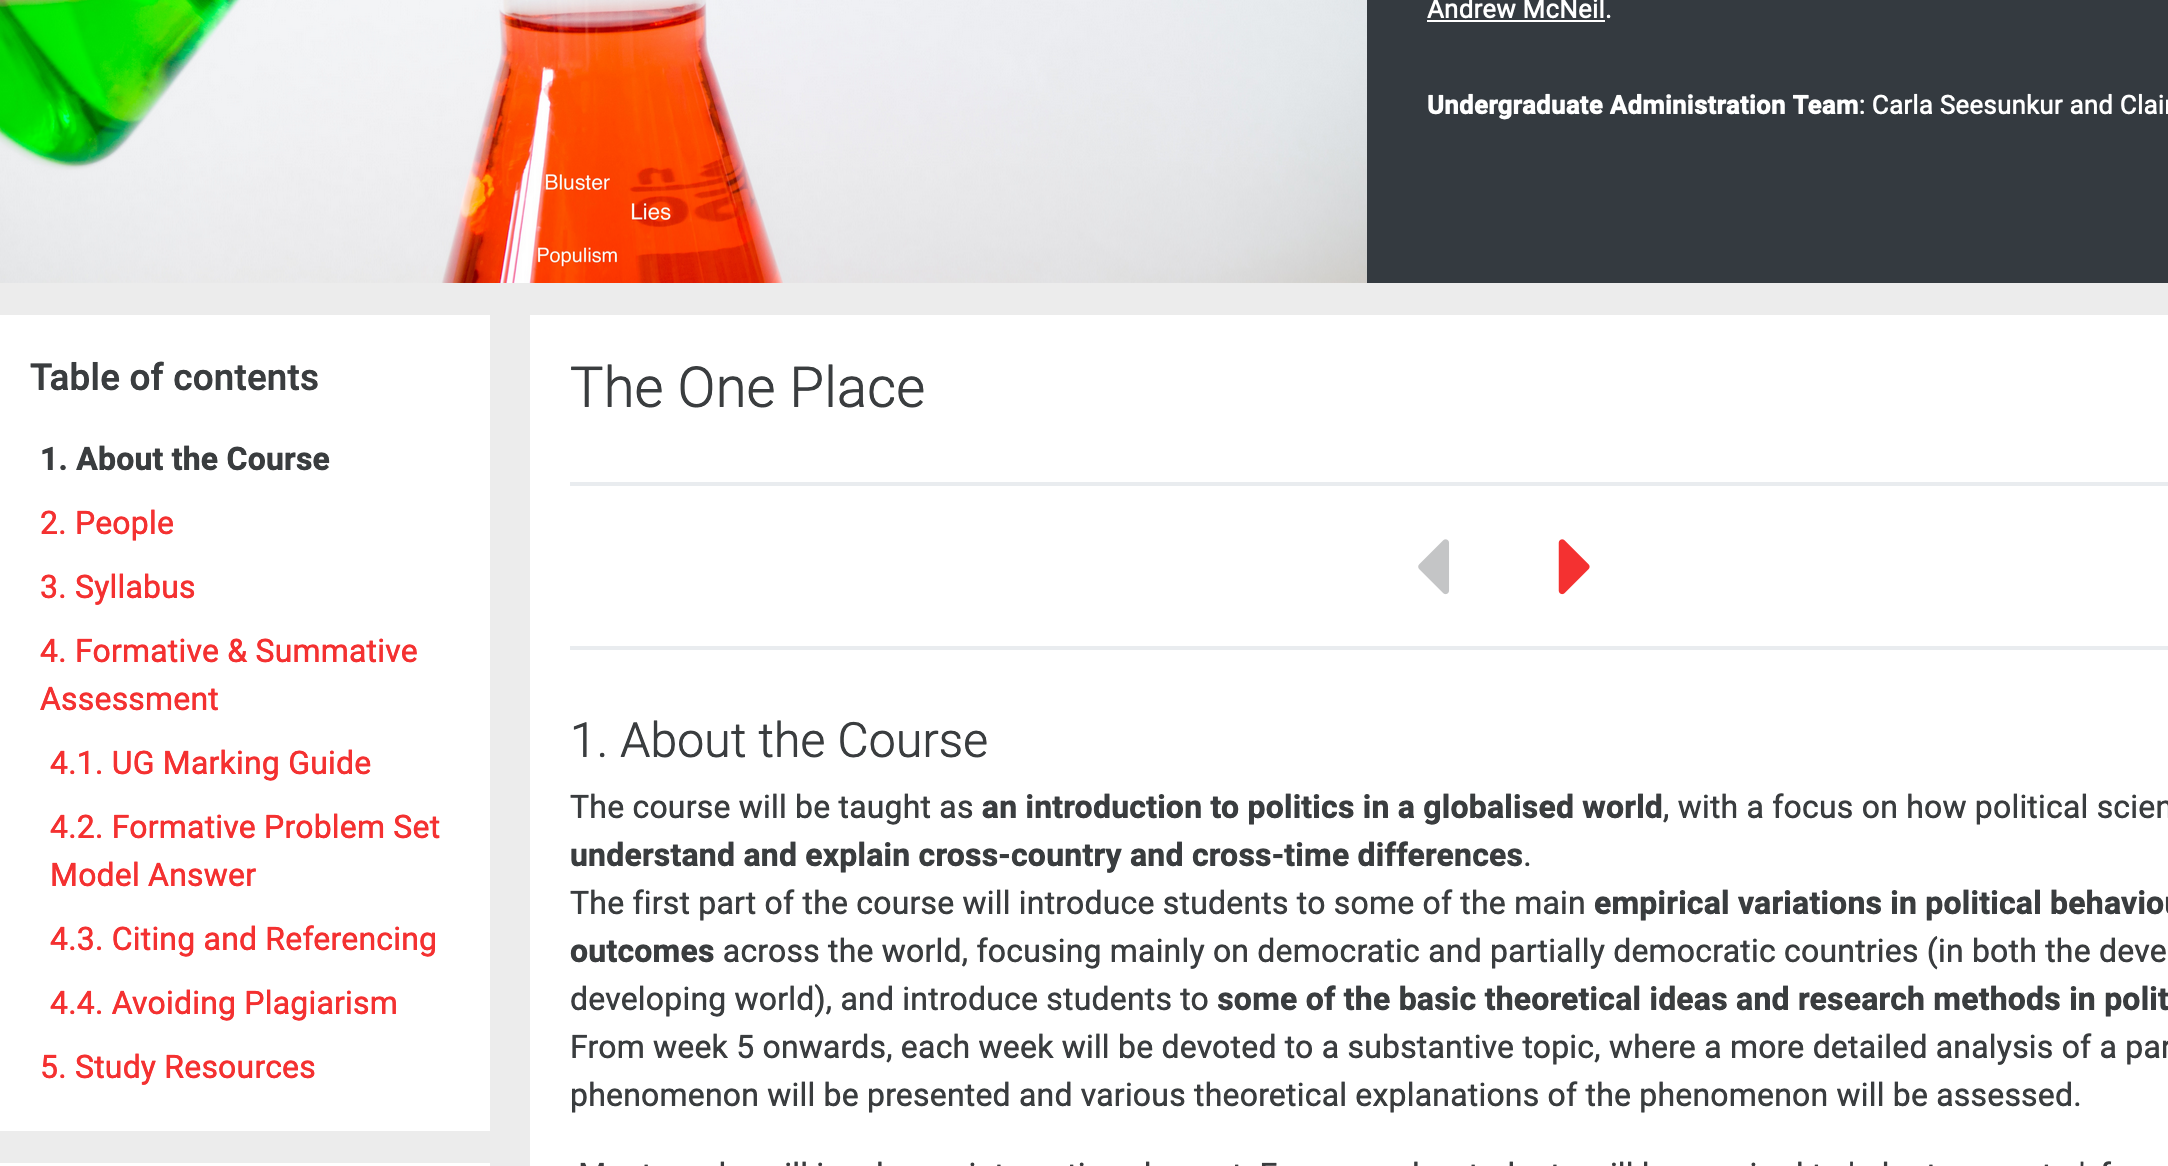 Example 2: SP410 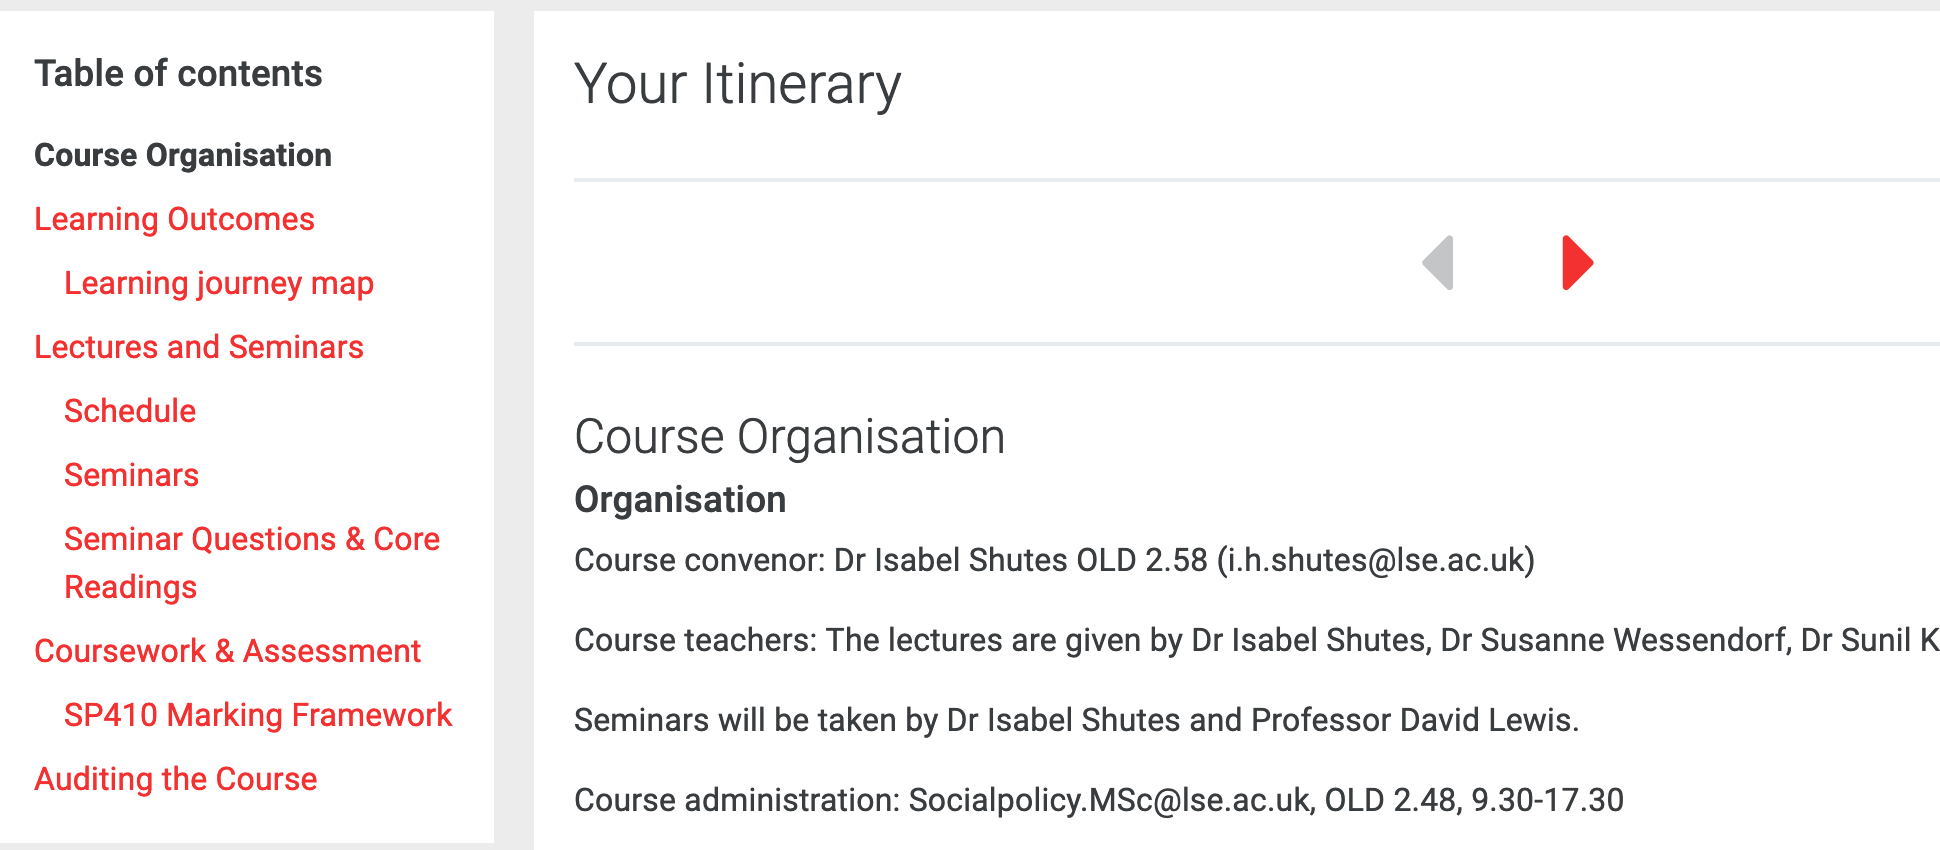 |
Step 1: Add a book
Go to the course page and Turn editing on. Scroll to the section where you want your book to be displayed, click Add an activity or resource and pick Book.
| Expand | ||
|---|---|---|
| ||
 |
Step 2: Settings
| Info |
|---|
Tip: Click on the question mark icon |
General
Give the book a meaningful Name and, optionally, a Description.
Appearance
Choose how you want the chapters and sub-chapters of the book to be displayed in the Table of Contents.
Chapter Formatting
None – Titles only, useful if you want to define your own numbering.
Numbers (default) – formatted as 1, 1.1, 1.2, 2, 2.1, 2.2, etc.
Bullets – Titles and sub-chapters appear with bullets and indented.
Indented – Sub-chapters appear indented.
Custom titles
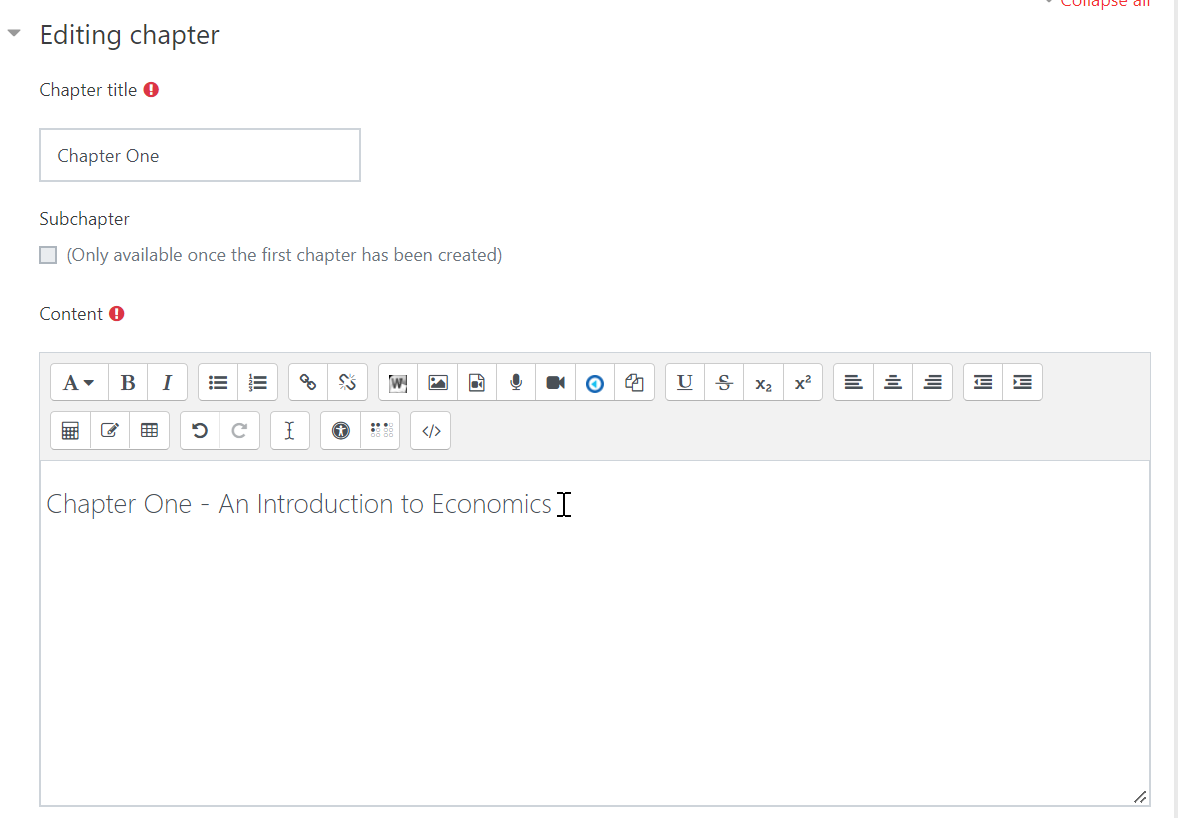
Tick the box if you do not want to use the same title in the table of contents and on the main chapter page. For example, you might use ‘Lecture One’ in the contents list, but give the page itself a longer title, such as ‘Chapter One: Introduction to Economics’.
| Expand | ||
|---|---|---|
| ||
 |
Click Save and display.
Step 3: Add chapters
Add the first chapter
Enter a Chapter Title and populate the Content area.
Note: Use the Moodle Text Editor tools to style your text. Should you wish to copy text that has already been written somewhere else, make sure that you use plain text. Copied formatted text types will often cause layout issues.
Click Save changes.
Add more chapters
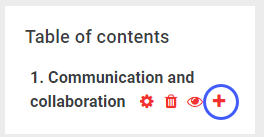
From the Table of contents add further chapters or sub-chapters by clicking on the plus sign icon+. Repeat as above.
| Expand | ||
|---|---|---|
| ||
 |
Step 4: Manage your chapters
Edit a chapter
From the Table of contents edit a chapter or a sub-chapters by clicking on the cog icon![]() next to it.
next to it.
Delete a chapter
From the Table of contents delete a chapter or a sub-chapter by clicking on the bin icon ![]() next to it.
next to it.
Hide a chapter
From the Table of contents hide a chapter or a sub-chapter by clicking on the eye icon ![]() next to it.
next to it.
Reorder chapters
From the Table of contents reorder chapters or a sub-chapter using the up/down arrows ![]() .
.
Export and Import chapters
From the Administration block it is also possible to export whole books or single chapters as Word documents. This option is only available to editors and managers. It is not visible to students.
| Expand | ||
|---|---|---|
| ||
 |
The ‘Import from Microsoft Word’ option allows editors to upload a document as a book chapter. However, it is only possible to add one chapter at a time, and the uploaded file must be in '.docx' format.
If you wish to download a whole book for easy reuse in other modules, you should use the IMS content package option instead. See the section below on [#Reusing book content] for details.
Step 5: Using the book
Navigation
Navigation is possible via:
the table of contents on the left (jump to specific content)
the arrows located on the top and the bottom of each page (work through content in order)
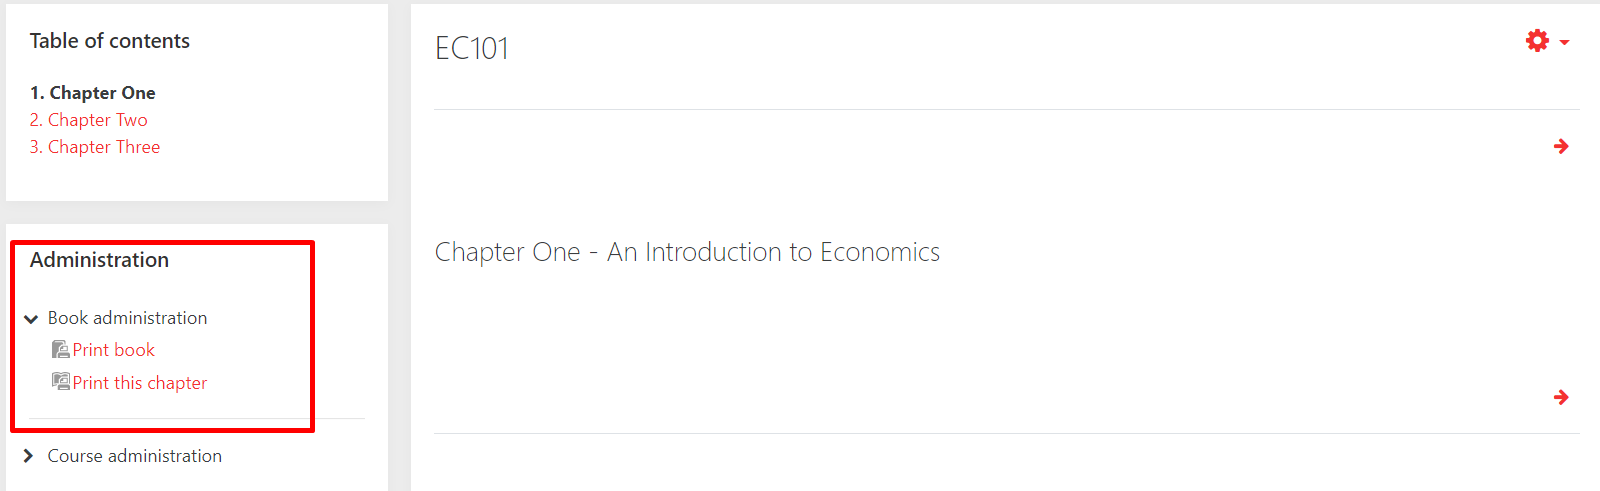
Printing
The whole book or selected chapters can be printed by anyone who can read the book. The print option is found in the Administration block on the left-hand side of the course page when a book is open.
| Expand | ||
|---|---|---|
| ||
 |
Step 6: Reusing book content
Exporting a book from one course and importing it into another
Export from one module
To export an entire book from one course, open the book. Then expand the Book administration section of the Administration panel on the left of the page.
| Expand | ||
|---|---|---|
| ||
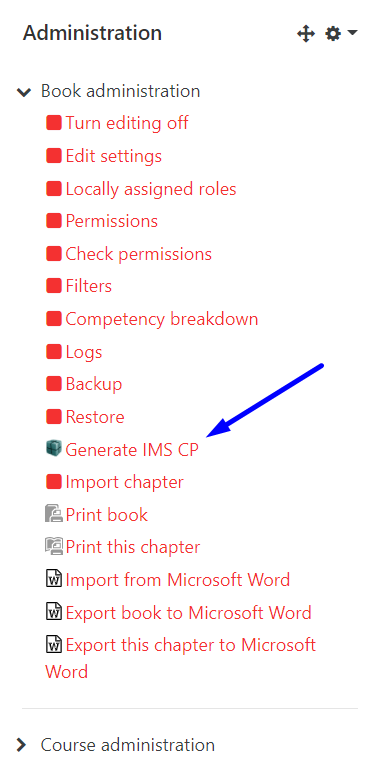 |
Click ‘Generate IMS CP’. Moodle will create a .zip file, which will be automatically downloaded to your device.
Import to another module
Navigate to the module to which you wish to add the book and create a new book into which to import your content (see Step 1 above).
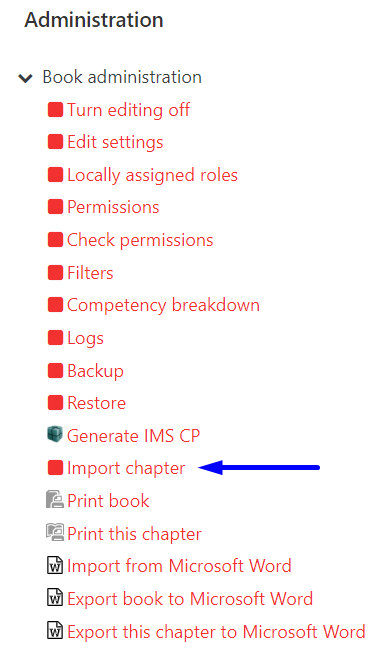
Inside the new book click Book administration > Import chapter
| Expand | ||
|---|---|---|
| ||
 |
Upload the .zip file of your book.
Make sure that the ‘Type’ drop down is set to ‘Each HTML file represents one chapter’.
| Expand | ||
|---|---|---|
| ||
 |
Click ‘Import’.