...
Go to the course page and Turn editing on. Scroll to the section where you want your Scheduler to be displayed, click Add an activity or resource and pick Scheduler.
| Expand | ||
|---|---|---|
| ||
 |
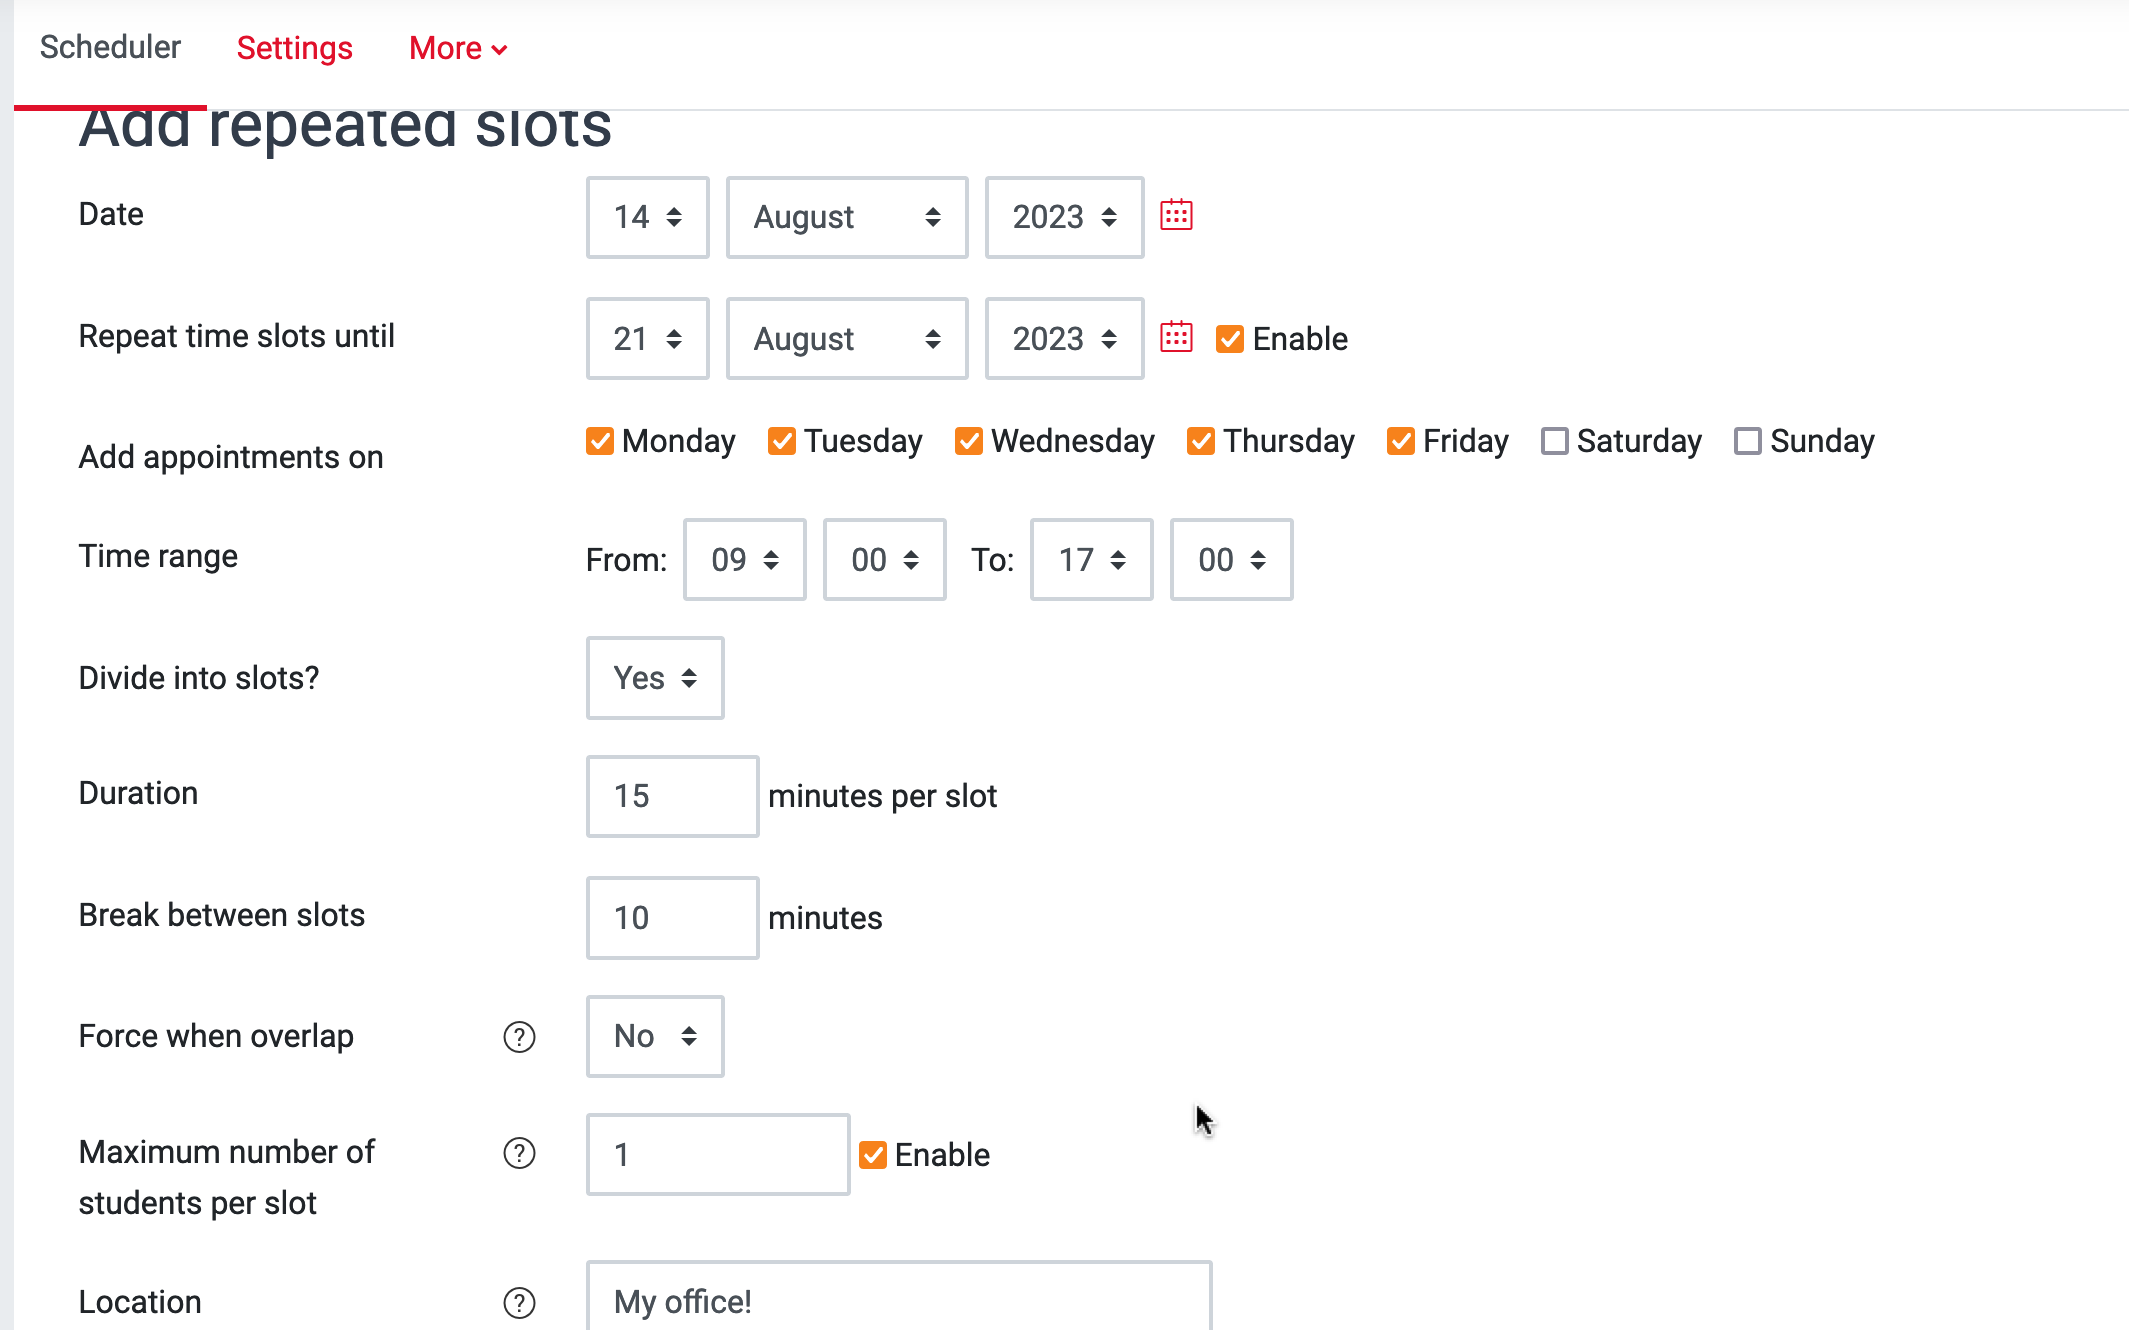
Step 2: Settings
| Info |
|---|
Tip: Click on the question mark icon |
...
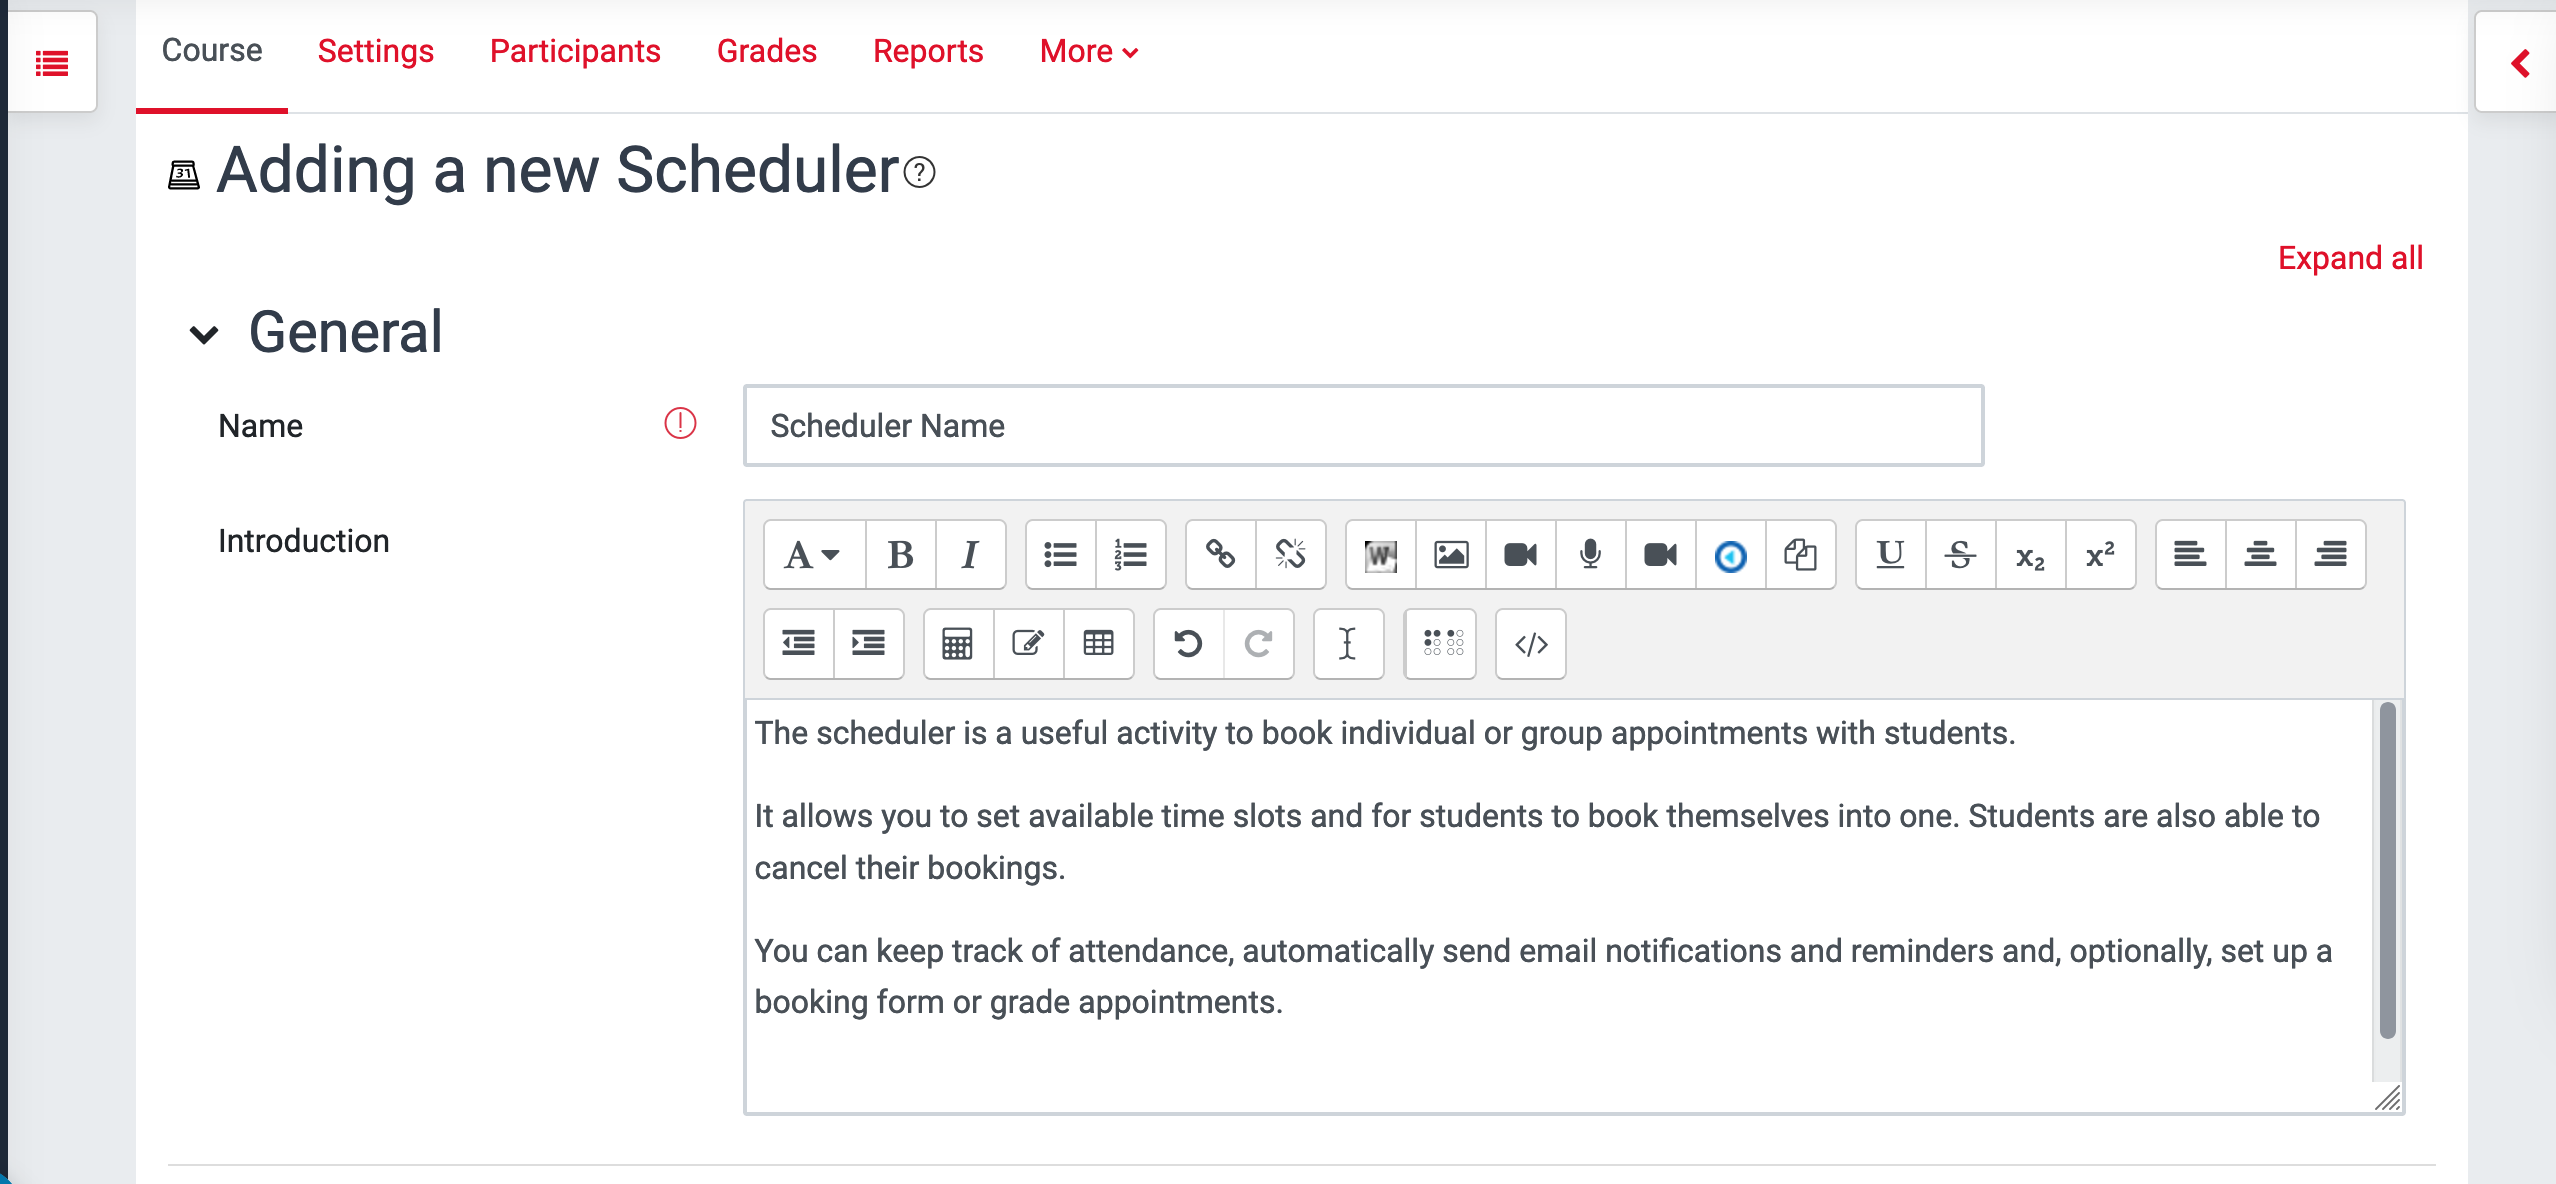
Give a Nameand an Introduction which explains to the students what the Scheduler is for or any additional instructions.
Options
| Expand | ||
|---|---|---|
| ||
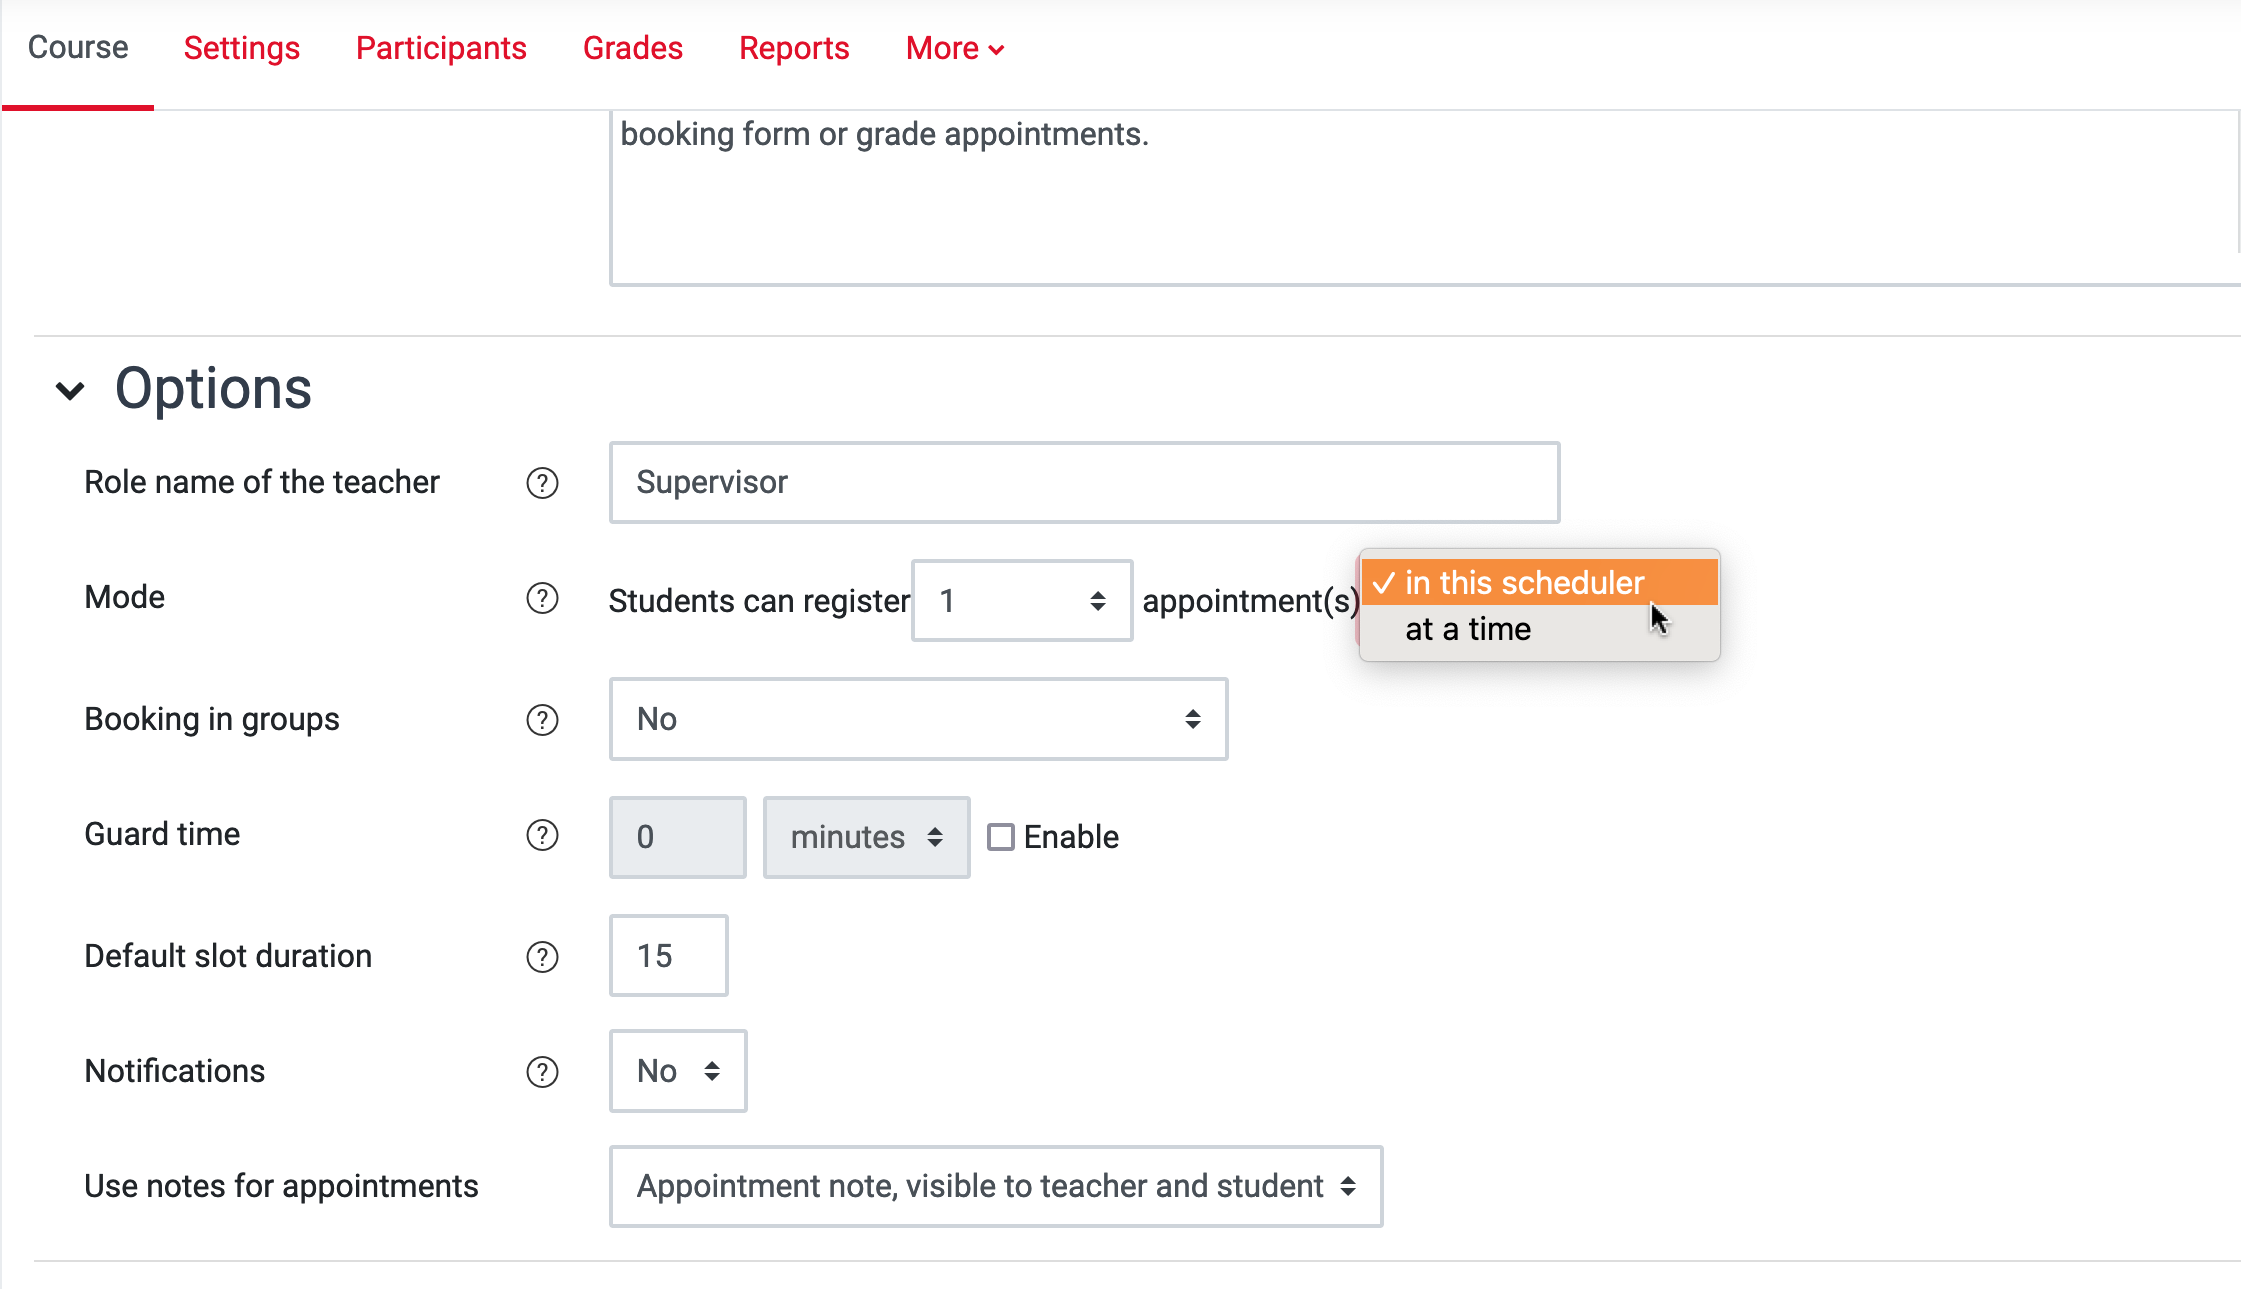 |
Role name of the teacher
This is optional but can be useful information to fill in if the attendant is someone other than the Teacher, for example, a Tutor or an academic adviser.
...
| Expand | ||
|---|---|---|
| ||
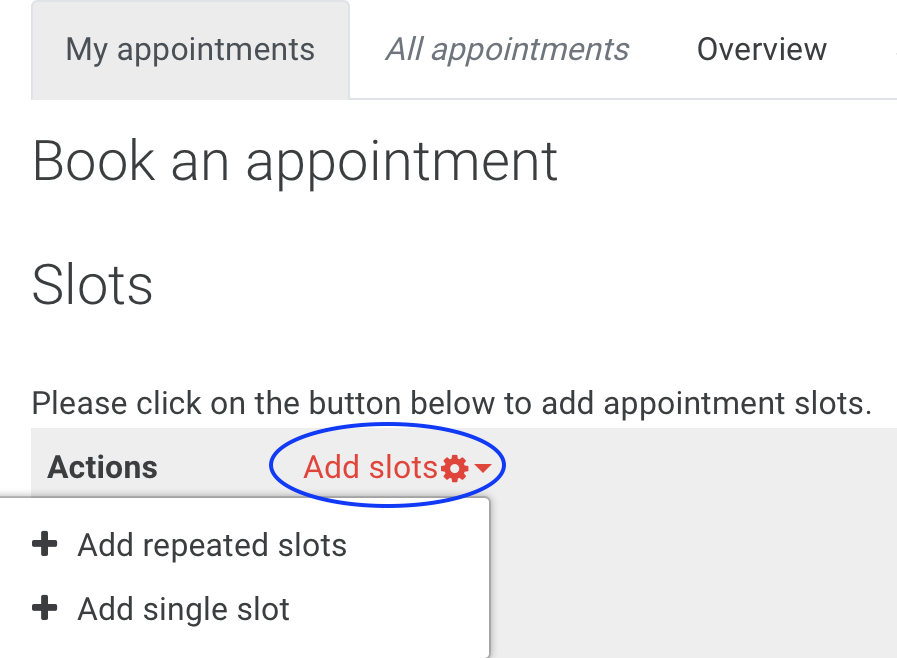 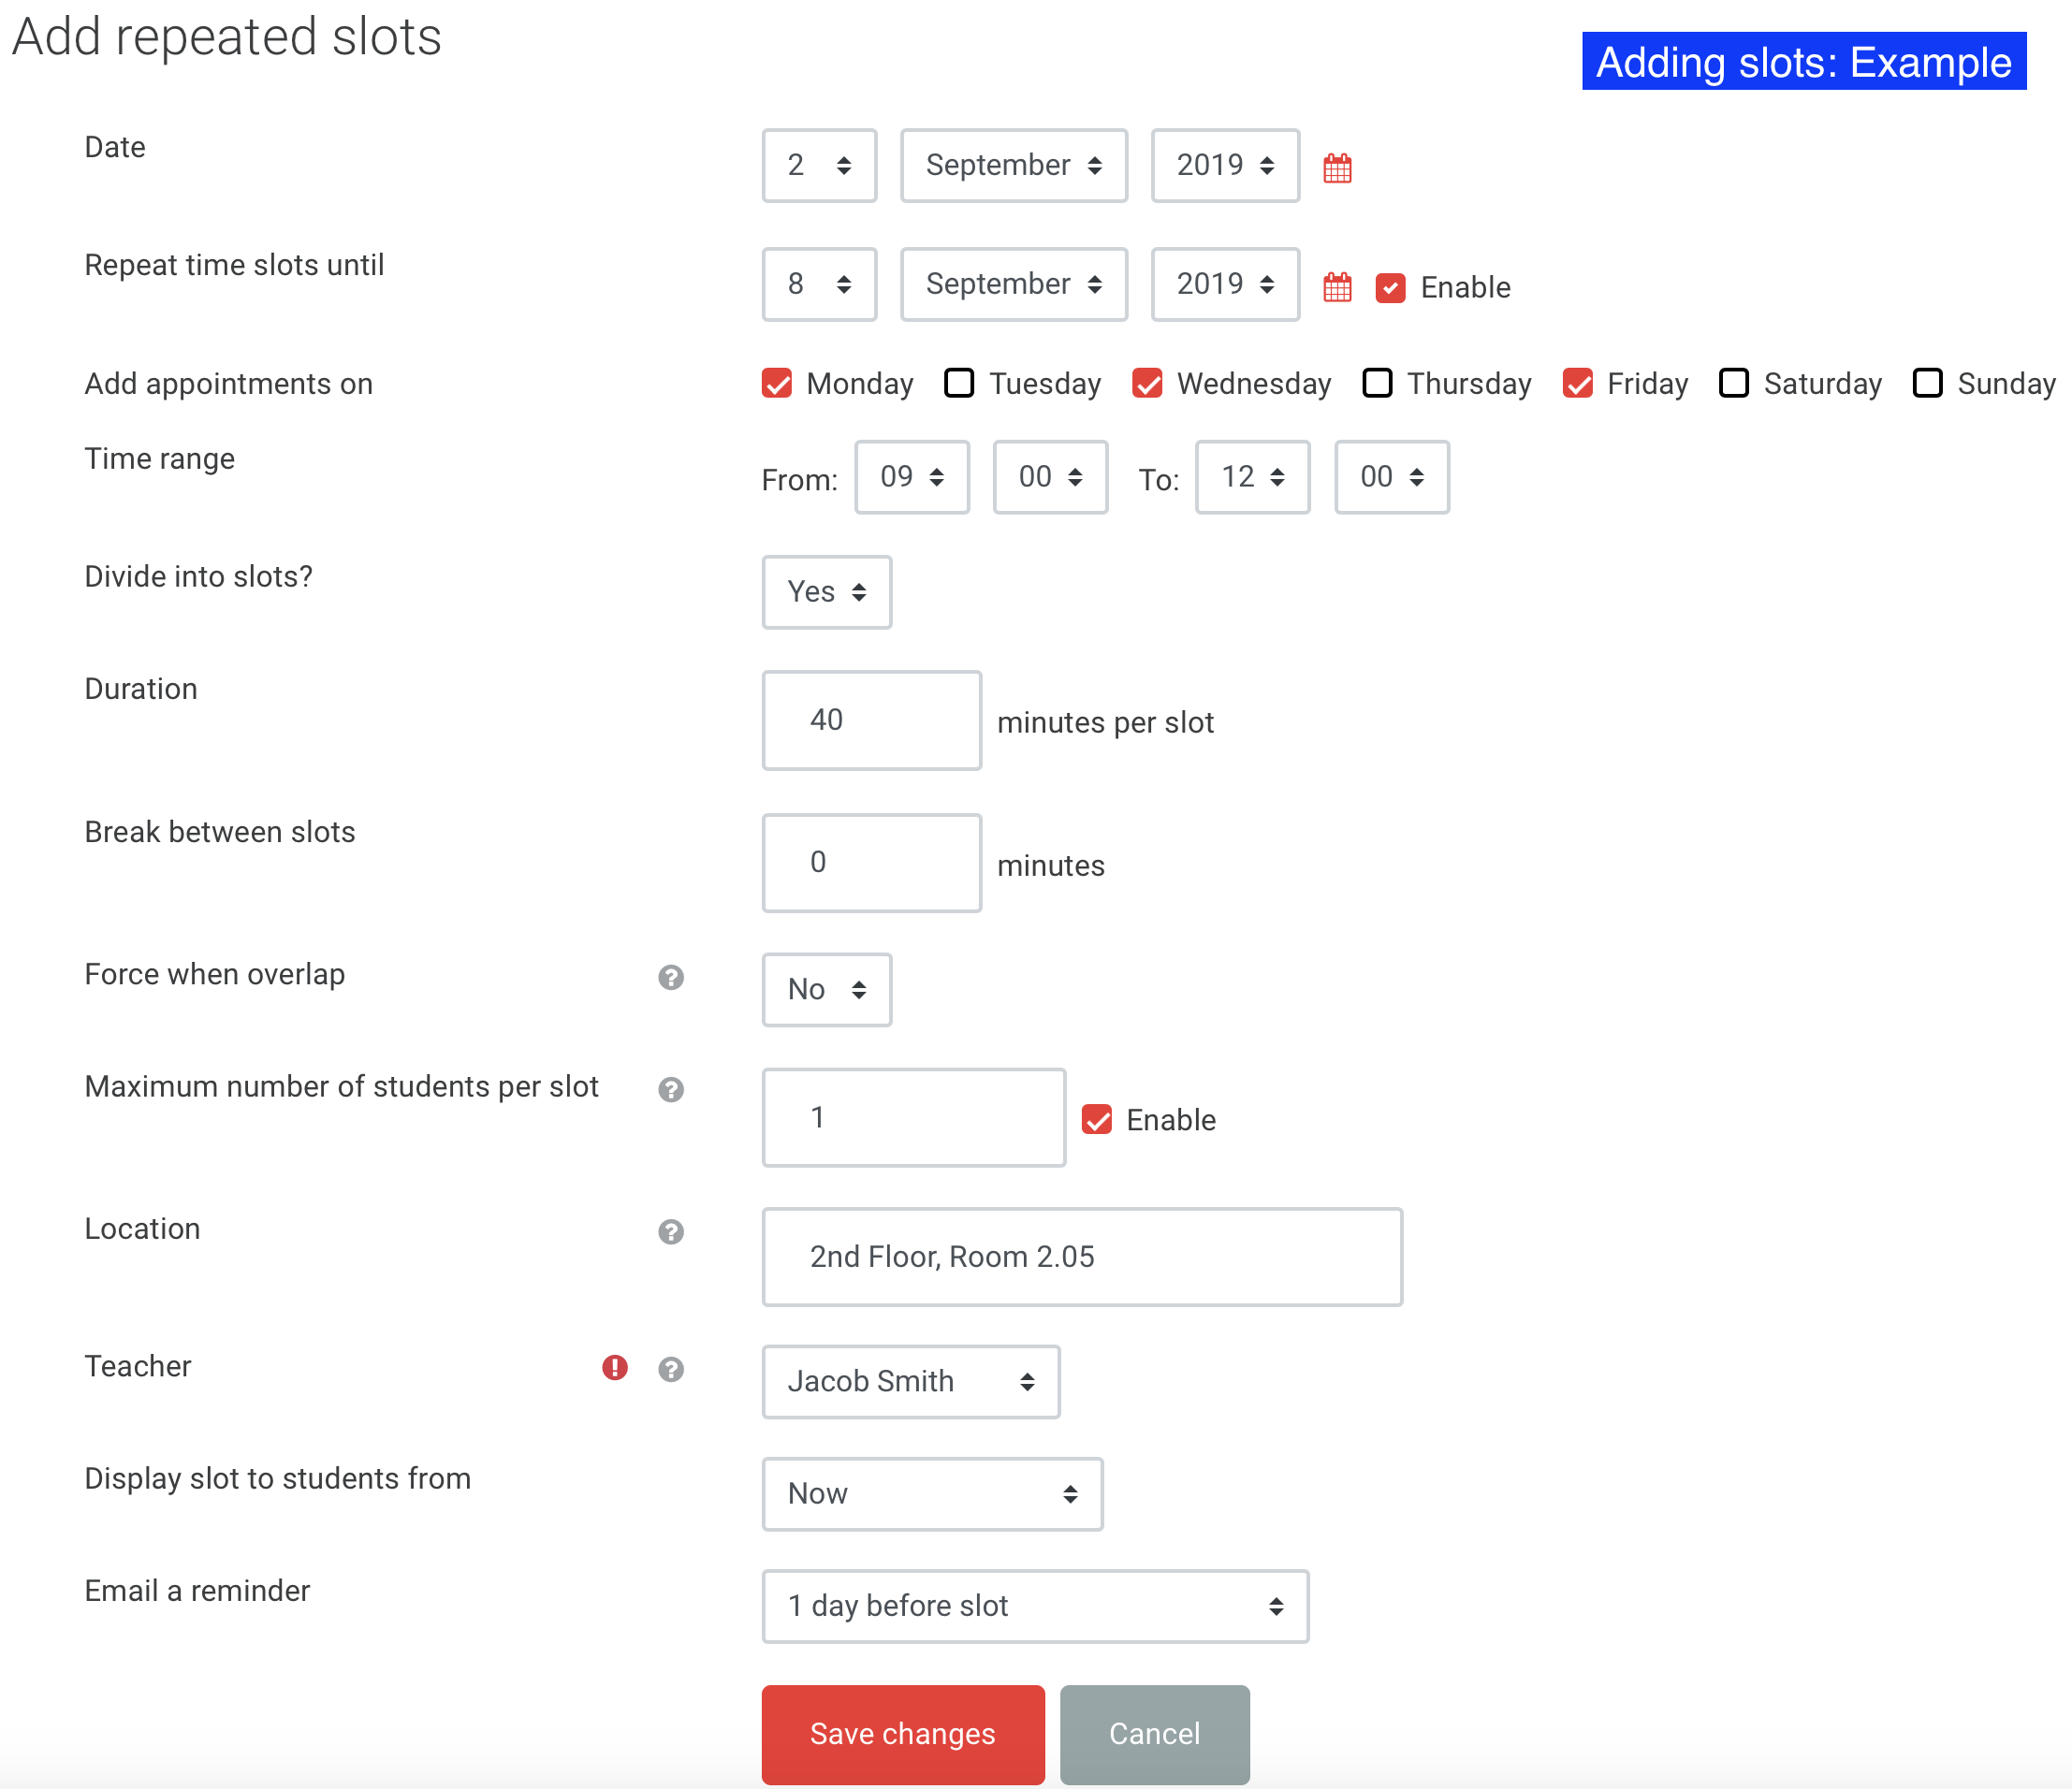   |
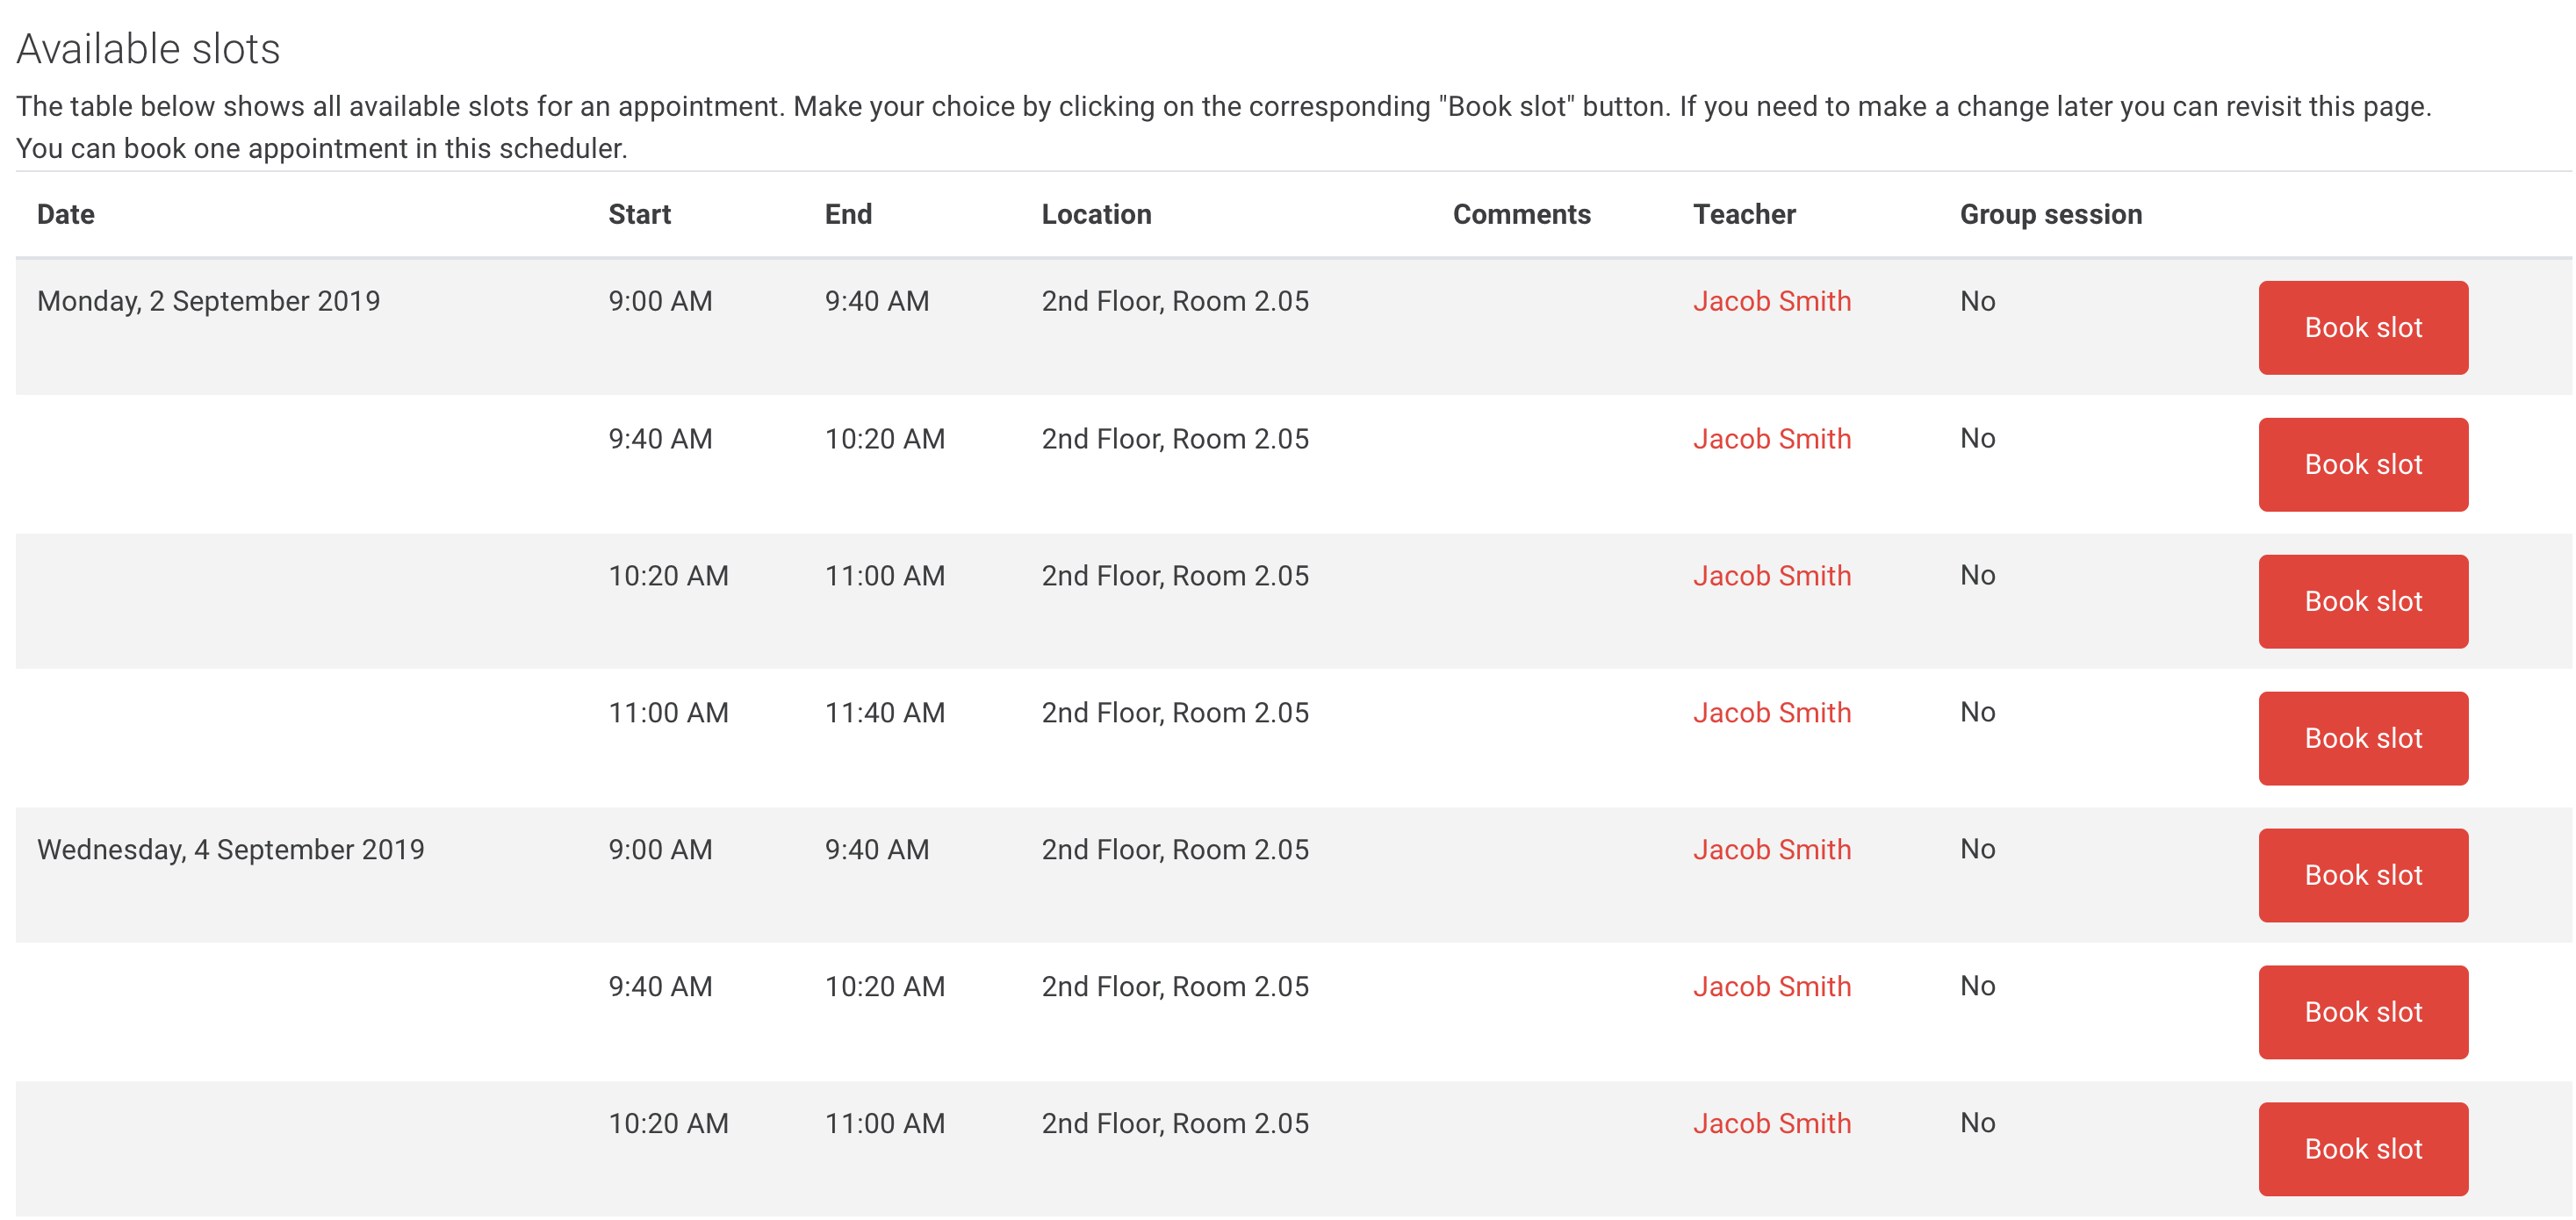
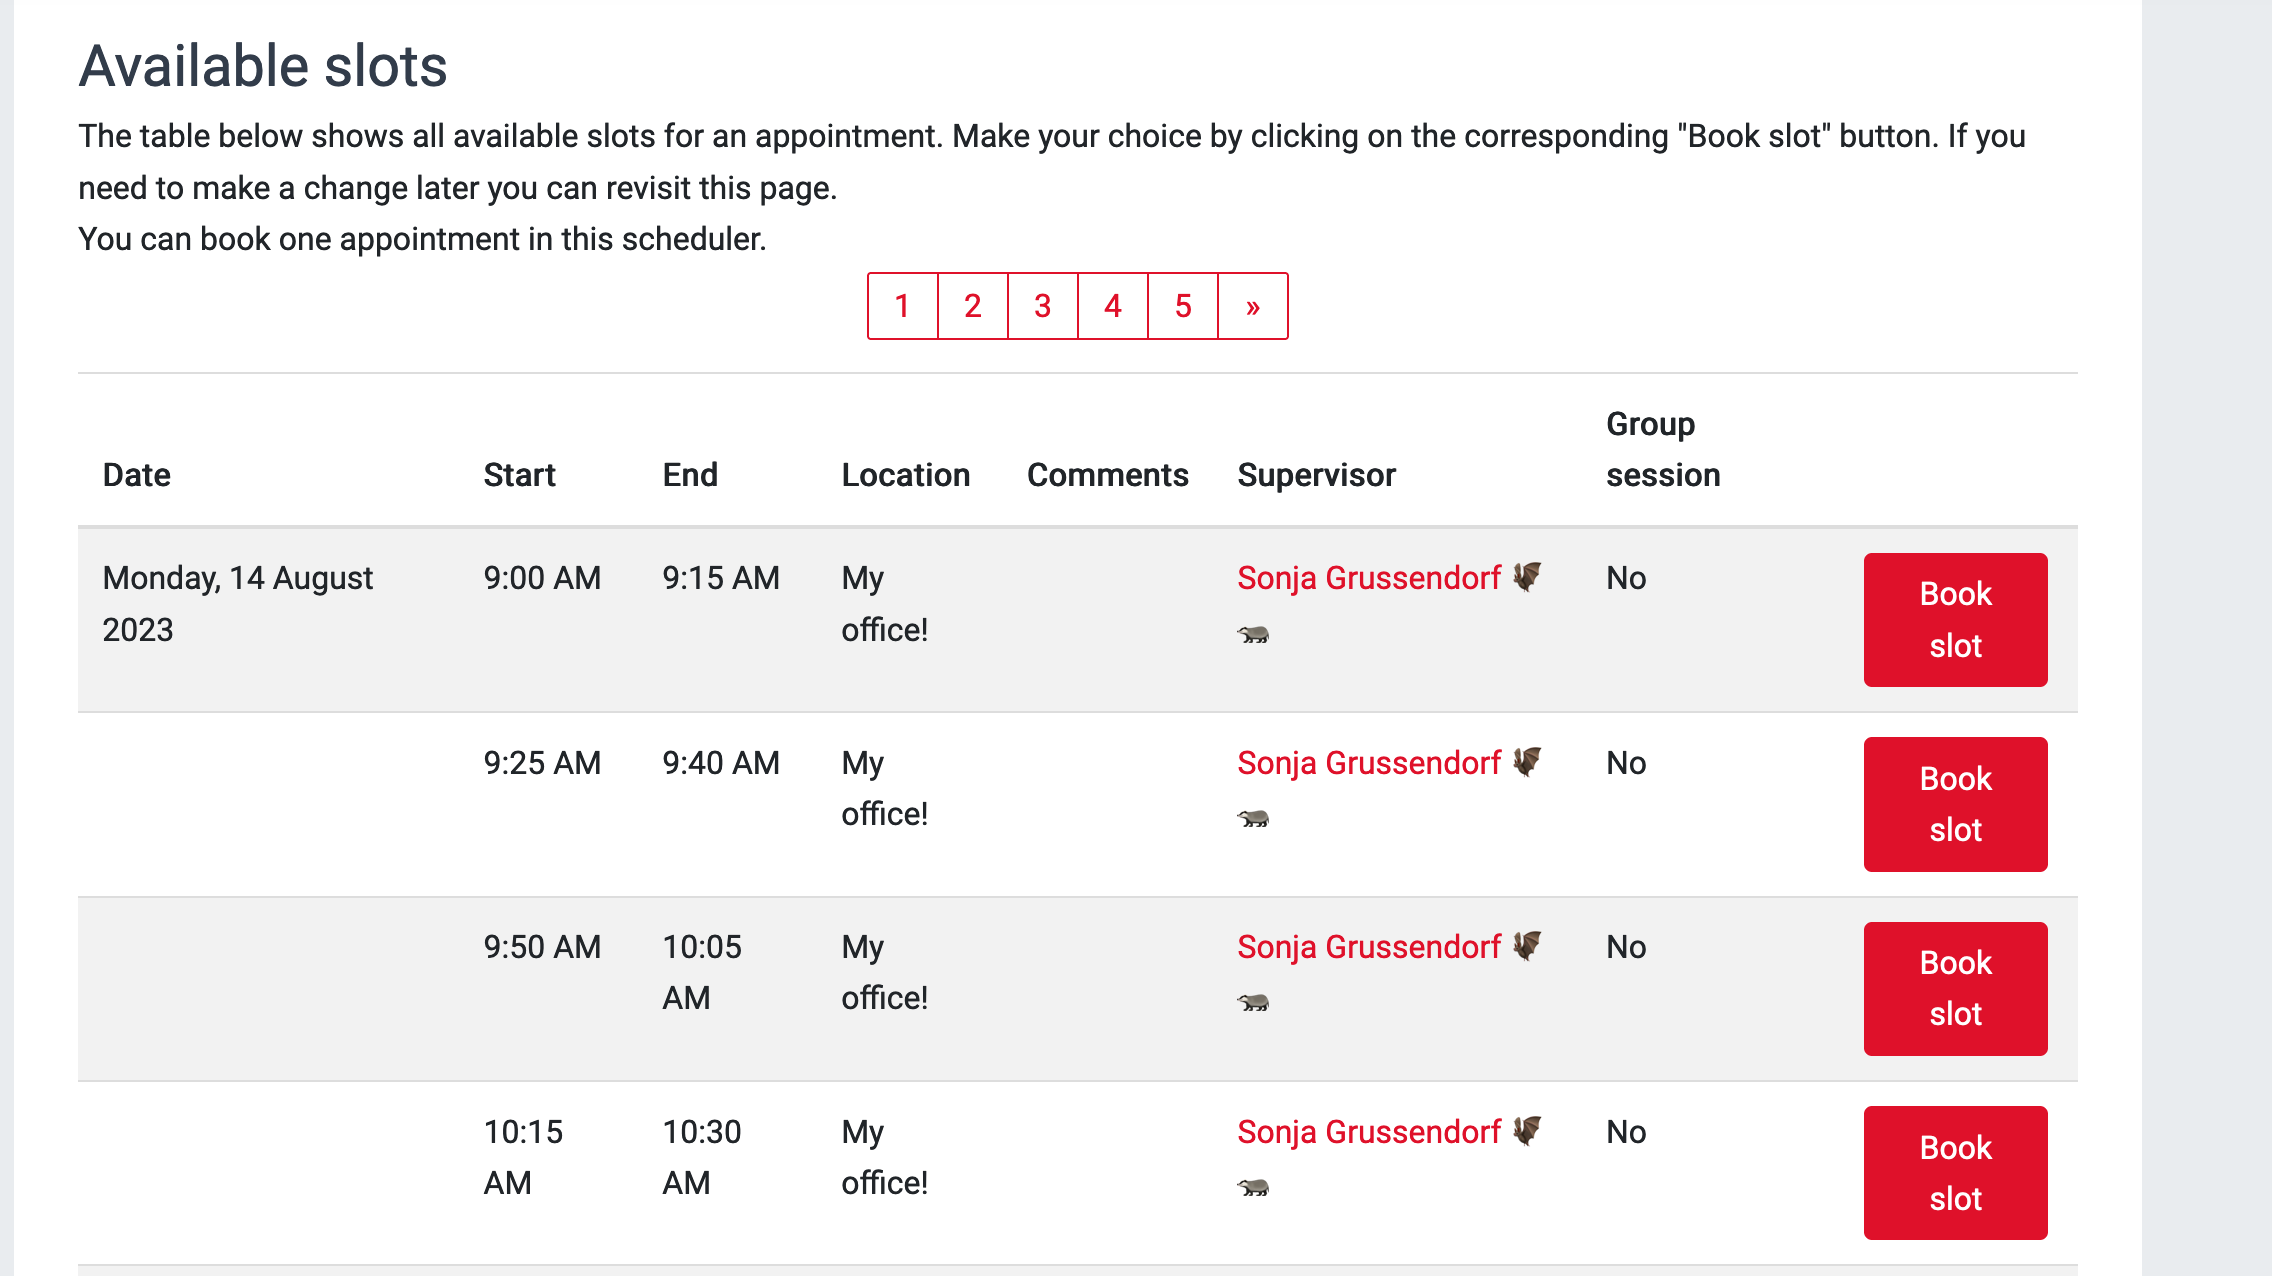
After adding your slots, students will be able to access the Scheduler and start booking appointments.
| Expand | ||
|---|---|---|
| ||
   |
Step 4: View appointments
...
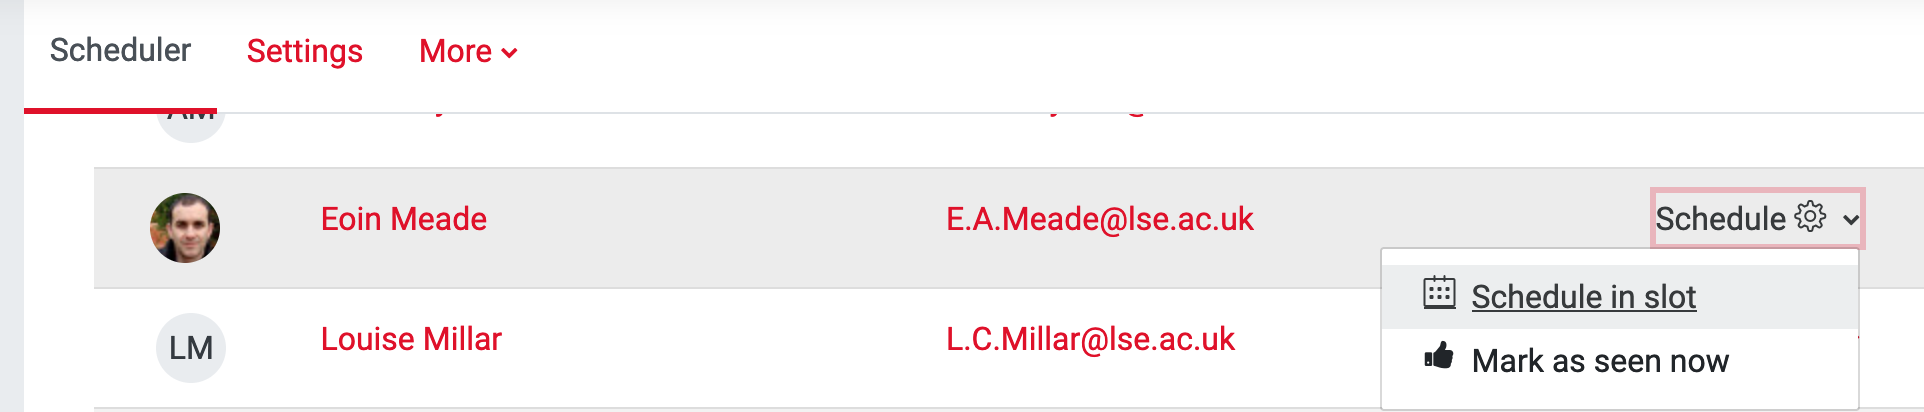
View all appointments in the scheduler including, if any, other teacher’s slots.
Overview
From the Overview tab, you can view, filter and search all slots.
...
| title | Click here to see screenshots... |
|---|
...
to see appointments for yourself or other teachers in the course
...
Statistics
From the Statistics tab, you can get a summary of all available and attended/unattended slots.
...
| Expand | ||
|---|---|---|
| ||
  |
| Filter by label (Content by label) | ||
|---|---|---|
|