...
A wiki is a collection of collaboratively authored web pages. It can be set up for the whole class, for groups or for individual student use. As changes are made to the wiki, a history is kept where old versions can be viewed and restored, if necessary.
Step 1: Add a Wiki
Go to the course page and Turn editing on. Scroll to the section where you want your Wiki to be displayed, click Add an activity or resource and pick Wiki.EDITING MODE ON.
Add activity, choose wiki:
...
Step 2: Settings
| Info |
|---|
Tip: Click on the question mark icon |
...
| Expand | ||
|---|---|---|
| ||
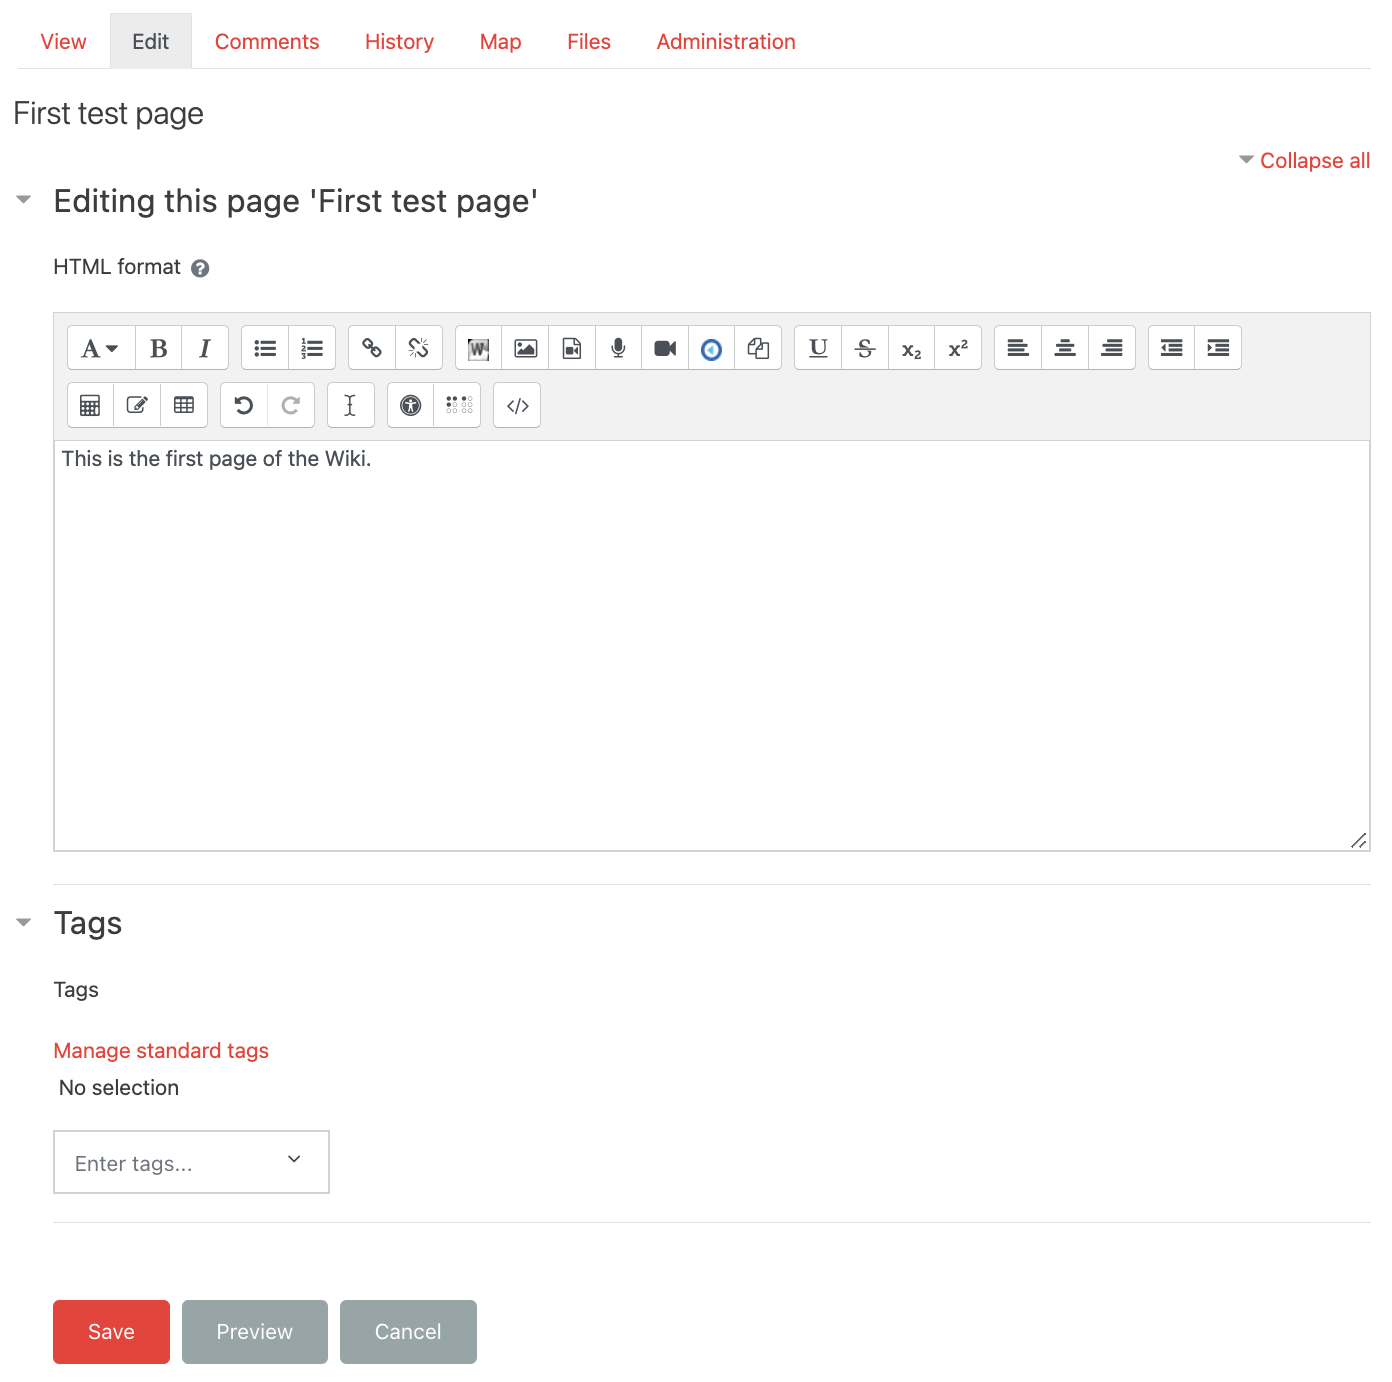 | ||
Tabs
Once you have added the initial page to the wiki, you are returned to the main wiki page.
At the top of the wiki page you will see the following tabs:in a drop down menu
View - normal reading mode
Edit - to make changes to the page
Comments – users can view and add comments.
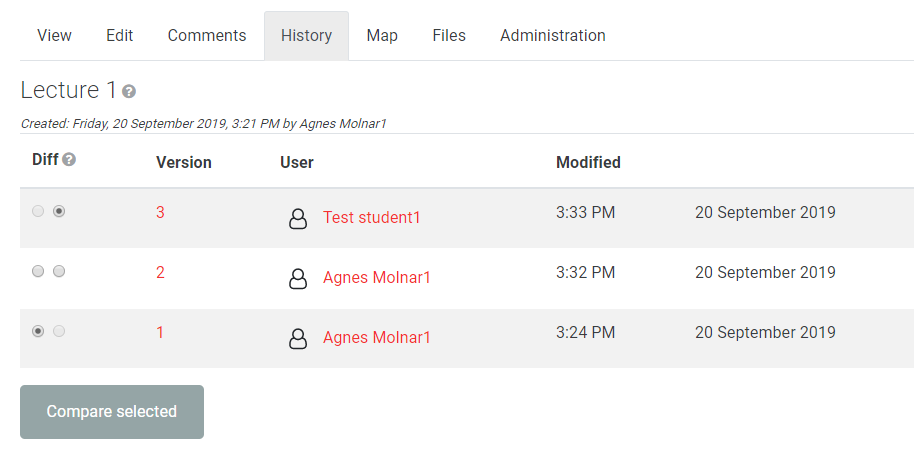
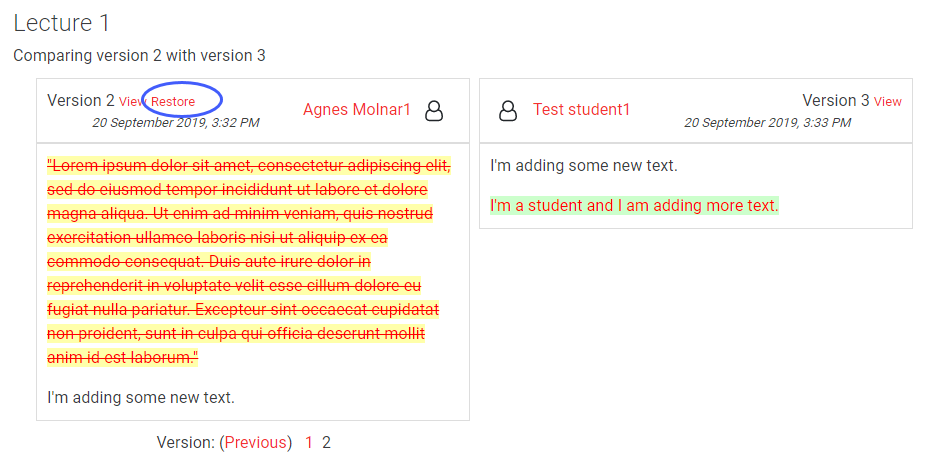
History – records all changes and is the page from which previous versions can be compared (and restored).
Map – shows the structure of the wiki.
Files– lists any files that have been attached to wiki pages. By default, only teachers can add files.
Administration – provides a means of tidying up wikis e.g. removing pages that are not linked (orphaned).
...
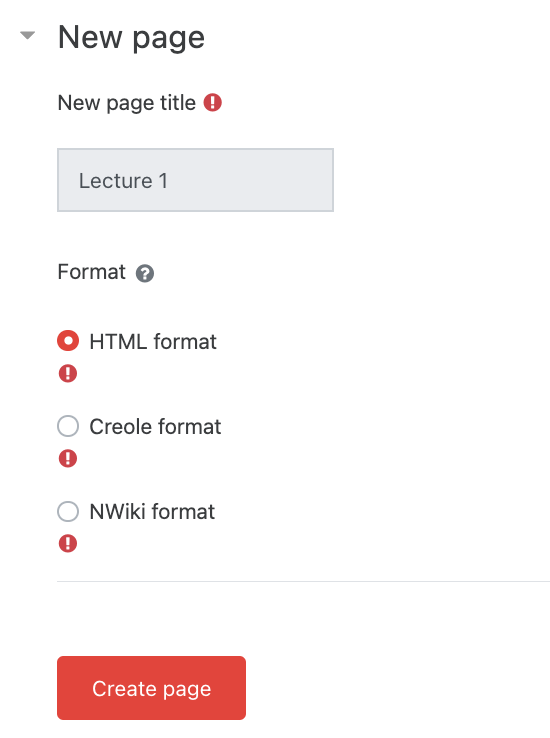
Adding a new page
To add a new page to a wiki, select Edit on the initial page and add the title of the new page surrounded by double square brackets e.g. [[Lecture 1COLLABORATIVE WIKI]] and Save.
...
| title | Click here to see screenshots... |
|---|
...
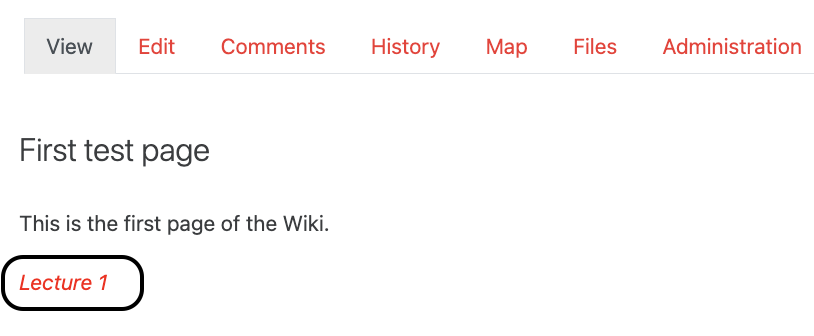
Once the new page link is saved, the page title appears as a link. Click on the new page link to continue to create the page.
| Expand | ||
|---|---|---|
| ||
   |
Use History to compare changes
...
| Expand | ||
|---|---|---|
| ||
   |
| Filter by label (Content by label) | ||
|---|---|---|
|